
Maintenance page
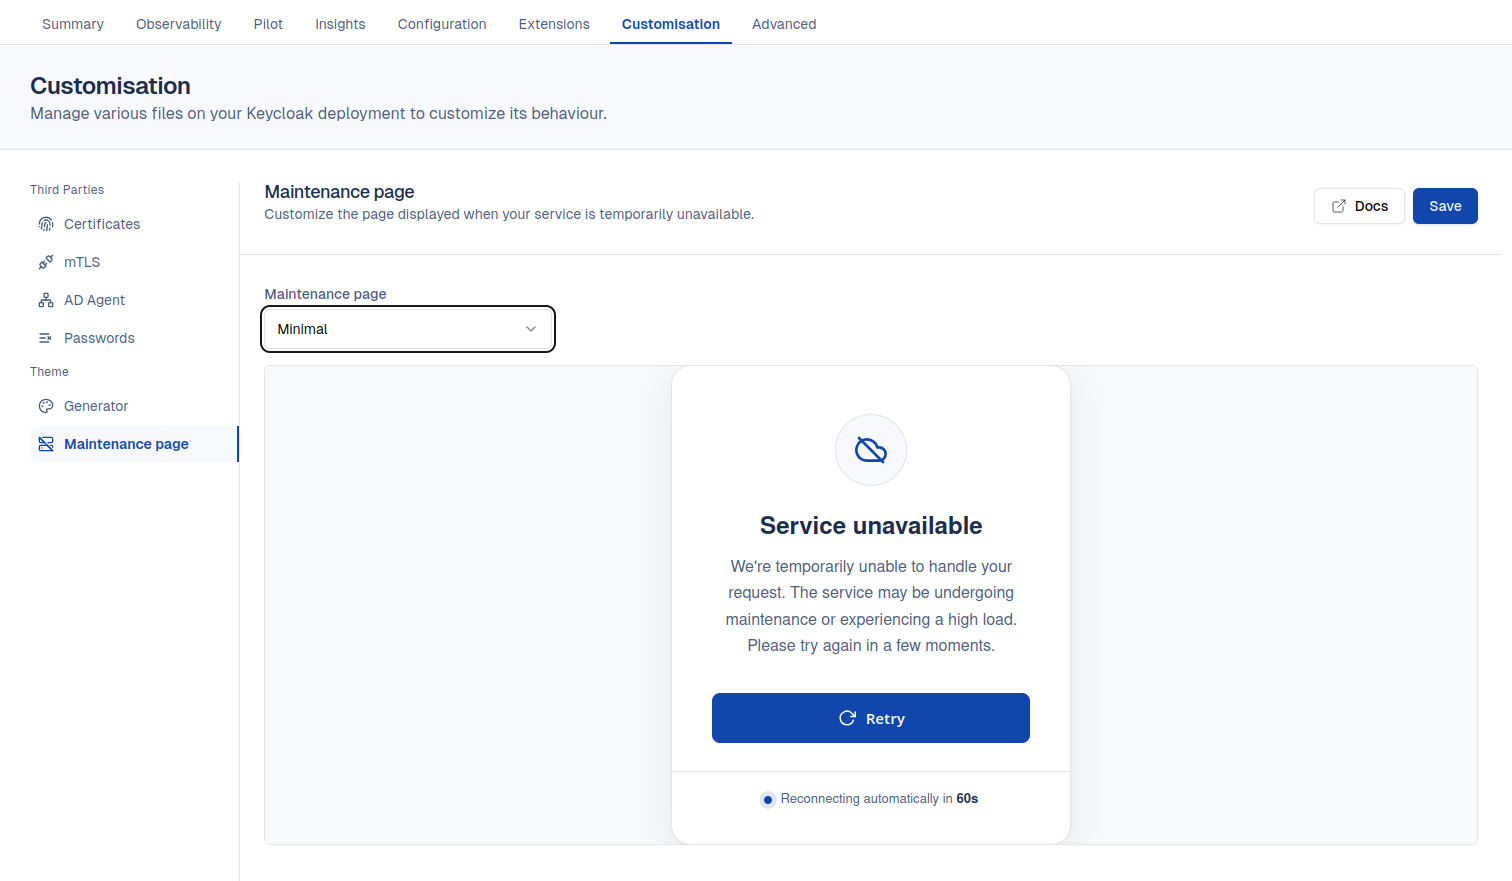
What is the maintenance page
The maintenance page is the page served to your end users when your Keycloak deployment is temporarily unavailable. It is displayed by the load balancer that sits in front of your deployment, so your users still get a clear response even when no Keycloak server can answer their request.
This happens in two situations:
- During maintenances - when your deployment is briefly down while Cloud-IAM applies updates, patches, or infrastructure changes.
- During incidents - when no Keycloak server is available to handle incoming requests.
Because the page is served by the load balancer and not by Keycloak itself, it stays available even when your deployment is fully down.
Not the same as Keycloak error pages
The maintenance page only concerns availability (when no Keycloak server can answer). It does not cover the 500 Internal Server Error pages, which are returned by Keycloak itself and handled through your Keycloak theme.
Maintenance page options
Cloud-IAM offers three modes, from no page at all to a fully branded experience:
- None - No custom page is served. Users receive the default response from the load balancer.
- Minimal - A clean, whitelabelled page that displays a generic Service unavailable message and a Retry button. It contains no Cloud-IAM or company branding, and reconnects automatically after a short delay.
- Custom - Your own page, where you can design the experience with your company logo, colors, links, and wording to match your brand.
How to access the maintenance page settings
To access the maintenance page feature, follow these steps:
- Open Cloud-IAM console
- Select the Keycloak deployment you want to configure.
- Click on
Customisation - Select
Maintenance pageunder the Theme section
How to configure the maintenance page
- In the
Maintenance pagedropdown, select the mode you want:None,Minimal, orCustom. - Preview the result directly in the console.
- Click
Save.
Saving restarts the load balancer
After you save, the deployment's load balancer is restarted to apply the new maintenance page. The restart is quick, but plan your change accordingly.
How to configure a custom maintenance page
When you select Custom, a dialog opens where you paste the full HTML of the page to display when your service is unavailable.
- In the
Maintenance pagedropdown, selectCustom. - In the
Custom maintenance pagedialog, paste the complete HTML of your page. - Click
Apply, thenSave.
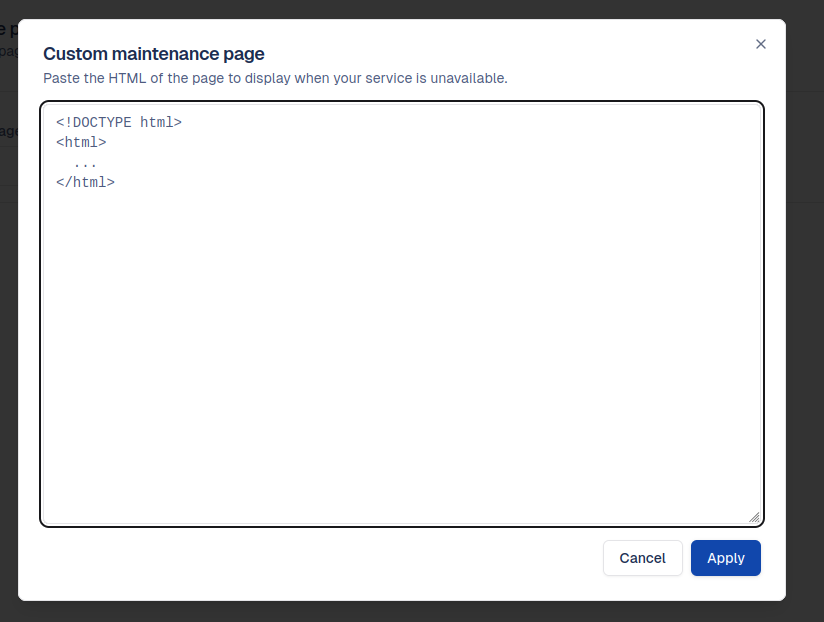
Keep these constraints in mind when authoring your custom page:
- Provide a single, self-contained HTML document. Inline your CSS in a
<style>block and embed images (logos, icons) as inline SVG ordata:URIs, since the page must render even when your deployment is fully down. - Avoid references to external resources that may be unavailable or slow to load during an incident.
- Use it to add your company logo, branding, colors, and links (for example to your status page or support).
Which option should I choose?
- Choose Minimal if you want a clean, neutral page without any setup. This is a good default for most deployments.
- Choose Custom if your end users reach Keycloak directly and you want the unavailability page to match your brand (logo, colors, links).
- Choose None if you prefer to handle the unavailable response yourself, for example behind your own reverse proxy or CDN.