Extensions Management
Extensions Management System (EMS) let you customize and enhance your Keycloak deployment by adding features beyond what Keycloak provides out of the box. From the deployment page, you can browse available extensions, install them, and manage the extensions already running on your deployment.
Before installing your own extensions on a deployment, you must first upload and validate them from My Extensions.
How to access deployment extensions?
- Open Cloud-IAM console
- Select the Keycloak deployment you want to manage
- Navigate to the
Extensionssection
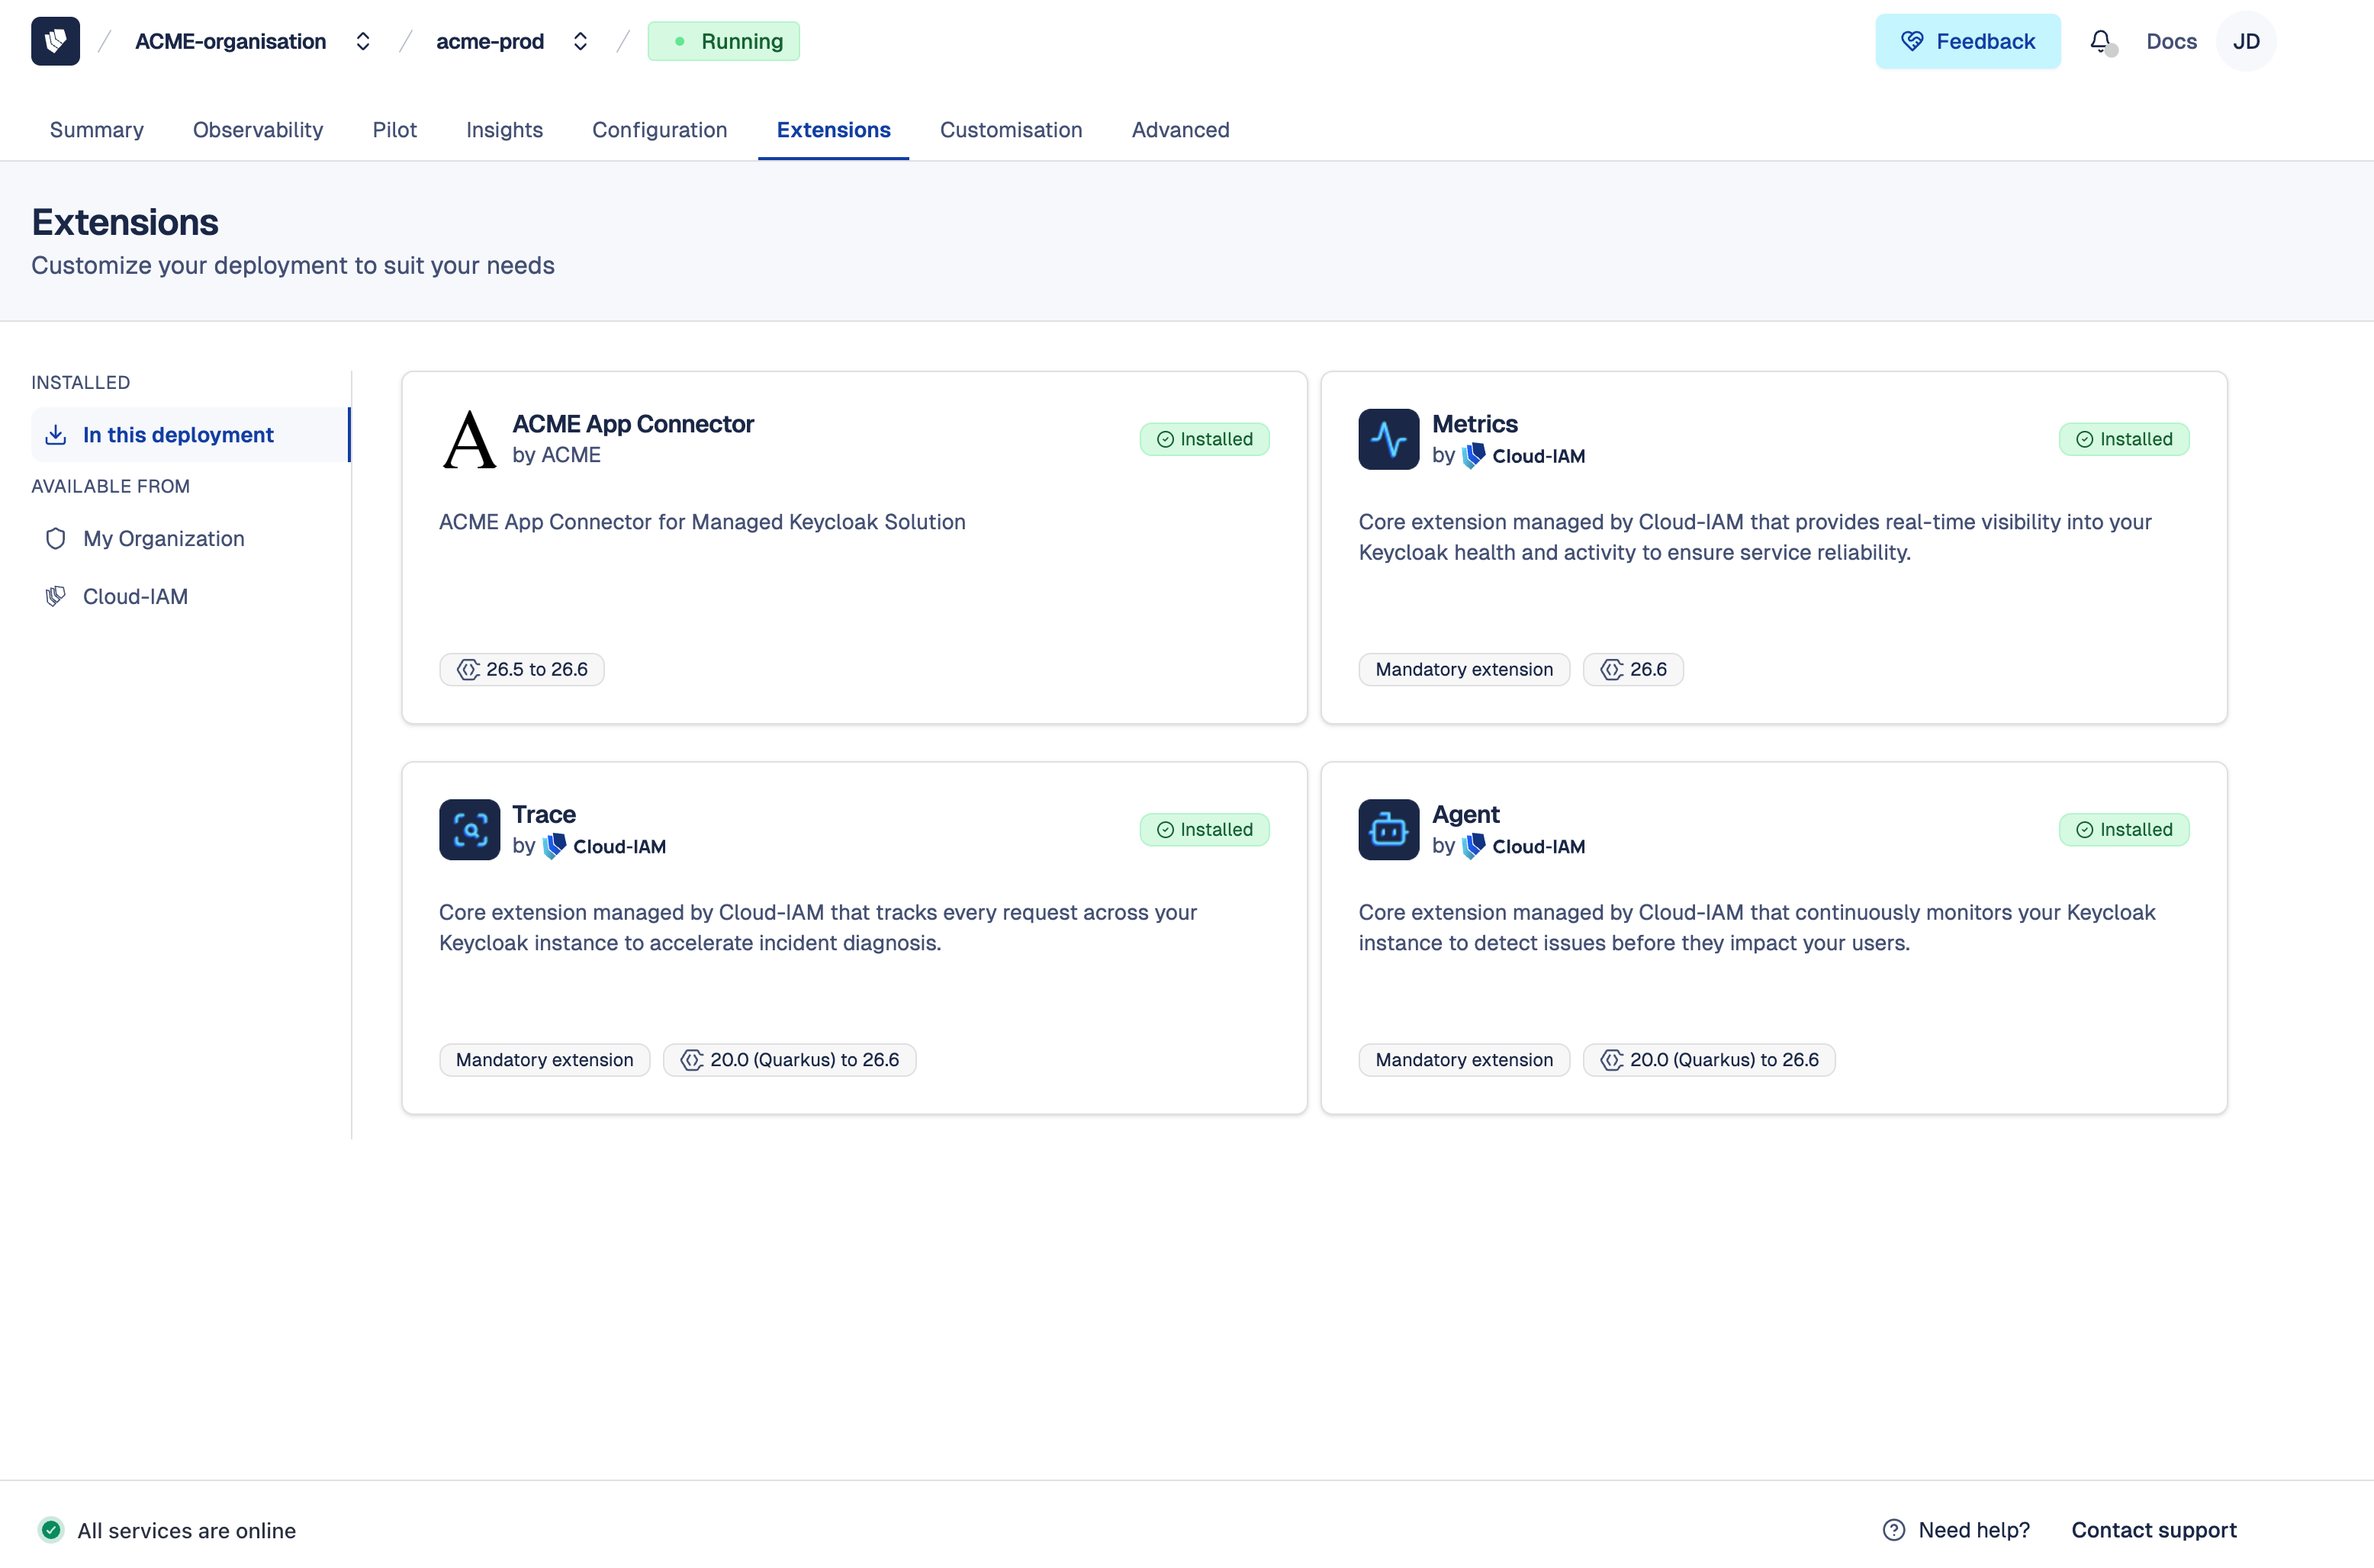
From here, you can browse two sections with three tabs:
Installed
In this deployment— extensions currently installed on this deployment
Available from
My Organization— your organization's My ExtensionsCloud-IAM— extensions published by Cloud-IAM
How to install an extension from my organization?
Before installing, ensure your extension has at least one validated release compatible with your deployment's current Keycloak version. See My Extensions to upload and validate your extensions.
Your extension is not visible?
The My Organization tab only displays extensions that have at least one validated release compatible with your deployment's current Keycloak version. If your extension does not appear, check in My Extensions that a release exists with the correct Keycloak compatibility range.
- Follow this tutorial to access deployment extensions
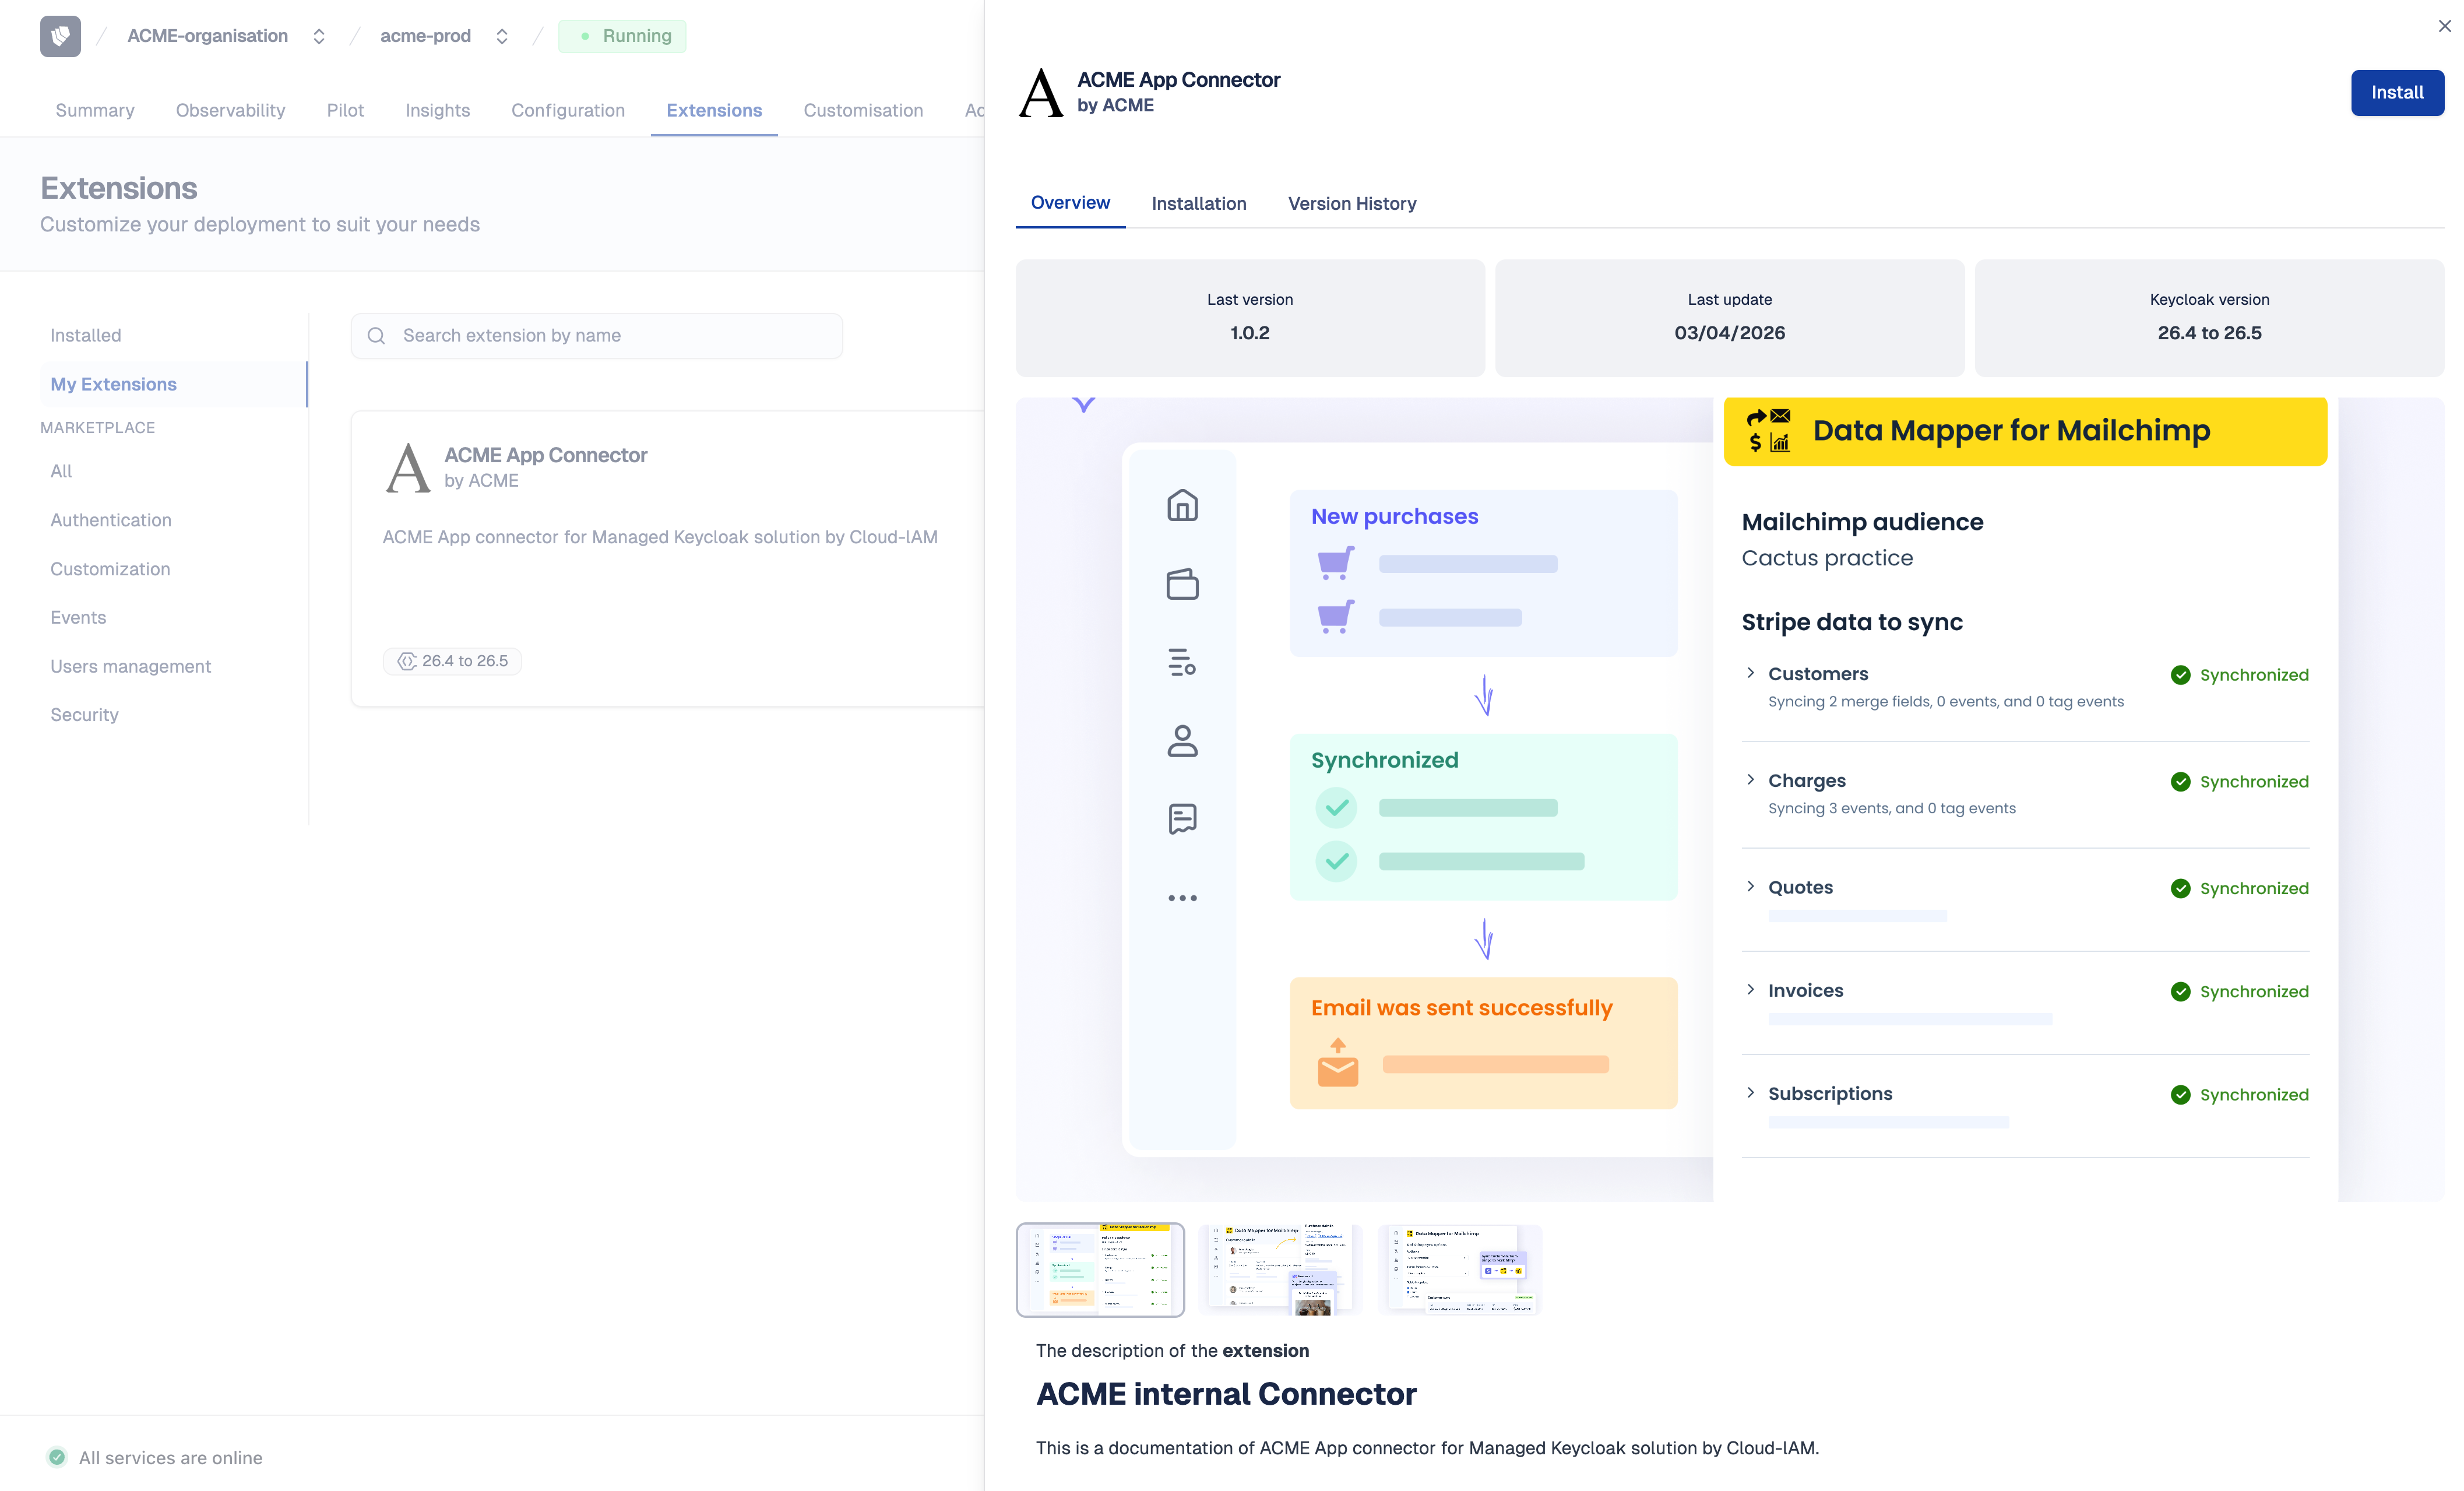
- Click on the
My Organizationtab - Select the extension to install (a drawer will appear with the extension details)
- Click on
Install - Choose whether to Apply now or Defer the installation
- Click on
Installto confirm
After 5–10 minutes, while your Keycloak deployment redeploys via the rolling upgrade process, the extension will be active on your deployment.
When to use the defer option?
Deferring is useful when additional configuration is needed before the extension runs, such as setting environment variables in the Keycloak admin console. It also allows you to batch multiple extension installations into a single redeployment.
How to install an extension that requires environment variables?
Some custom extensions depend on environment variables to function correctly, for example, an API endpoint URL, a secret key, or a feature flag. If these variables are not configured before the extension starts, your Keycloak deployment may fail to start or behave unexpectedly.
Step 1 — Install the extension with deferred mode
- Follow this tutorial to access deployment extensions
- Click on the
My Organizationtab - Select the extension to install (a details panel will open on the right)
- Click on
Install - Toggle the Defer option, this queues the extension without triggering a redeployment
- Click on
Installto confirm
Step 2 — Configure the required environment variables
- Follow this tutorial to configure environment variables
- Enter the required variables for your extension
- Click on
Save and Redeploy
After 5–10 minutes, while your Keycloak deployment redeploys via the rolling upgrade process, the extension and its environment variables will be active on your deployment simultaneously.
How to update an installed extension?
Each deployment is pinned to a specific release of the extension it uses. This pinning is stable: restarts, incidents, or minor Keycloak updates do not change the release version, your deployment always uses the release it was pinned to.
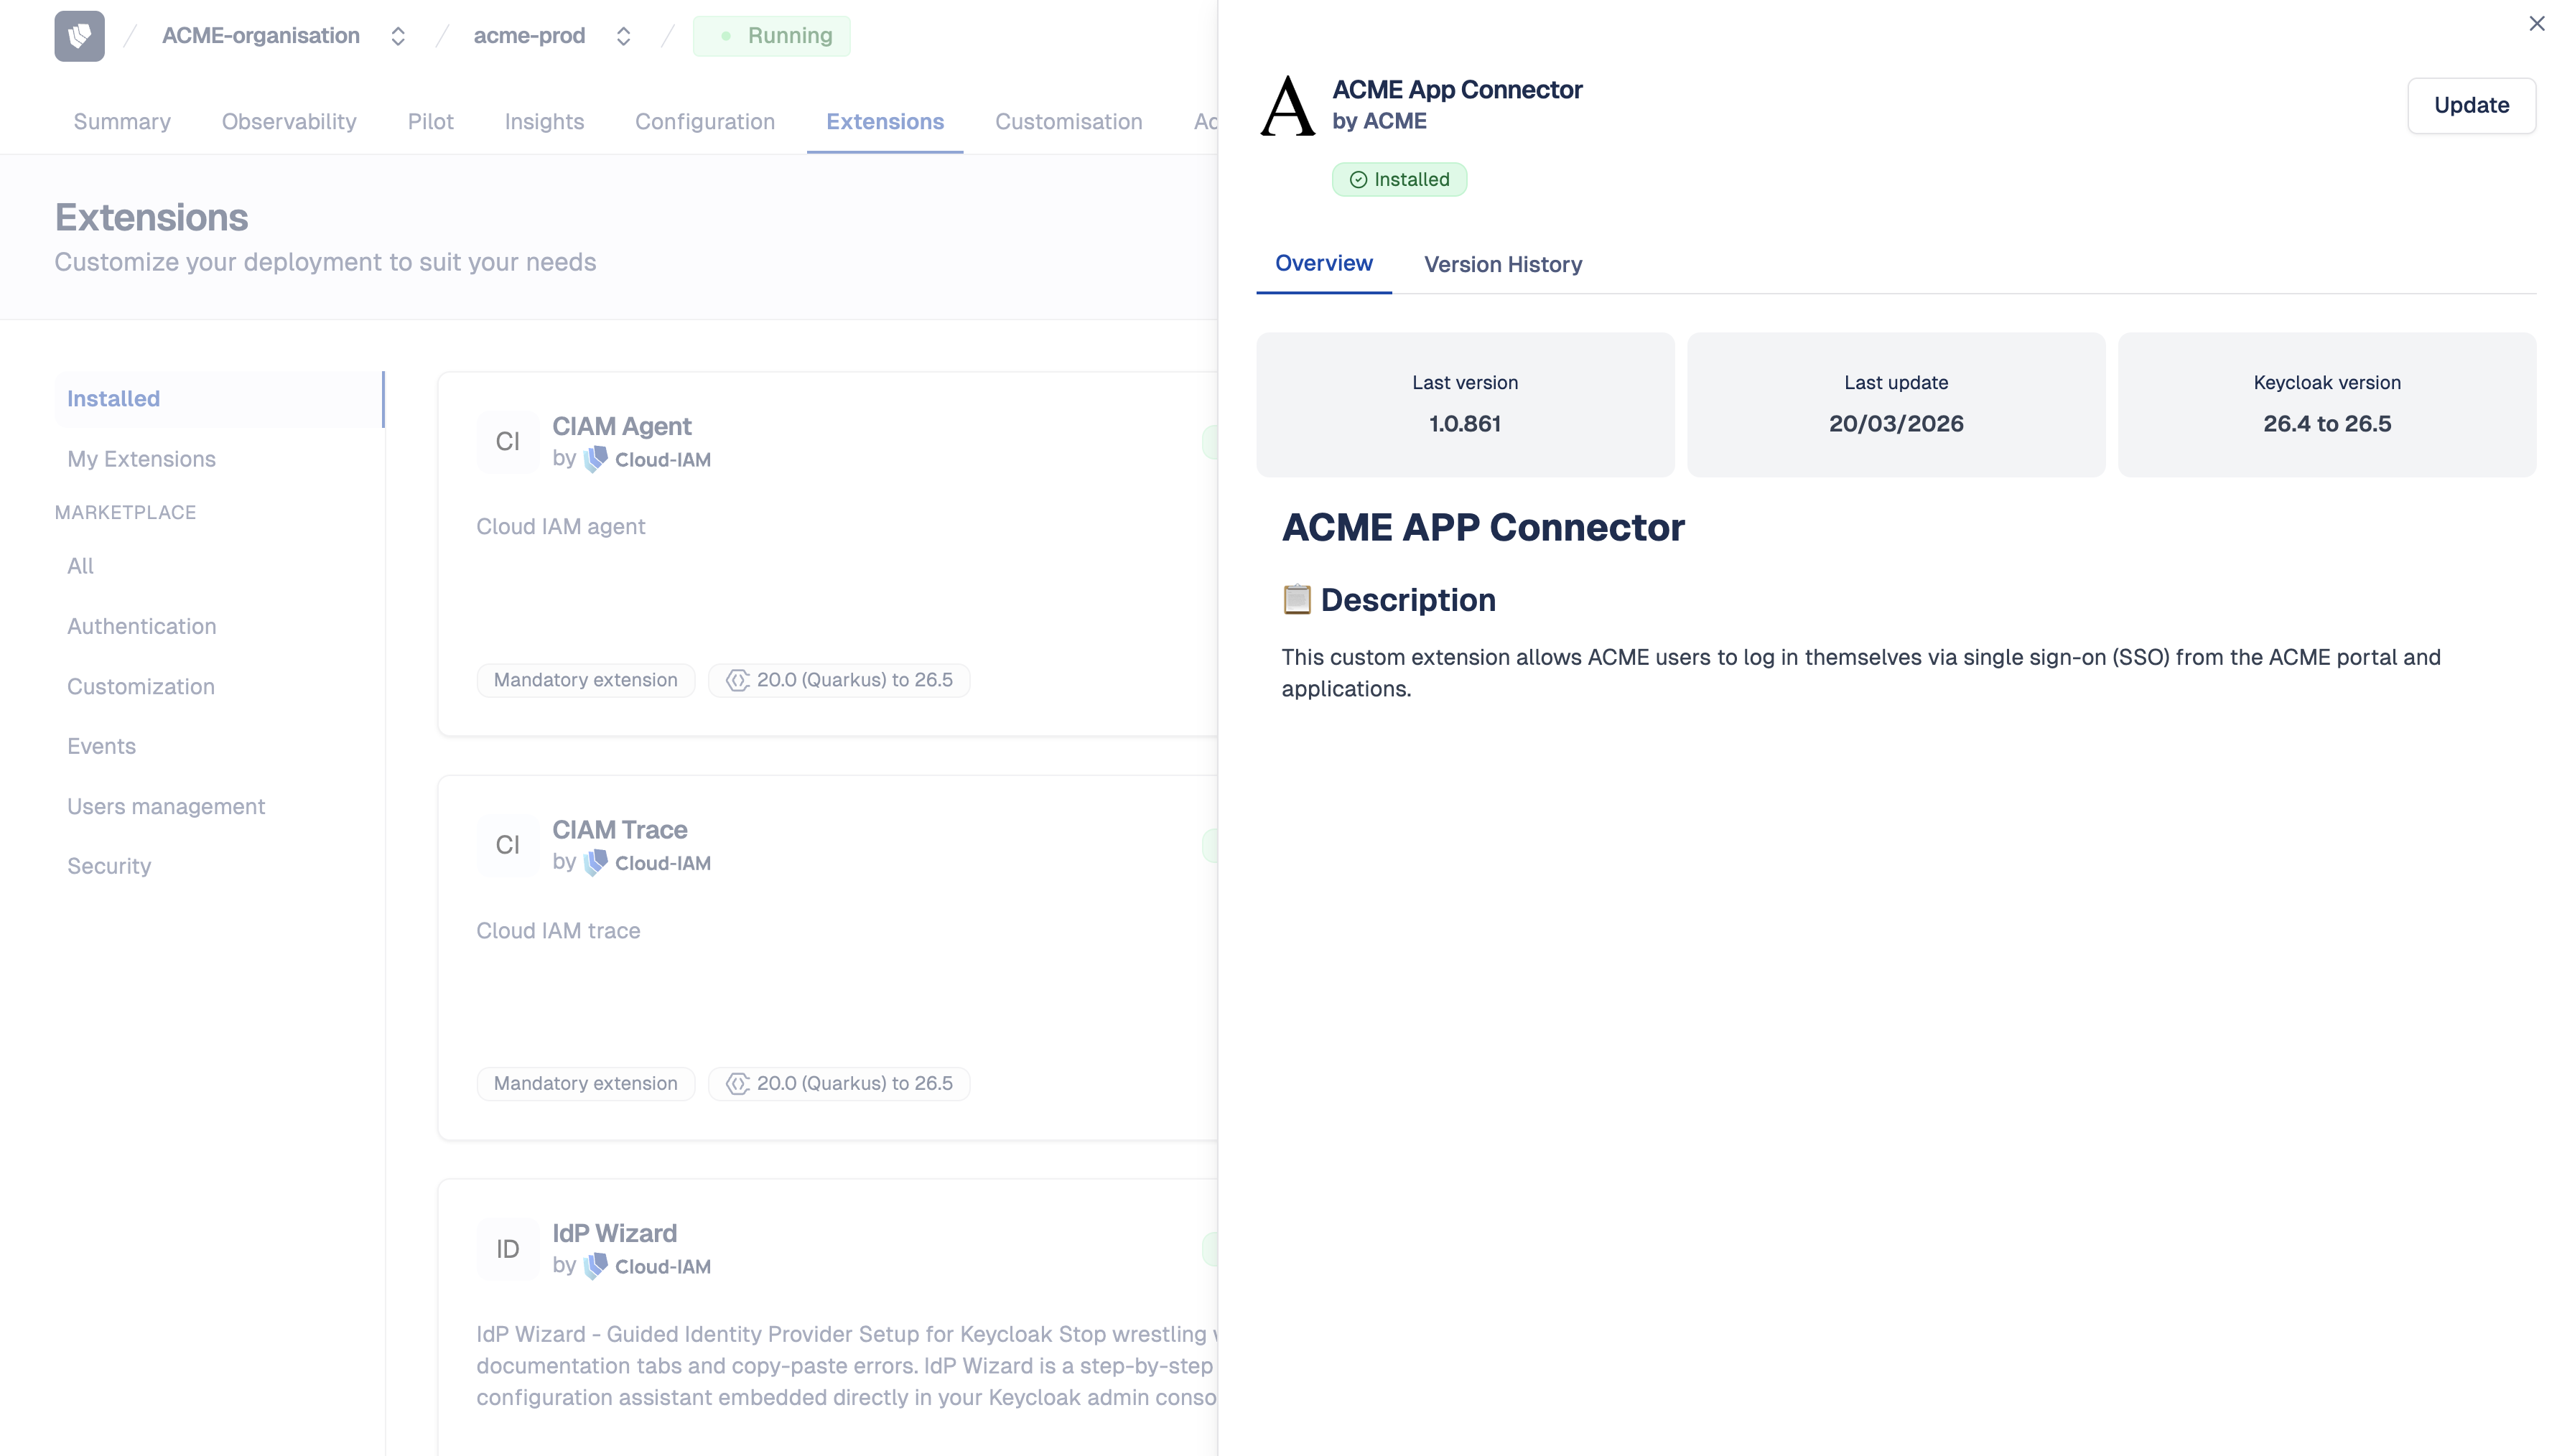
When a new release is available for an extension already installed on your deployment, it appears with an Update available badge in the Installed tab. This happens when a newer validated release compatible with your deployment's current Keycloak version is published, either in My Extensions for your own extensions, or by the publisher extensions.
- Follow this tutorial to access deployment extensions
- Click on the
In this deploymenttab - Select the extension with an available update (a details panel will open on the right)
- Click on
Update - Choose whether to Apply now or Defer the update
- Click on
Updateto confirm
After 5–10 minutes, while your Keycloak deployment redeploys via the rolling upgrade process, the new release will be active on your deployment.
When would you update an extension?
Common reasons to publish a new release and update an installed extension include:
- Bug fixes or security patches
- New features or enhancements
- Compatibility updates for newer Keycloak versions
- Performance improvements
- Configuration or SPI changes
How to uninstall an extension?
If an extension is no longer needed on your deployment, you can remove it directly from the Cloud-IAM Console. Uninstalling removes the extension from your Keycloak deployment but does not delete it from your organization's My Extensions library.
- Follow this tutorial to access deployment extensions
- Click on the
In this deploymenttab - Select the extension you want to remove (a details panel will open on the right)
- Click on
Uninstall - Choose whether to Apply now or Defer the removal
- Click on
Uninstallto confirm
After 5–10 minutes, while your Keycloak deployment redeploys via the rolling upgrade process, the extension will be removed from your deployment.
This action cannot be undone
Once the redeployment is complete, the extension and any associated configuration will be removed from your Keycloak deployment. If you need the extension again later, you can reinstall it at any time.

How to get the deployment ID?
- Open Cloud-IAM console
- Select the Keycloak deployment where you want to upload the custom extension
- In the summary section, copy the
Deployment ID.

How to install extensions on a deployment through Cloud-IAM API?
- Obtain a Bearer token using a Service Account
- Obtain your Deployment ID
- Obtain your Extension ID
- Execute this command while replacing your Deployment ID and your Extension ID.
curl -s -X POST \
  -H "Authorization: Bearer $TOKEN" \
  -H "Content-Type: application/json" \
  -d '{
    "extensionIds": ["ext-001", "ext-002"],
    "applyNow": true
  }' \
  "https://api.cloud-iam.com/deployments/{deploymentId}/marketplace/extensions"
Request body fields:
extensionIds(required) — list of extension IDs to installapplyNow(required) — set totrueto trigger a redeployment immediately, orfalseto install without applying
TIP
Returns 204 No Content on success.
WARNING
The deployment must be in a RUNNING state. The request will fail if the deployment is not running.
How to list installed extensions on a deployment through Cloud-IAM API?
- Obtain a Bearer token using a Service Account
- Obtain your Deployment ID
- Execute this command while replacing your Deployment ID:
curl -s \
  -H "Authorization: Bearer $TOKEN" \
  "https://api.cloud-iam.com/deployments/{deploymentId}/marketplace/extensions"
Returns a paginated list of extensions installed on the deployment, including whether an update is available for each one.
How to update an extension on a deployment through Cloud-IAM API?
When a newer compatible release is available (updateAvailable: true), you can update the extension via the API.
- Obtain a Bearer token using a Service Account
- Obtain your Deployment ID
- Obtain your Extension ID
- Execute this command while replacing your Deployment ID and your Extension ID:
curl -s -X PUT \
  -H "Authorization: Bearer $TOKEN" \
  "https://api.cloud-iam.com/deployments/{deploymentId}/marketplace/extensions/{extensionId}?apply=true"
Query parameters:
apply— set totrueto trigger a redeployment immediately (default:true)
TIP
Returns 204 No Content on success.
How to remove an extension from a deployment through Cloud-IAM API?
- Obtain a Bearer token using a Service Account
- Obtain your Deployment ID
- Obtain your Extension ID
- Execute this command while replacing your Deployment ID and your Extension ID:
curl -s -X DELETE \
  -H "Authorization: Bearer $TOKEN" \
  "https://api.cloud-iam.com/deployments/{deploymentId}/marketplace/extensions/{extensionId}?apply=true"
Query parameters:
apply— set totrueto trigger a redeployment immediately (default:true)
TIP
Returns 204 No Content on success.
WARNING
Mandatory extensions cannot be removed from a deployment.
Related pages
- My Extensions — upload and manage your custom extensions
- Cloud-IAM Extensions Catalog — ready-to-use extensions by Cloud-IAM
- FAQ — Extensions