Organization Management
A Cloud-IAM Organization acts as a central entity that groups users, manages access to deployments, and governs organizational settings such as billing, security, and permissions.
Each managed deployment is associated with an organization that includes at least one Owner. This organization is automatically created when your Cloud-IAM account is registered, using a randomly generated name by default.
In this guide, you’ll learn what actions can be performed within an organization, from managing members to configuring security settings. For a full breakdown of roles and permissions, refer to the Organization & Roles Reference
Recommended best practice for your organization
For secure and resilient access management, we strongly recommend adding at least 2 Owners to your organization.
This ensures continuity and control in case one owner loses access to their account.
How to switch between organizations
While a default organization is created when you sign up, you may also have access to other organizations, either because you were invited to one or because you manage multiple organizations yourself (each potentially with its own Keycloak deployment).
Steps to Switch Organizations:
- Open Cloud-IAM console
- Select on your current organization name in the top-left corner of the console
- From the dropdown list, click the organization you want to switch to
Once selected, the console will reload with the context and resources of the chosen organization.

How to create new organization
While a default organization is automatically created when you sign up, there are cases where creating additional organizations is useful, for example, to separate access for different teams, projects, or clients across deployments.
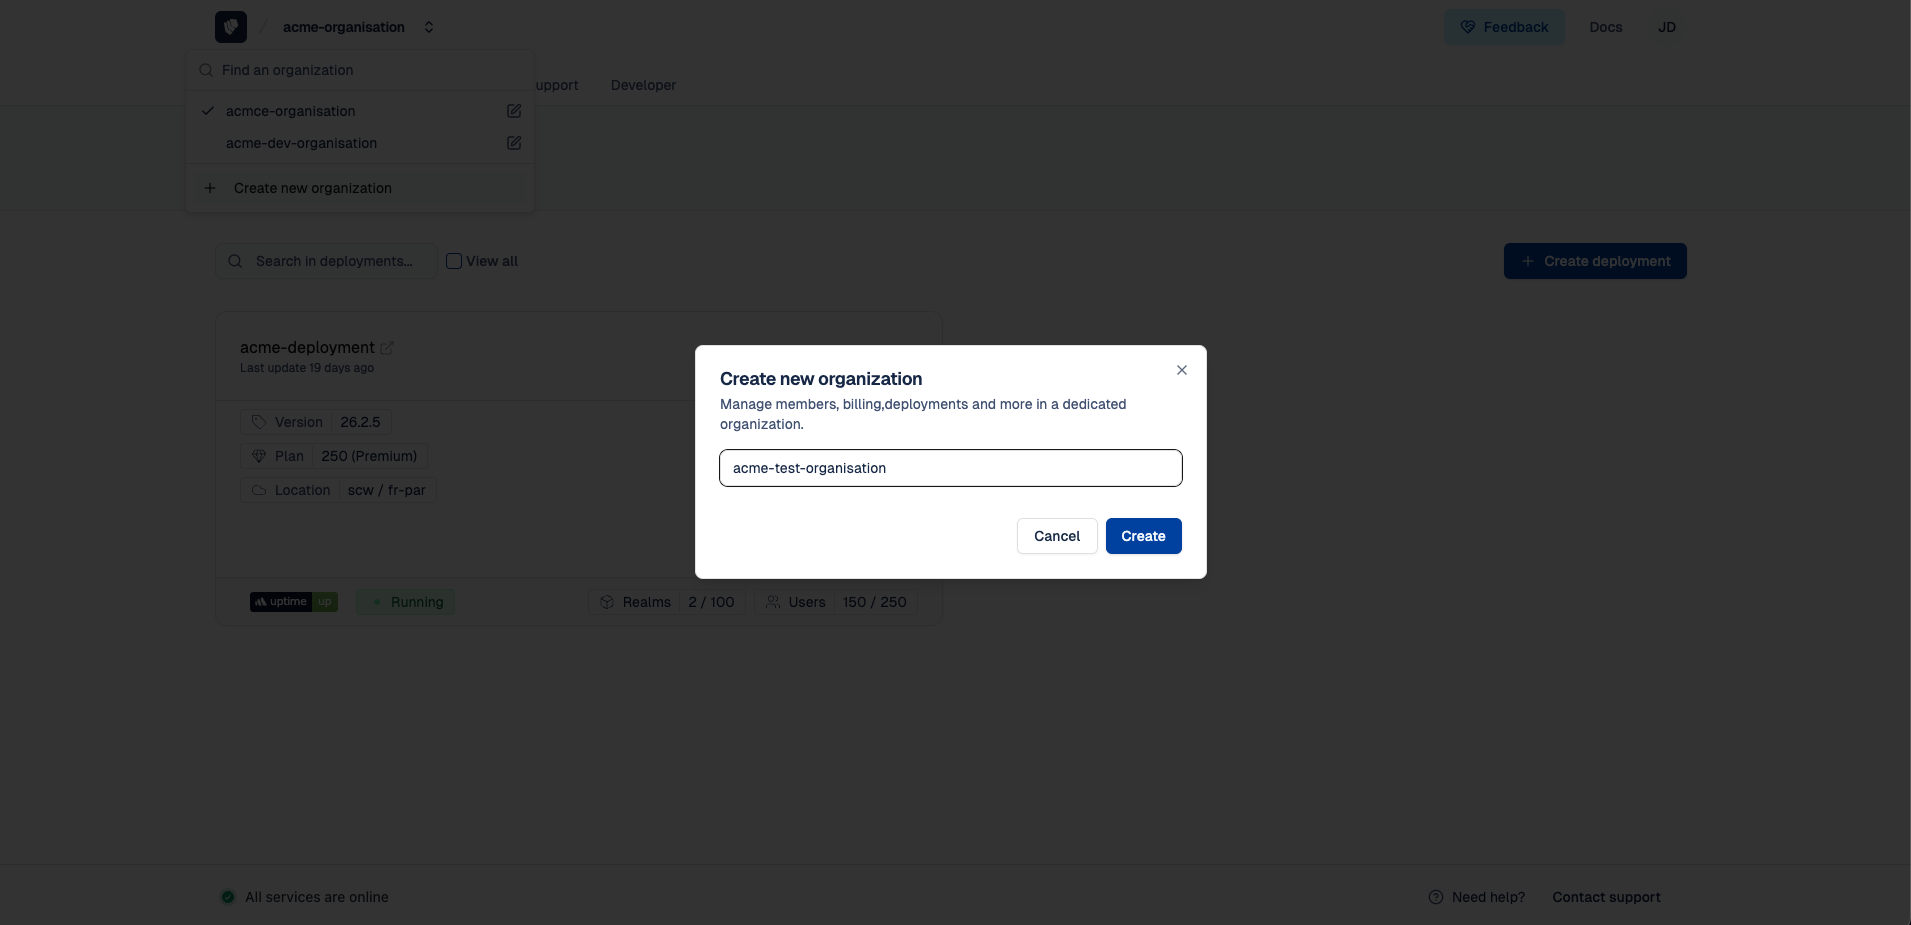
Follow these easy steps to create new organization:
- Open Cloud-IAM console
- Select your current organization name in the top-left corner of the console
- Click on
+ Create new organization - Name your new organization
- Then click on
Create
Your new organization will now appear in the organization switcher at the top left.
Organisations quota
Please note that you can create a maximum of 10 distinct organizations.
If you would need more organization, please contact the Cloud-IAM support team.
How to rename an organization
When your Cloud-IAM account is first created, a default organization is automatically generated using a randomly assigned name. You may want to rename it to reflect your company, team, or project for better clarity and management.
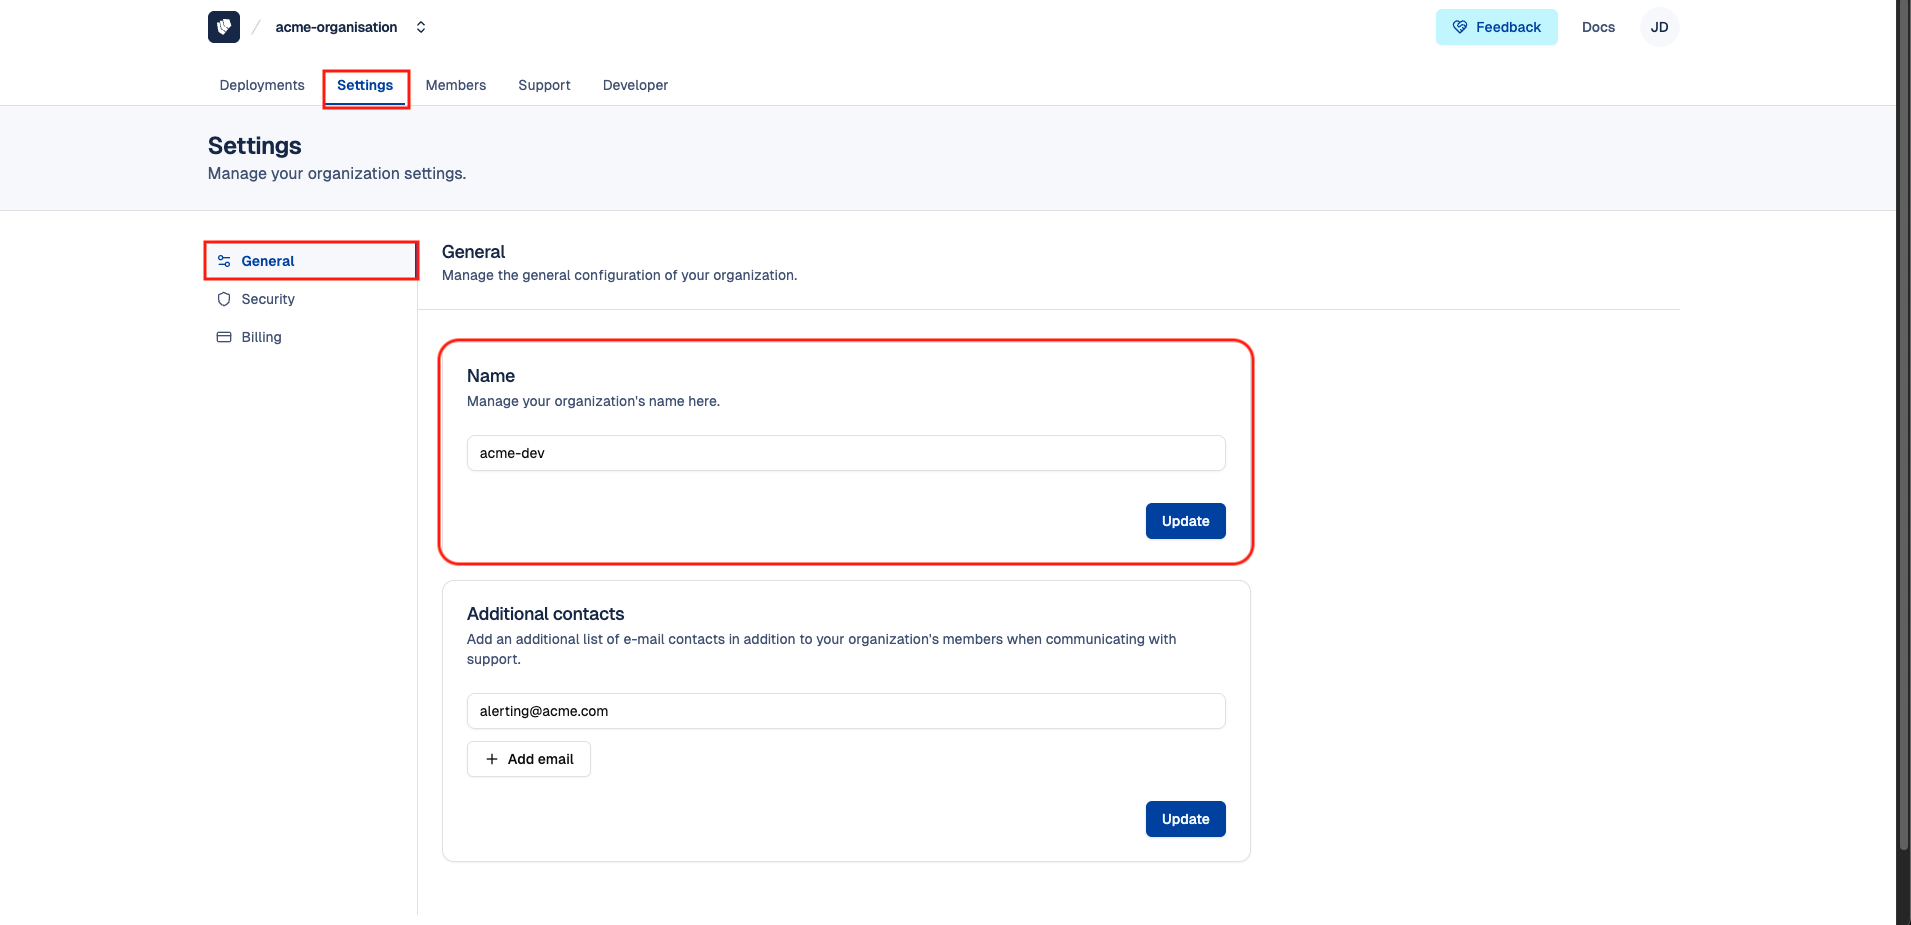
Steps to rename your organization:
- Open Cloud-IAM console
- Navigate to
Settingssection - In the General section, locate the Name field and Enter the new organization name
- Then click on
Updateto save the changes
Your organization is now renamed and will appear with the new name throughout the Cloud-IAM Console.
Organization Role
Only Organization Owners have permission to rename an organization in the Cloud-IAM Console.
How access the Organisation ID
Each time an organisation is created in Cloud-IAM, it is automatically assigned a unique Organisation ID.
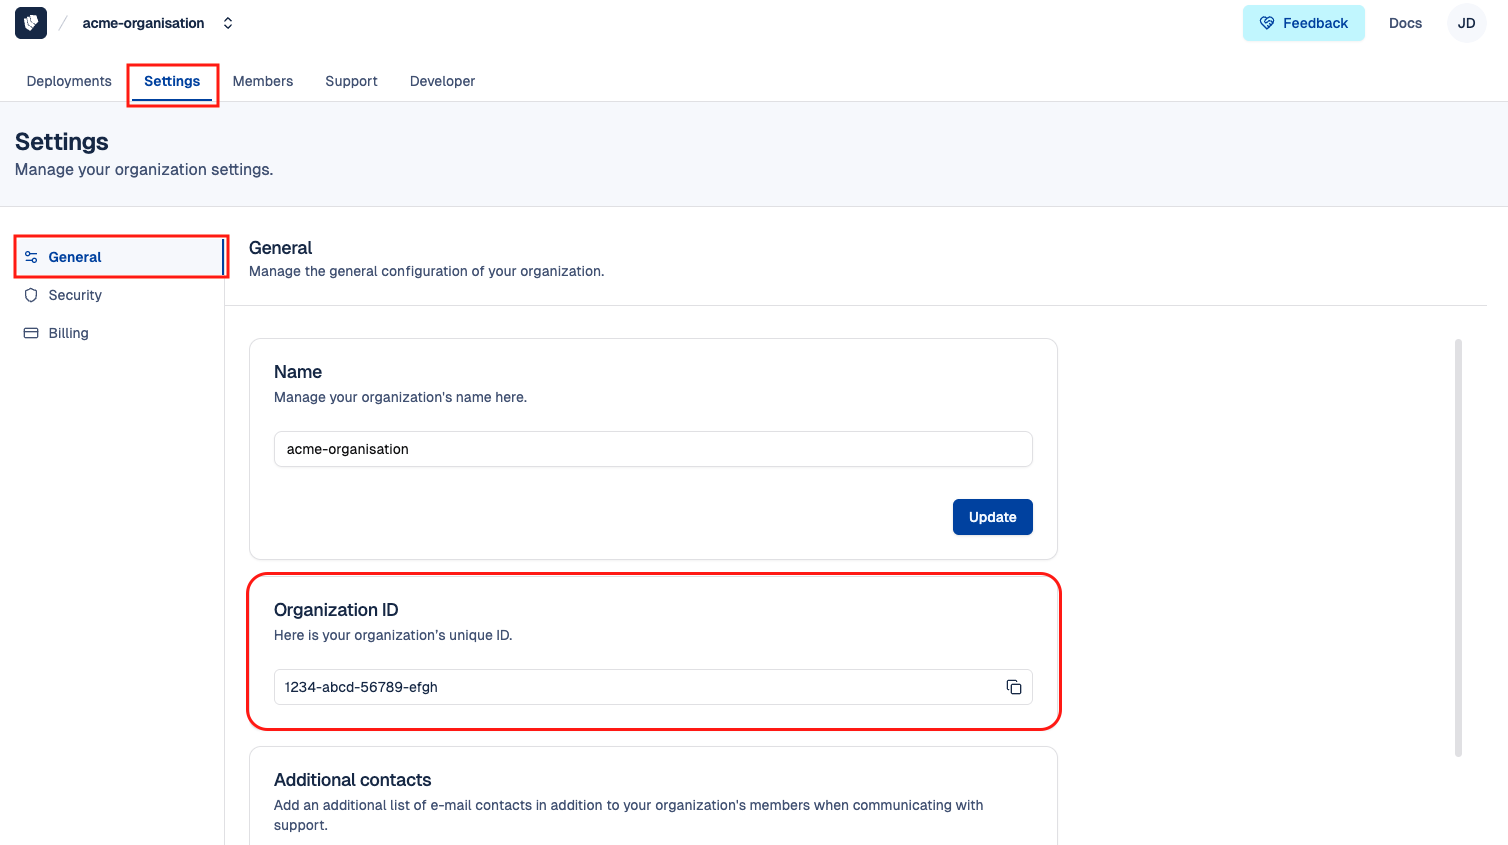
To find and copy this ID, follow these steps:
- Open Cloud-IAM console
- Select the correct organisation from the list
- Navigate to
Settings - Go to
Generaltab - In the Organisation ID section, copy the unique identifier
Your Organisation ID may be needed for API usage or when requested by Cloud-IAM support for identity verification.
How to add users to your organization
Each managed deployment on Cloud-IAM is tied to an organization that includes at least one Owner. To allow other team members to access deployment settings via the Cloud-IAM Console, you can invite them to join your organization.
Account Activation Required
Before you can add a user to an organization, they must have already created and activated their account on the Cloud-IAM Console.
To learn how, refer to the First-time access guide
Steps to add new users in your organization:
- Open Cloud-IAM console
- Navigate to
Memberssection - Select
+ Add account - Enter the email address associated with the user’s activated Cloud-IAM account
- Assign Role (more information about role)
- Then click on
Add.
Once added, the user will gain access to your organization and deployments, with permissions based on their assigned role.

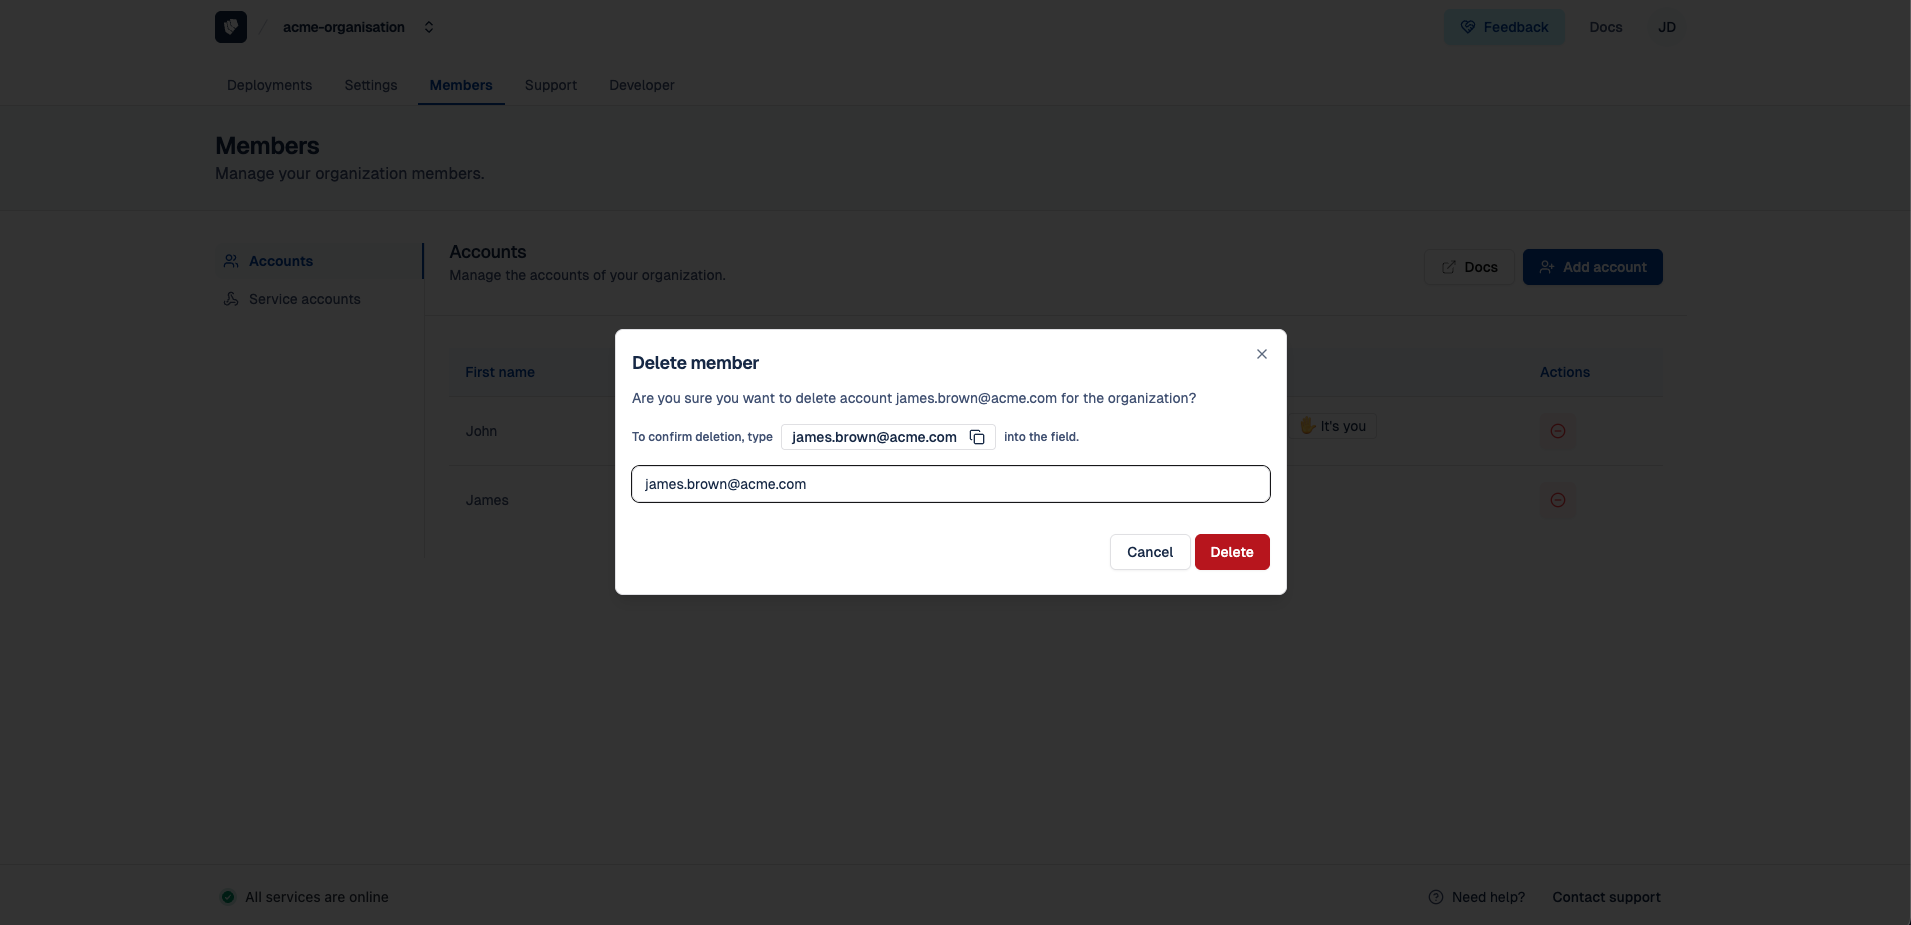
How to remove users from your organization
If a user (such as a former employee or contractor) no longer requires access to your deployments or settings via the Cloud-IAM Console. You should remove their account from your organization's membership.
Steps to remove a user in your organization:
- Open Cloud-IAM console
- Navigate to
Memberssection - Find the user to be removed and click on
⛔️(Remove) icon - Confirm by entering the user's email address
- Then click on
Deleteto finalize the removal
Once removed, the user will immediately lose access to your organization and all associated deployments.
Cloud-IAM Console Access Only
This action only revokes access to the Cloud-IAM Console.
If the user should also be removed from your Keycloak instance, you must manually revoke their permissions from the Keycloak Admin Console.
How to change a user’s role
If a user needs elevated privileges to manage Cloud-IAM console features or deployment settings, you may need to update their role.
Steps to change user role in your organization:
- Open Cloud-IAM console
- Navigate to
Memberssection - Remove the user from your organization
- Then re-add the user and assign the desired role
Once re-added, the user will regain access to your organization and deployments with the updated role-based permissions.
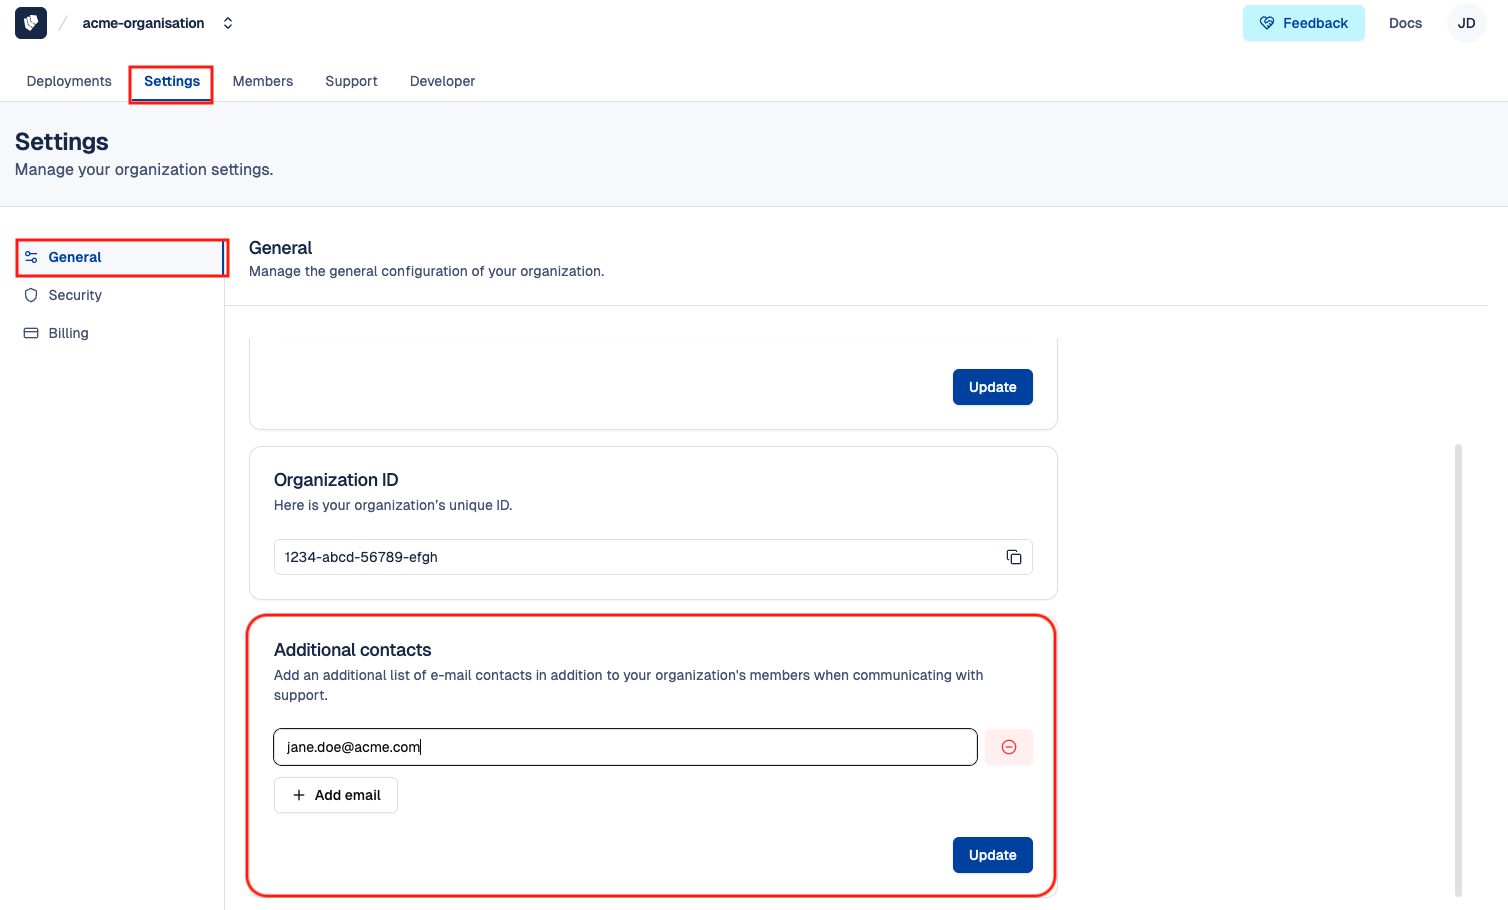
How to add Additional Contacts in your organisation
In some cases, you may want to include email contacts who can receive alerts and communications from the Cloud-IAM support team, without requiring them to have a user account in the Cloud-IAM Console.
This feature allows you to define an additional list of email recipients, beyond your organization's registered members, to stay informed during support interactions and incident alerts.
Steps to add Additional Contacts in your organization:
- Open Cloud-IAM console
- Navigate to
Settingssection - Go to the
Generaltab 4.Scroll down to the Additional Contacts section - Enter the email address you want to add and click
Update - To add more addresses, click
+ Add mailand repeat the process
Once added, the email contact(s) will be included in the Cloud-IAM support notification list for your organization.
Note: To remove a contact, click the ⛔️ (Remove) icon next to the email address.
How to activate two-factor authentication
To enhance account security, the Cloud-IAM Console supports Two-Factor Authentication (2FA). 2FA adds a second layer of protection beyond your password, significantly reducing the risk of unauthorized access to Cloud-IAM console.
Users can enable 2FA individually from their profile settings, or it can be enforced by organization owners as a security policy. Organization Owners can enforce Two-Factor Authentication (2FA) for all members to ensure consistent security standards across the organization.
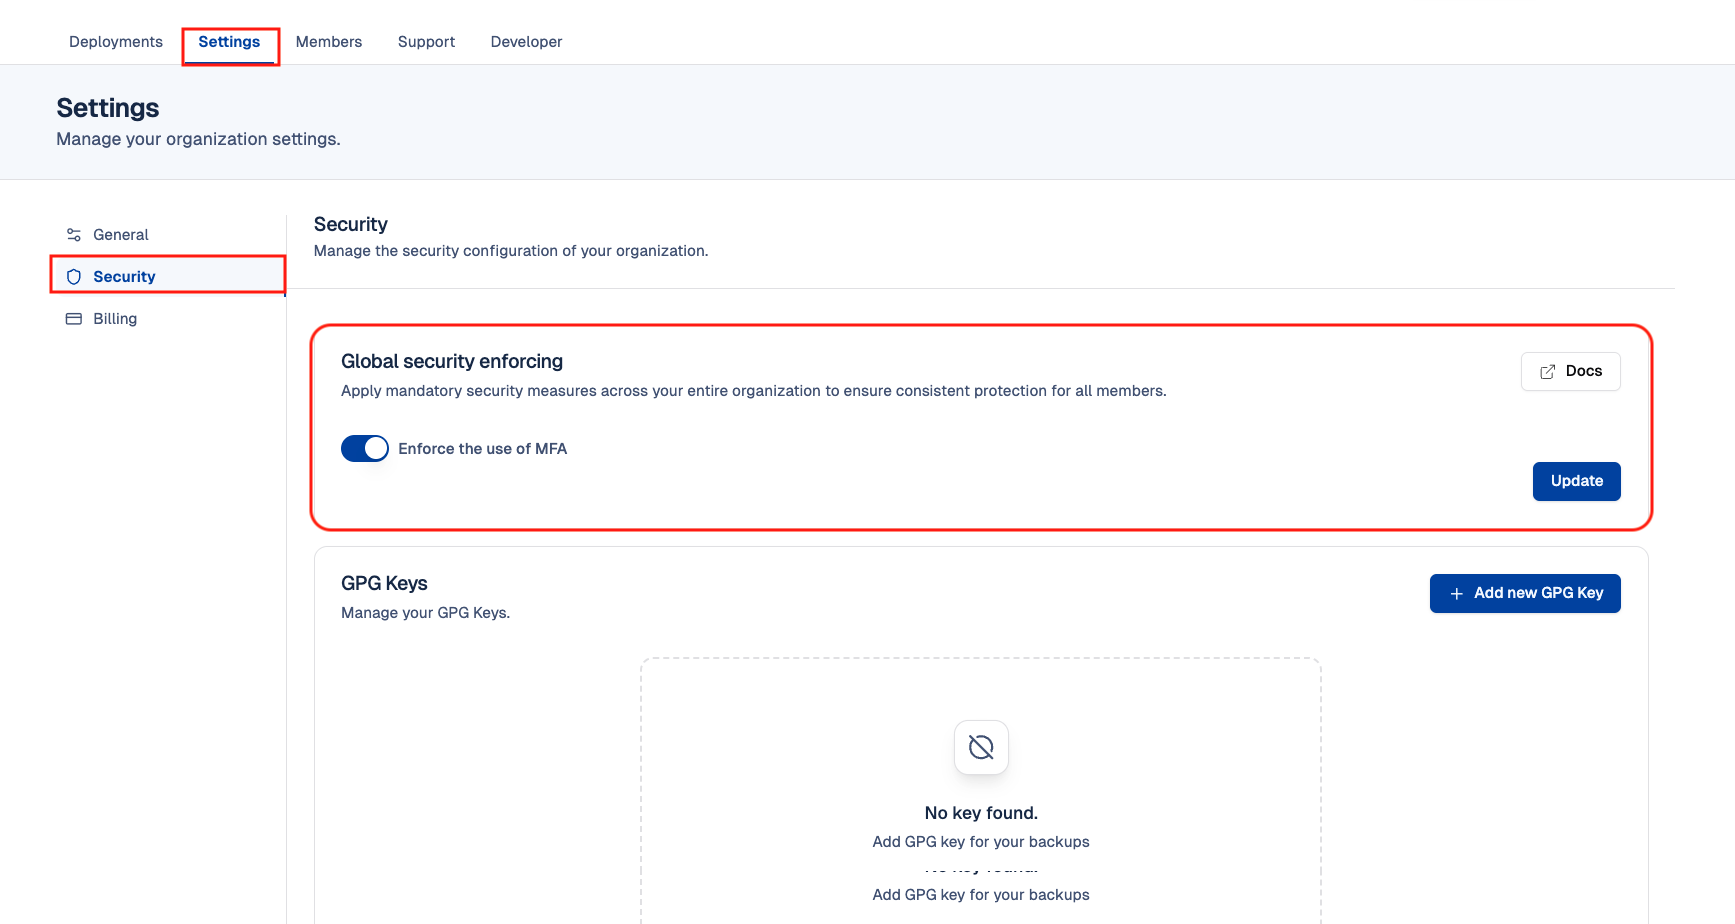
Steps to enforce 2FA organisation-wide:
- Open Cloud-IAM console
- Select
Settings - Click on
Securitytab - Enable the toggle for
Enforce the use of MFA - Then select
Updateto apply the policy
Once enforced, all users in the organization who haven’t yet configured 2FA will be prompted to add a 2FA device upon their next login.
How to create and associate a GPG Key to your organization
If you want to use backups, you need to register your public GPG key via the Cloud-IAM console on your organization settings. GPG (GNU Privacy Guard) is used for asymmetric encryption.
Cloud-IAM will use your public key to encrypt the backup files, which can only be decrypted using the corresponding private key in your possession. This approach ensures that only you, holding the private key, can access the unencrypted backup data.
WARNING
Please be extremely cautious with your private GPG key. If the private key is compromised, an unauthorized party could potentially access sensitive information. We strongly recommend storing your private key securely in a password-protected, access-controlled environment, and maintaining a backup in a safe location.
Step 1 - Initiate GPG key creation
- Use the following command to initiate key generation:
$ gpg --full-generate-key- You will be prompted to make several selections:
- Key Type: choose RSA and RSA (default option).
- Key Size: we recommend a minimum of 3072 bits.
- Key Expiration: it is considered best practice to set an expiration date to support key rotation (be sure to renew or replace the key before it expires to avoid service interruption).
- User ID Information: provide a name and email to identify your key.
- Once complete, GPG will generate your key pair and store it locally. A sample output might look like this:
pub   rsa3072 2025-06-26 [SC] [expires: 2025-07-02]
7D42BCE0C837A8D0F369C8A39E19788B707738D7
uid                      for-ops (none) <my-email@acme.inc>
sub   rsa3072 2025-06-26 [E] [expires: 2025-07-02]
WARNING
Expired, revoked, or invalid public keys will not be used to encrypt your backup data. Always ensure the key uploaded in the Cloud-IAM Console is valid and up to date.
- Use the following command, to allow Cloud-IAM to encrypt your backups, you must export and upload your public key in ASCII-armored format.
$ gpg --output my-email@acme.inc.public.pgp.txt --armor --export my-email@acme.inc- Use the following command, to get the contents:
$ cat my-email@acme.inc.public.pgp.txt- Copy the output similar to:
-----BEGIN PGP PUBLIC KEY BLOCK-----
mQGNBGhdRmwBDACux9dtim6sC1rBaLNSmOIYm5eGVnoAEhQVLwqNEQfUGrHa8d1g
...
=HTjH
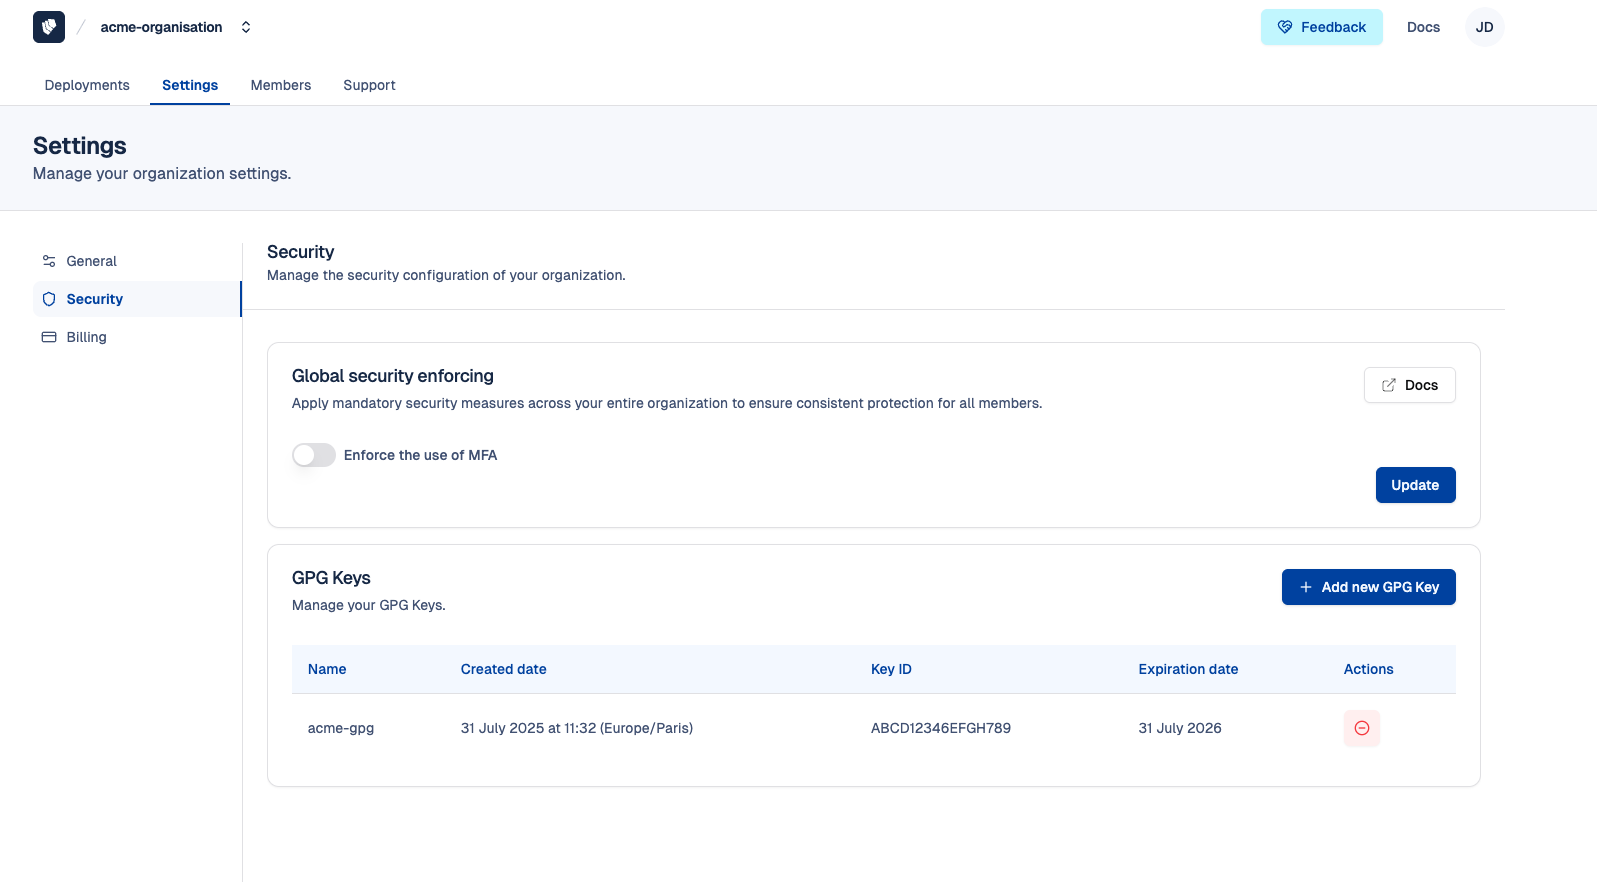
-----END PGP PUBLIC KEY BLOCK-----Step 2 - Access to GPG Keys
Once you've generated and exported your GPG public key, you need to upload it to your organization's security settings in the Cloud-IAM Console.
- Open Cloud-IAM console
- Click on
Settings - Select
Security - From GPG Keys section, click
+ Add GPG Key
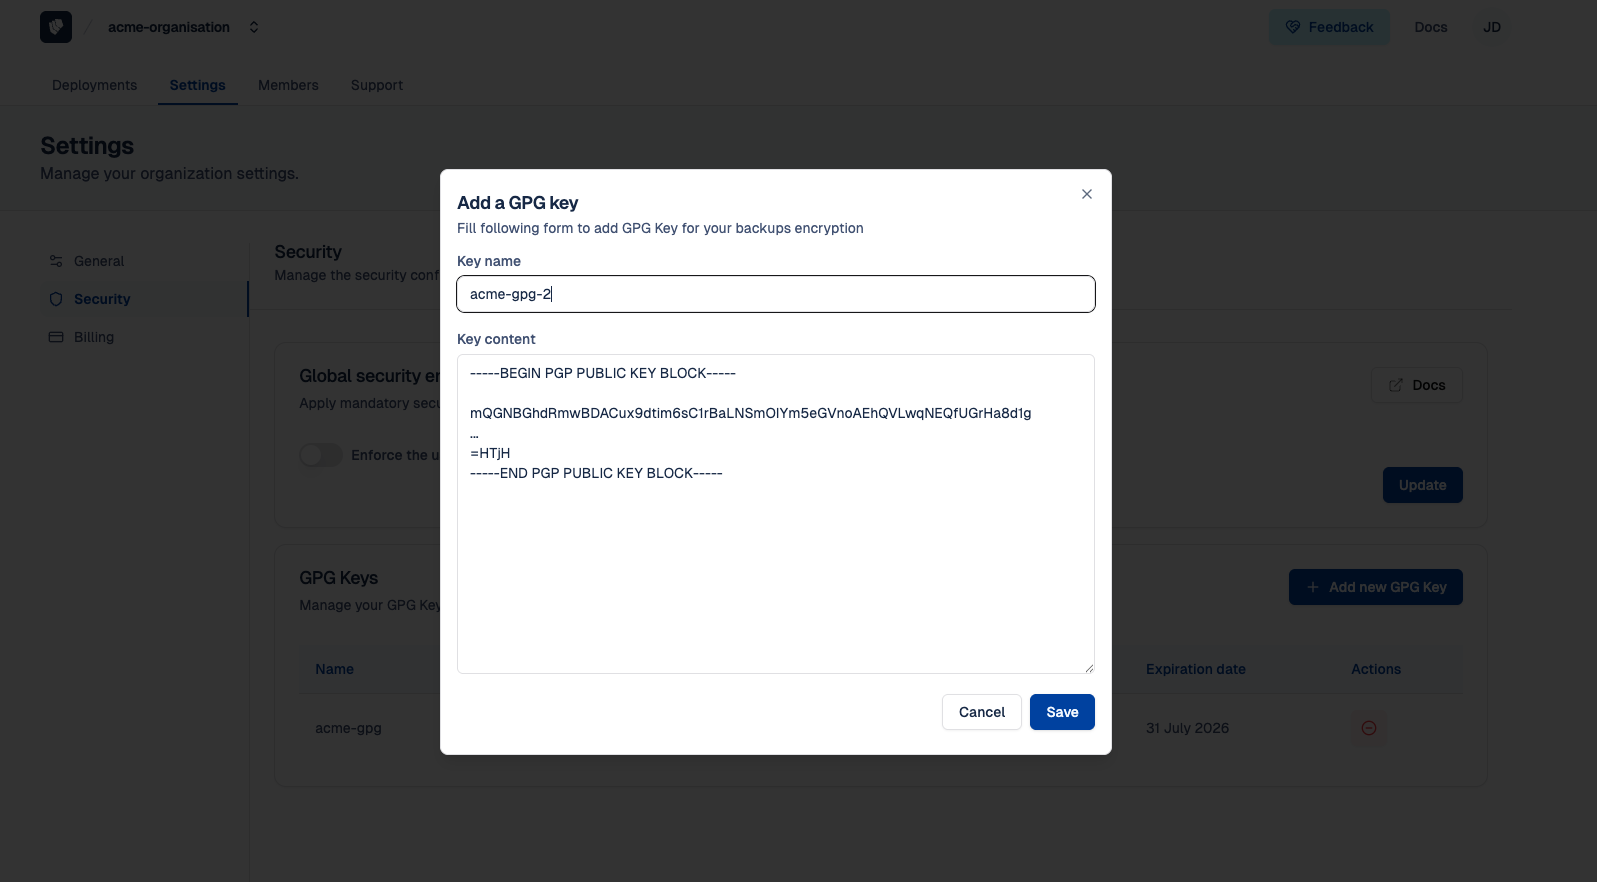
Step 3 - Fill in the GPG key form
Follow these steps to associate the key.
- Provide a name the GPG key
- Past the previous ASCII-armored public key block you previously copy
- Then click on
Save