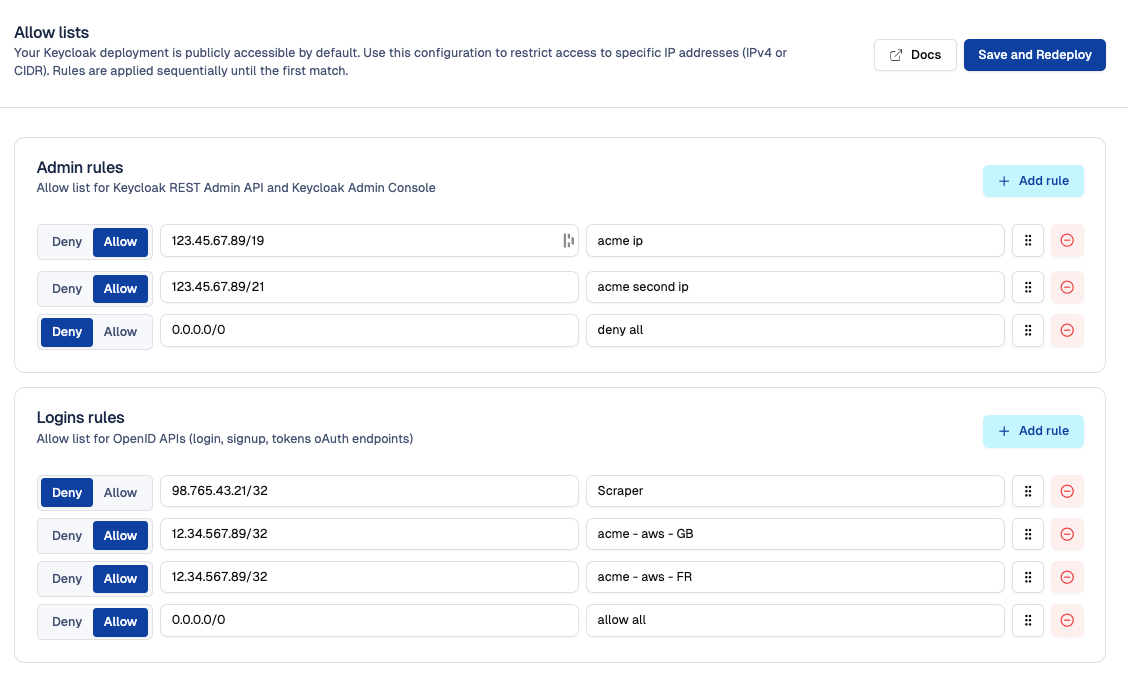
Allow lists
What is allow list
An allow list (also called a whitelist) is used to control which IP addresses can access certain parts of your system. It works alongside a deny list (also called a blacklist) to define accepted and blocked sources.
By default, your Keycloak deployment is publicly accessible. Using the allow list lets you reduce its exposure to the internet by restricting access, directly configurable from the Cloud-IAM Console.
What are zones of access control
The allow/deny lists are divided into two zones:
Admin Rules
Allow list for the Keycloak REST Admin API and Keycloak Admin Console.
- Covers the Keycloak Admin Console and the REST Admin API.
- These URLs are intended for use by Keycloak administrators or automated tools that provision or configure realms.
Logins rules
Allow list for OpenID APIs (login, signup, tokens oAuth endpoints)
- Covers endpoints like
/login,/signup,/token, and other OAuth endpoints. - These are used by end-users to authenticate and get tokens.
How the Allow List Works
- Each list contains IPv4 addresses or CIDR blocks (e.g.,
192.168.1.0/24). - Entries are evaluated from top to bottom.
- When an IP matches an entry, the rule is applied and evaluation stops.
- If no rule matches, the request is allowed by default.
Default Allowed IPs for Cloud-IAM Operations
By default, Cloud-IAM automatically allows and integrates IP addresses during deployment creation.
These IPs addresses are used for internal operations, incident and monitoring services They do not appear in the allow or deny lists feature and cannot be removed by the customer.
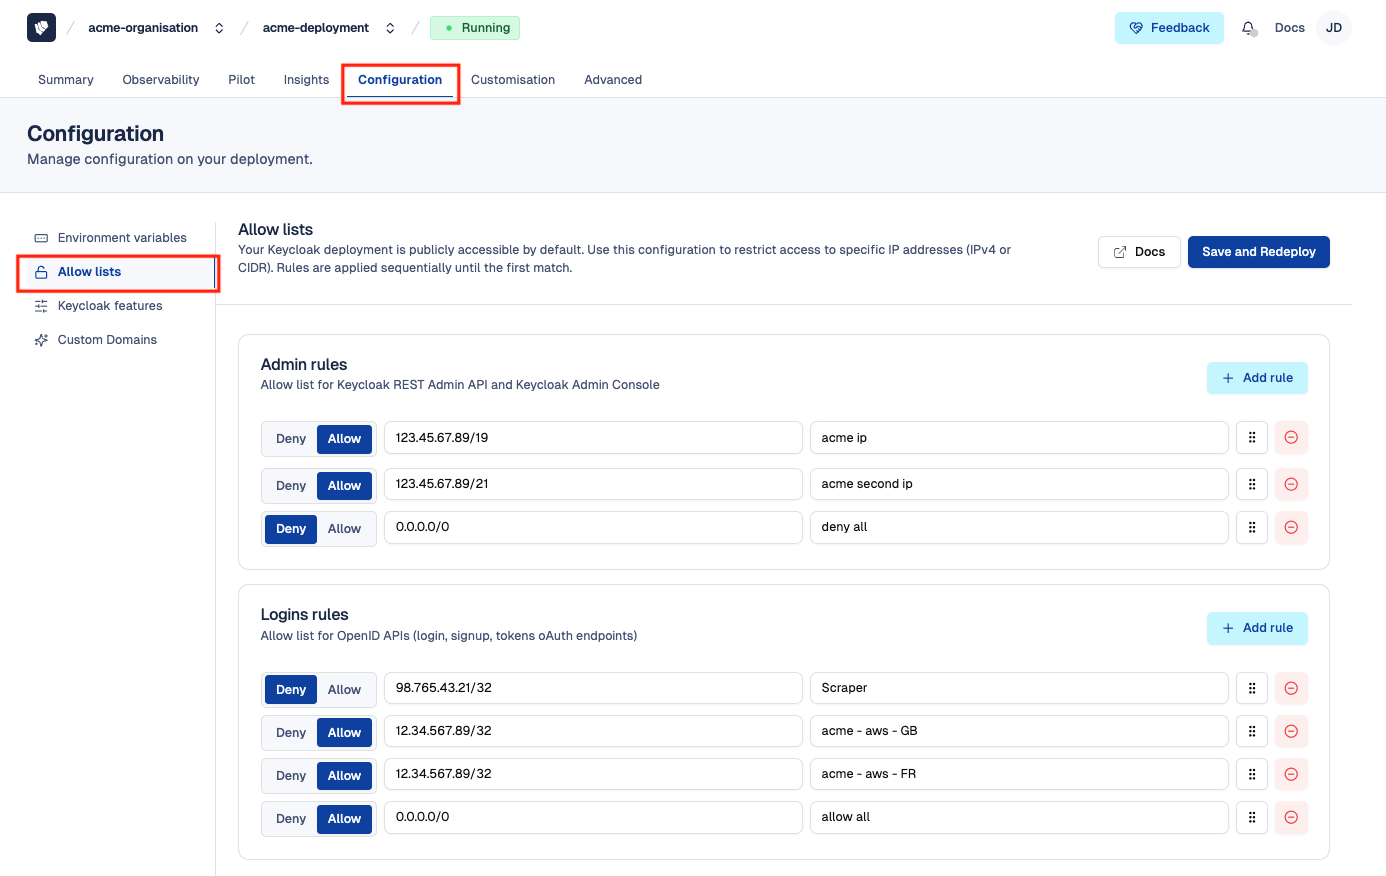
How to access to allow list
To access allow list feature, follow these steps:
- Open Cloud-IAM console
- Select the Keycloak deployment you want to configure.
- Click on
Configuration - Select
Allow Lists
How to Allow or Deny IP address
To configure the allow list feature, follow these steps:
- Follow the steps in the How access to allow list section
- In the appropriate zone (Admin Rules or Login Rules), click the
+ Add rulebutton - Enter the IP address and provide a descriptive name for the rule
- Choose whether to
AlloworDenythe IP address - Set the priority of each rule by arranging its position in the list. (Note: The rule 0.0.0.0/0 must always be placed at the end.)
- Then Click
Save and Redeployto apply the changes
After 10–15 minutes, while your Keycloak deployment redeploys via the rolling upgrade process, the changes will be applied.
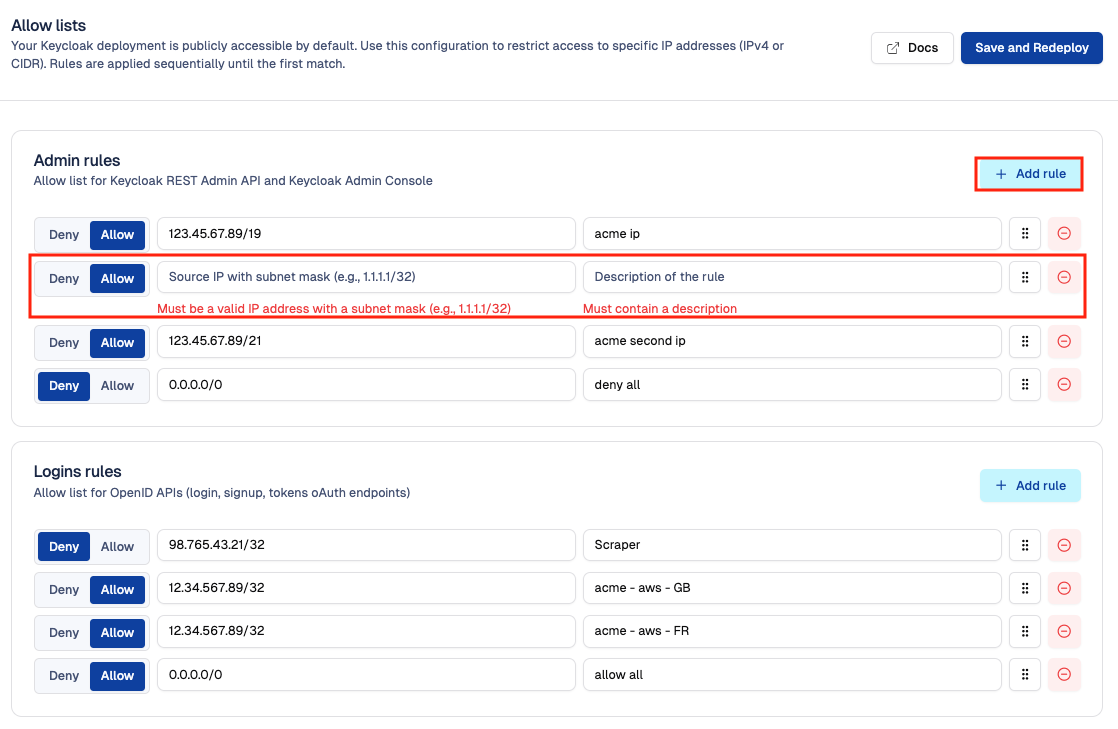
⚠️ Position rules to define priority and sequencing
Make sure that the last entry in your allow list is the rule 0.0.0.0/0 — this rule marks the end of the sequence. This ensures that all specific IP addresses listed above it are processed first, while any remaining traffic is handled by the generic 0.0.0.0/0 rule.
The image below provides a visual example of the correct sequencing order, with arrows indicating the order in which the rules are applied: 
Rate limiting and request protection
To ensure security and reliability, Cloud-IAM applies rate limiting to protect your deployment from abuse, DDoS attacks, and excessive traffic.
The default limits are as follows:
- Admin urls and APIs(see admin rules): 30 requests per second per IP
- OpenID urls and APIs (see login rules): 50 requests per second per IP
These limits help maintain performance across shared infrastructure.
They can be adjusted upon request by the Cloud-IAM support team.
Exclusion for allowed IP addresses
IP addresses explicitly allowed in the corresponding allow list (excluding 0.0.0.0/0) are not subject to rate limiting.
Brute force detection and DDoS protection
Cloud-IAM Managed Keycloak includes automated protection mechanisms to detect and block malicious or abusive behavior.
What is detected?
- Enumeration attacks
- Path brute force attempts
- DDoS (distributed denial of service) attacks
- Path traversal attacks
- Other suspicious or abnormal request patterns
When detected, the source IP address is temporarily banned to protect the deployment. Bans apply globally to the entire deployment, regardless of the target zone (admin or login).
Customers can also configure brute force protection directly in Keycloak at the realm level, more details here.
Exclusion for allowed IP addresses
IP addresses explicitly added to either the admin or login allow list (except 0.0.0.0/0) are never banned, even if their behavior matches one.
How to unban a legitimate IP address
If a trusted service (such as a monitoring tool or automation script) has been temporarily banned, you can restore access by allowing its IP address. This procedure can also be used proactively if you know the service will exceed rate-limiting thresholds.
- Add its IP address to the allow list by following this guide: How to allow or deny an IP address
- After clicking Save and redeploy, the IP will:
- Be automatically unbanned
- Be excluded from rate limiting for the corresponding zone
Request handling logic summary
Overview of how Cloud-IAM processes incoming requests, step by step:
Allow List Check
- Rules are evaluated top to bottom.
- First match is applied.
- If no match, the request is allowed.
Rate Limiting
- Applies only if the IP is not explicitly allowed.
- Limits: 50 req/s for OpenID, 30 req/s for Admin.
DDoS & Abuse Detection
- Suspicious patterns result in a temporary ban
- Affects all zones
- Does not apply to explicitly allowed IPs (except
0.0.0.0/0)