Password Blacklists
What are password blacklists
Keycloak provides a rich set of built-in password policies, designed to help keep user accounts secure. However, there are cases where you may want to prevent users from choosing specific passwords, such as commonly used, weak, or organization specific passwords.
This is where password blacklists (also called a Password Deny Lists) come in. A password blacklist allows you to define a list of disallowed passwords that users cannot use during registration or password updates.
In Cloud-IAM-managed Keycloak deployments, direct access to the Keycloak server for manually applying custom password restrictions is not available. Instead, you can manage password blacklists directly through the Cloud-IAM Console.
What are the prerequisites to use password blacklist feature on Cloud-IAM
Before managing password blacklist on Cloud-IAM, please ensure the following:
- Dedicated Keycloak Deployment: Password blacklist is available only on dedicated Keycloak deployments managed by Cloud-IAM.
- Support Plan: Your Cloud-IAM support plan must include the Password Blacklist privilege, more details in Cloud-IAM pricing page.
- User Role: You must have the Editor role within your organization to upload, update, or delete password Blacklists. For more details, see Organization Roles.
- File Format: Password blacklist must be packaged as text
.txtfiles.
How to upload your custom password blacklists in the Cloud-IAM Console
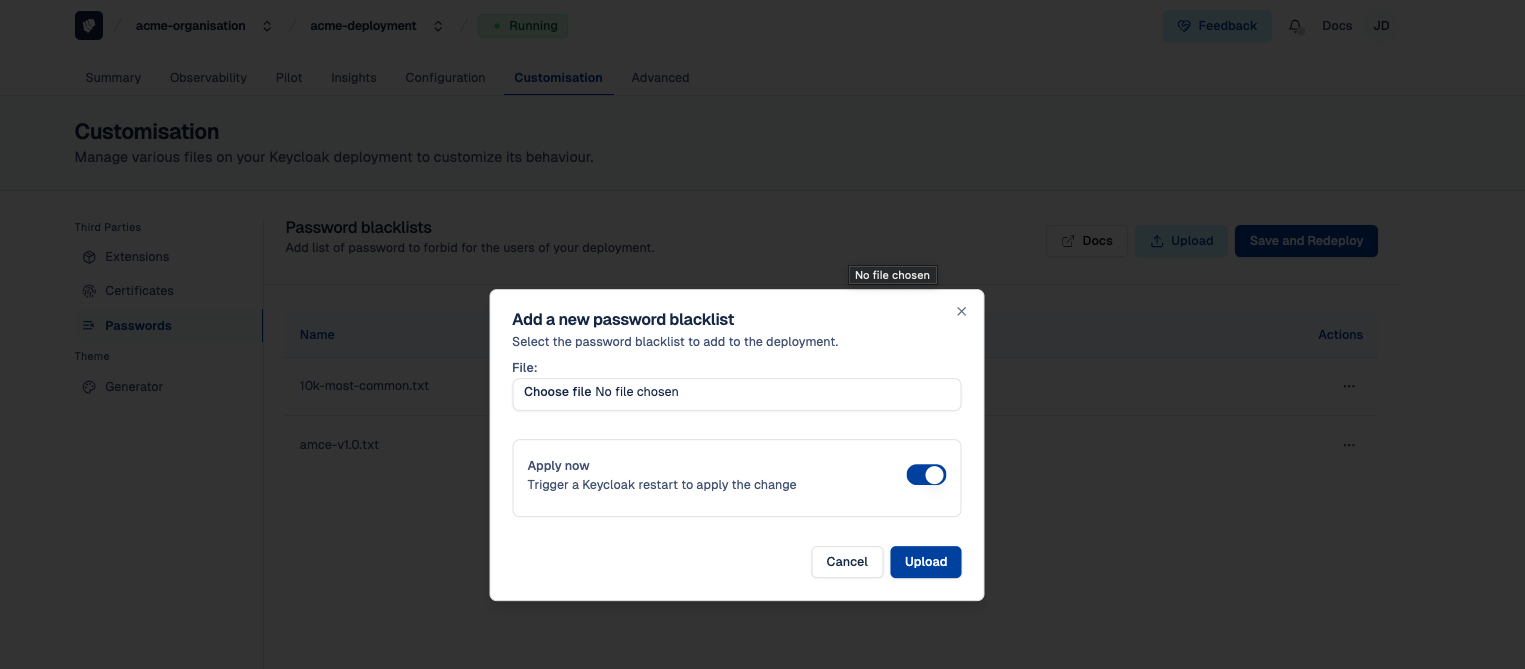
To configure your custom Password blacklists, follow these steps:
- Open Cloud-IAM console
- Select the Keycloak deployment where you want to upload the password blacklists
- Navigate on the
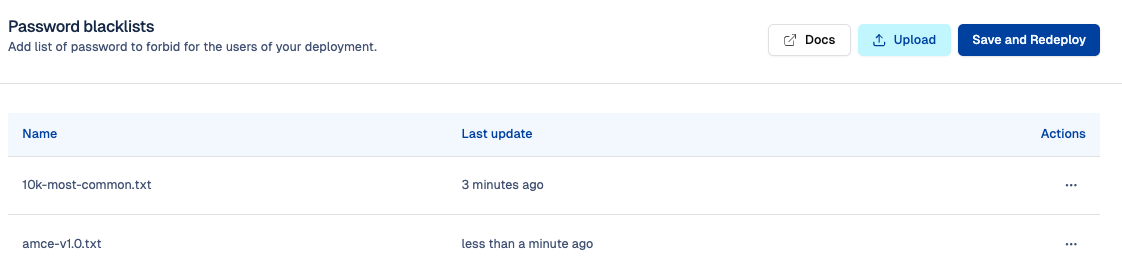
Customisationsection - Select the
Passwordstab - Click
Upload - Select the
.txtfile containing your blacklist (for example: acme-v1.0.txt) - Toggle the option to either apply immediately and trigger a restart or upload now and restart later.
- Then click
Uploadto confirm
After 5–10 minutes, while your Keycloak deployment redeploys via the rolling upgrade process, the changes will be applied. Your password blacklist is now uploaded to your deployment.
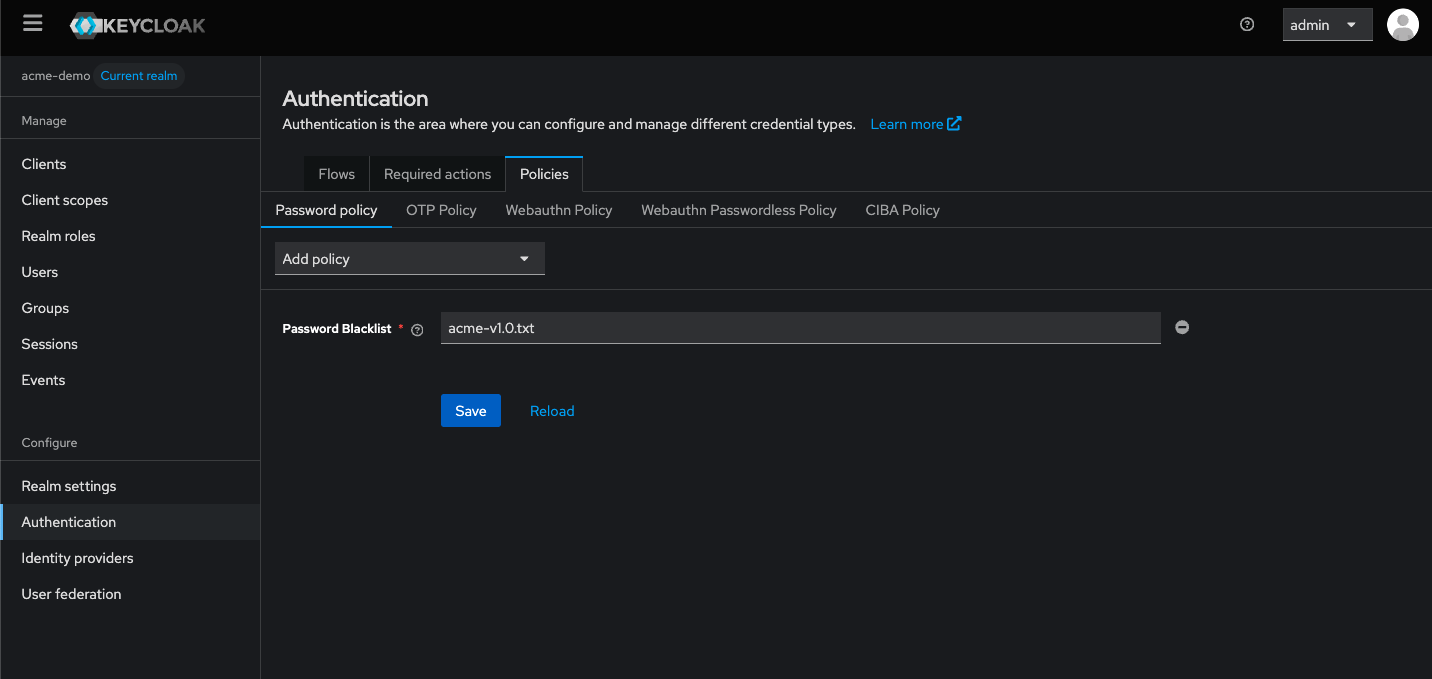
How to activate your list on Keycloak
Once your password blacklist is fully deployed (i.e. status : Running):
- Login to your Keycloak as an admin
- Select the realm where you want to apply the password blacklist
- Click on
Authentication - Select
Policies - Click on
Password Policy - From the drop-down, select
Password Blacklist - Paste your list name (e.g. acme-v1.0.txt)
- Then click on
Save
Your custom password blacklist is now active in Keycloak.
One List at a Time
Keycloak only supports one active password blacklist per realm.
To use multiple lists, you need to combine them into a single file before uploading.
How the managing uploaded password lists
From the Password Blacklist section in the Cloud-IAM Console, click the ... menu next to any uploaded list to:
Updateit with an updated versionDeleteit from your deployment
This gives you control over list lifecycle.
Default Blacklist for Freemium Plans
For Freemium Cloud-IAM deployments where custom password blacklists are not available, you can still use the predefined list provided by Cloud-IAM. Cloud-IAM provides each Keycloak deployment with a built-in blacklist named top-10000.txt, containing the 10,000 most commonly used and weakest passwords.
To activate, follow the How to Activate Your List on Keycloak section and enter top-10000.txt as the list name. This enables Cloud-IAM’s default password blacklist on your realm, improving security with minimal setup.