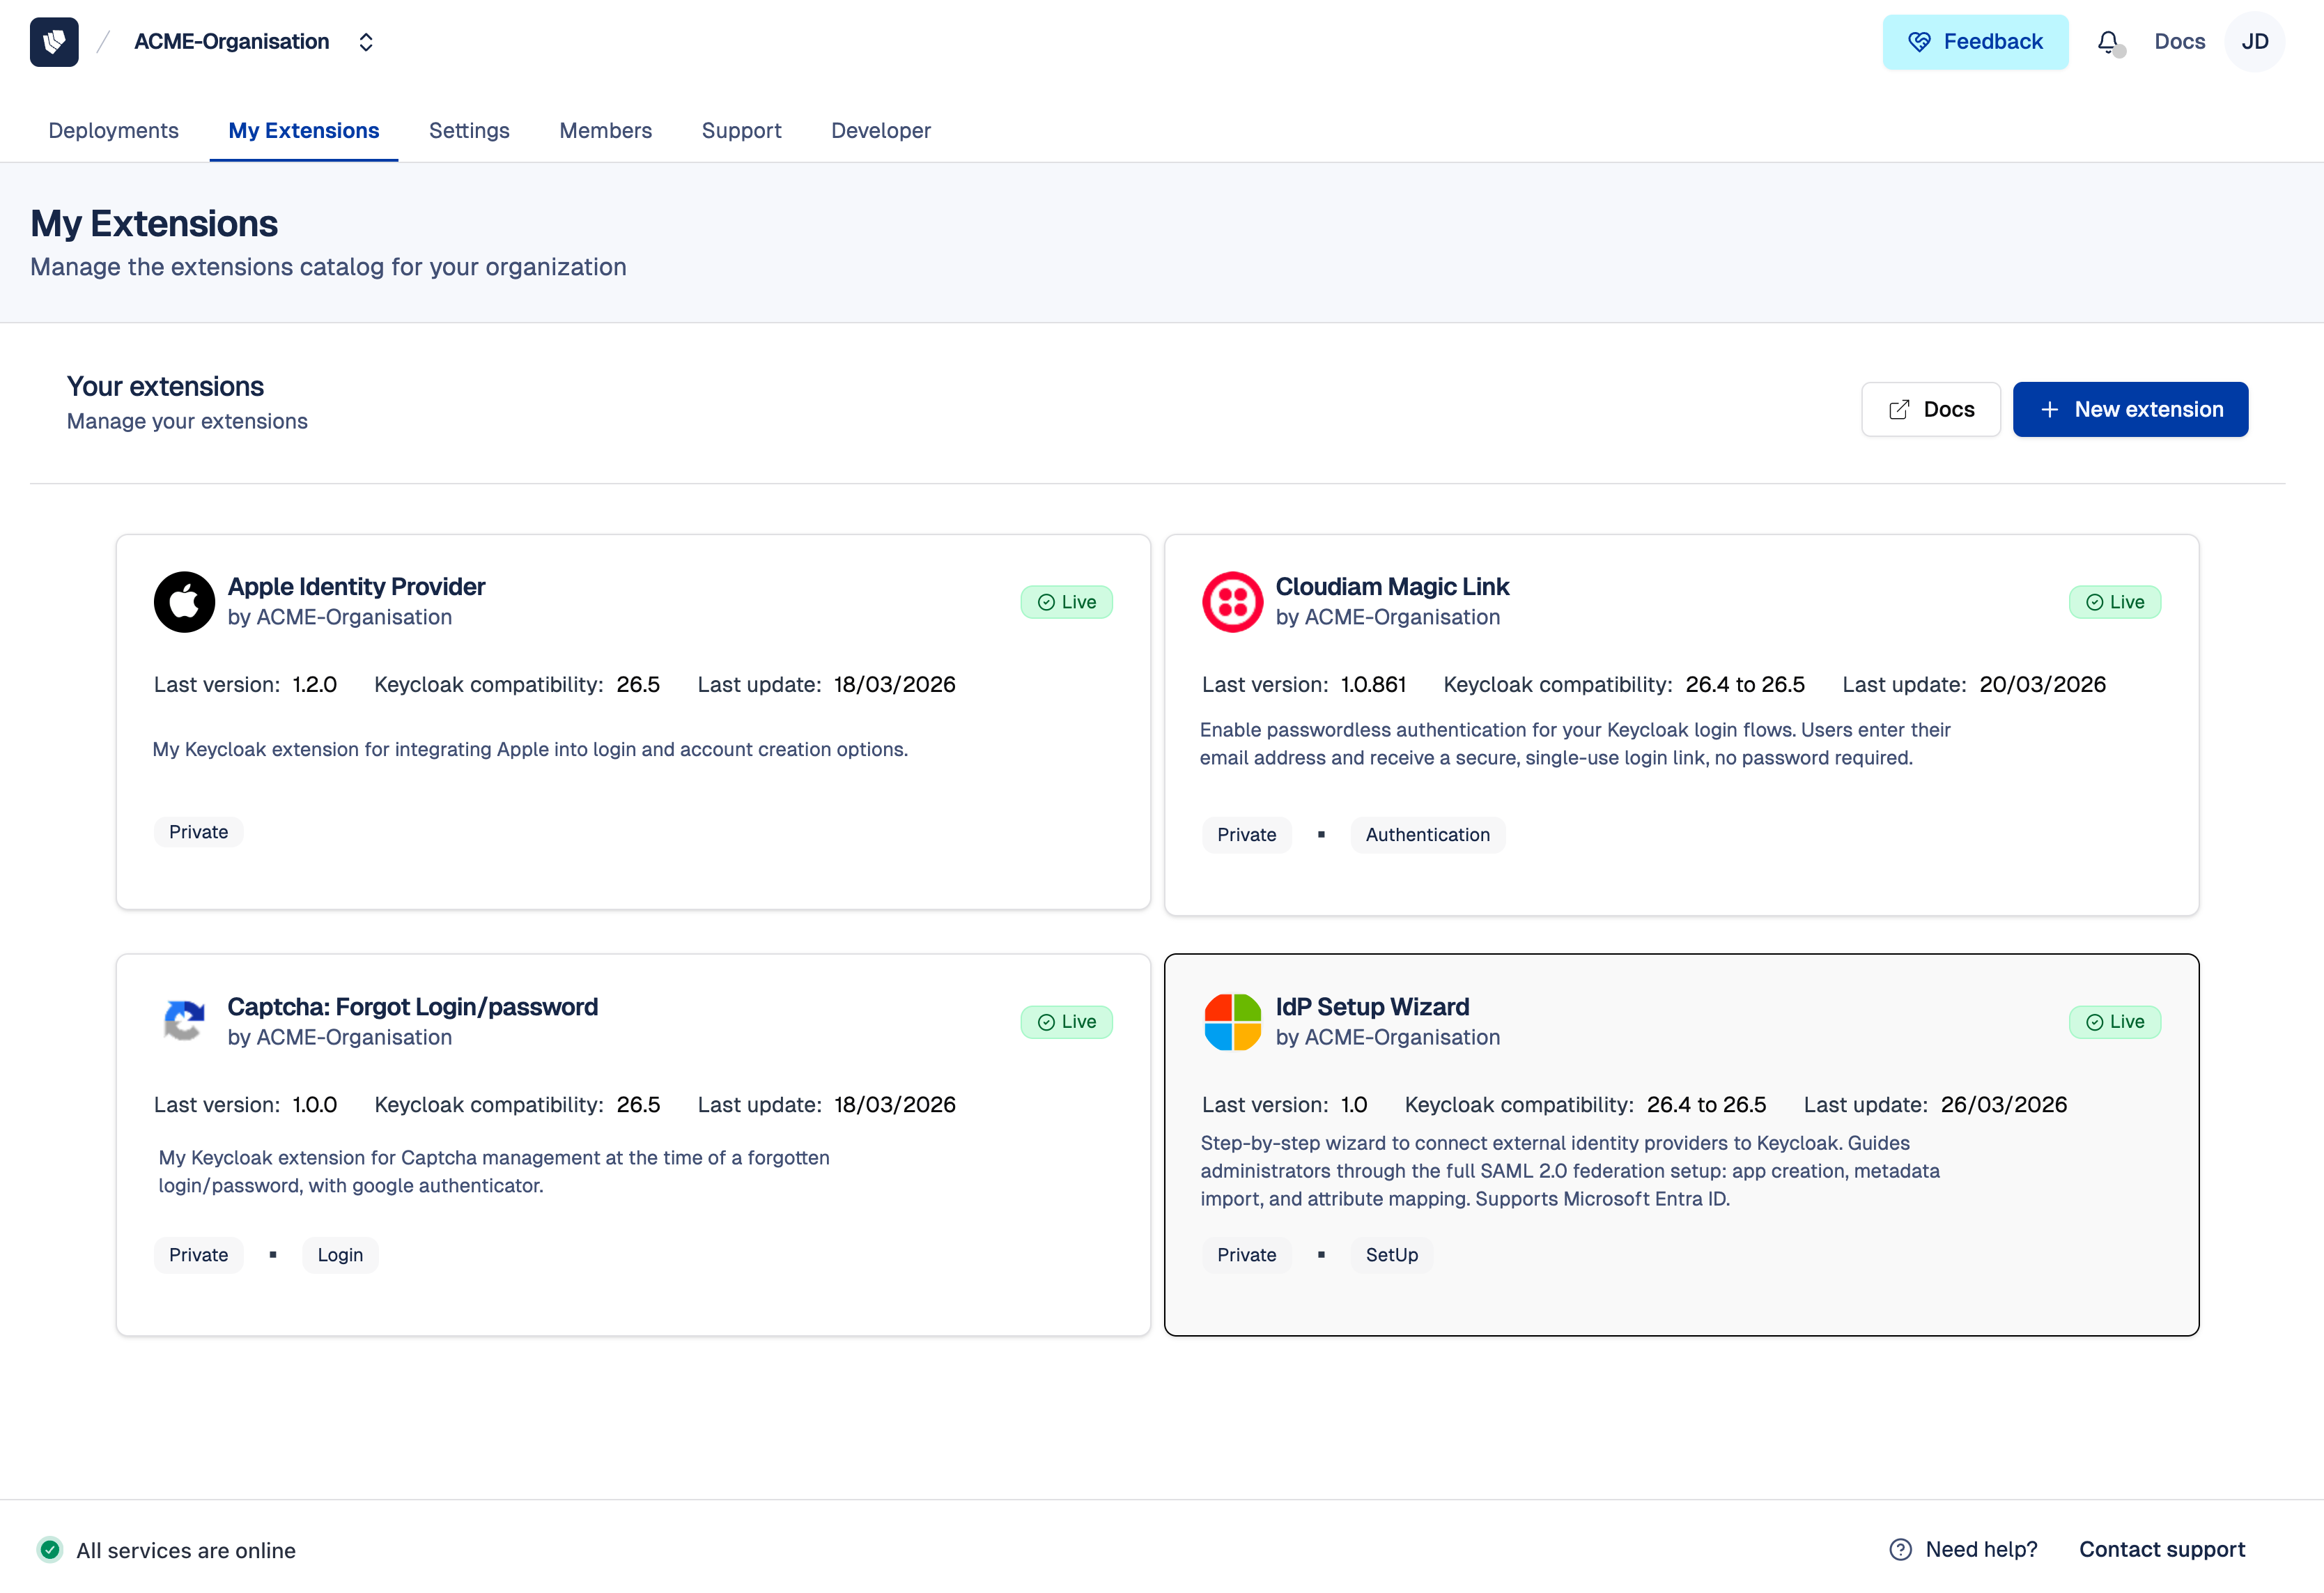
My Extensions
My Extensions is your organization's centralized library of custom extensions. It provides a single place to store, version, validate, and distribute all your custom Keycloak extensions across every deployment in your organization.
From My Extensions, you manage all your extensions and their versions in one place, across your different Keycloak environments (development, pre-production, staging, beta, and production). Track and test your extension compatibility with specific Keycloak versions to simplify and secure the upgrade process of your deployments. Each extension release goes through an automated technical validation process to verify its compatibility with the declared Keycloak versions. This validation covers technical aspects (correct loading, SPI registration, absence of conflicts) so you can focus your testing efforts on functional behavior, without worrying about startup failures.
Document your extensions for your internal teams so that no knowledge is lost, from one release to another or from one test to another. Want to share your extension with other Cloud-IAM users? You can publish it on the Cloud-IAM Marketplace directly from My Extensions.
What is a custom extension on Cloud-IAM?
Keycloak is a powerful identity and access management solution designed to cover most common use cases right out of the box. However, there are situations where its default functionality may not fully address your unique business requirements. In these cases, custom extensions allow you to tailor and enhance Keycloak, bridging functionality gaps and adapting the platform precisely to your needs.
An extension in Cloud-IAM represents a single customization, for example, a custom authenticator, a user federation provider, or an event listener. Each extension is managed at the organization level and can be installed on any of the organization's deployments.
For a detailed overview of what custom extensions are, how they work, and best practices, refer to our Custom Extensions Reference.
With Cloud-IAM Managed Keycloak deployments, direct access to your Keycloak server for deploying custom extensions is not available. Instead, all custom extensions must be uploaded through the Cloud-IAM Console or via the Cloud-IAM API.
What are the prerequisites to use My extensions feature on Cloud-IAM?
Before managing My extensions on Cloud-IAM, please ensure the following:
- Dedicated Keycloak Deployment: Custom extension support is available only on dedicated Keycloak deployments managed by Cloud-IAM.
- Support Plan: Your Cloud-IAM support plan must include the Custom Extension privilege, more details in Cloud-IAM pricing page.
- User Role: You must have the Editor role or above within your organization to upload, update, or delete custom extensions. For more details, see Organization Roles.
- Extension Packaging: Custom extensions must be packaged as Java
.JARfiles, compliant with Keycloak's Service Provider Interfaces (SPI).
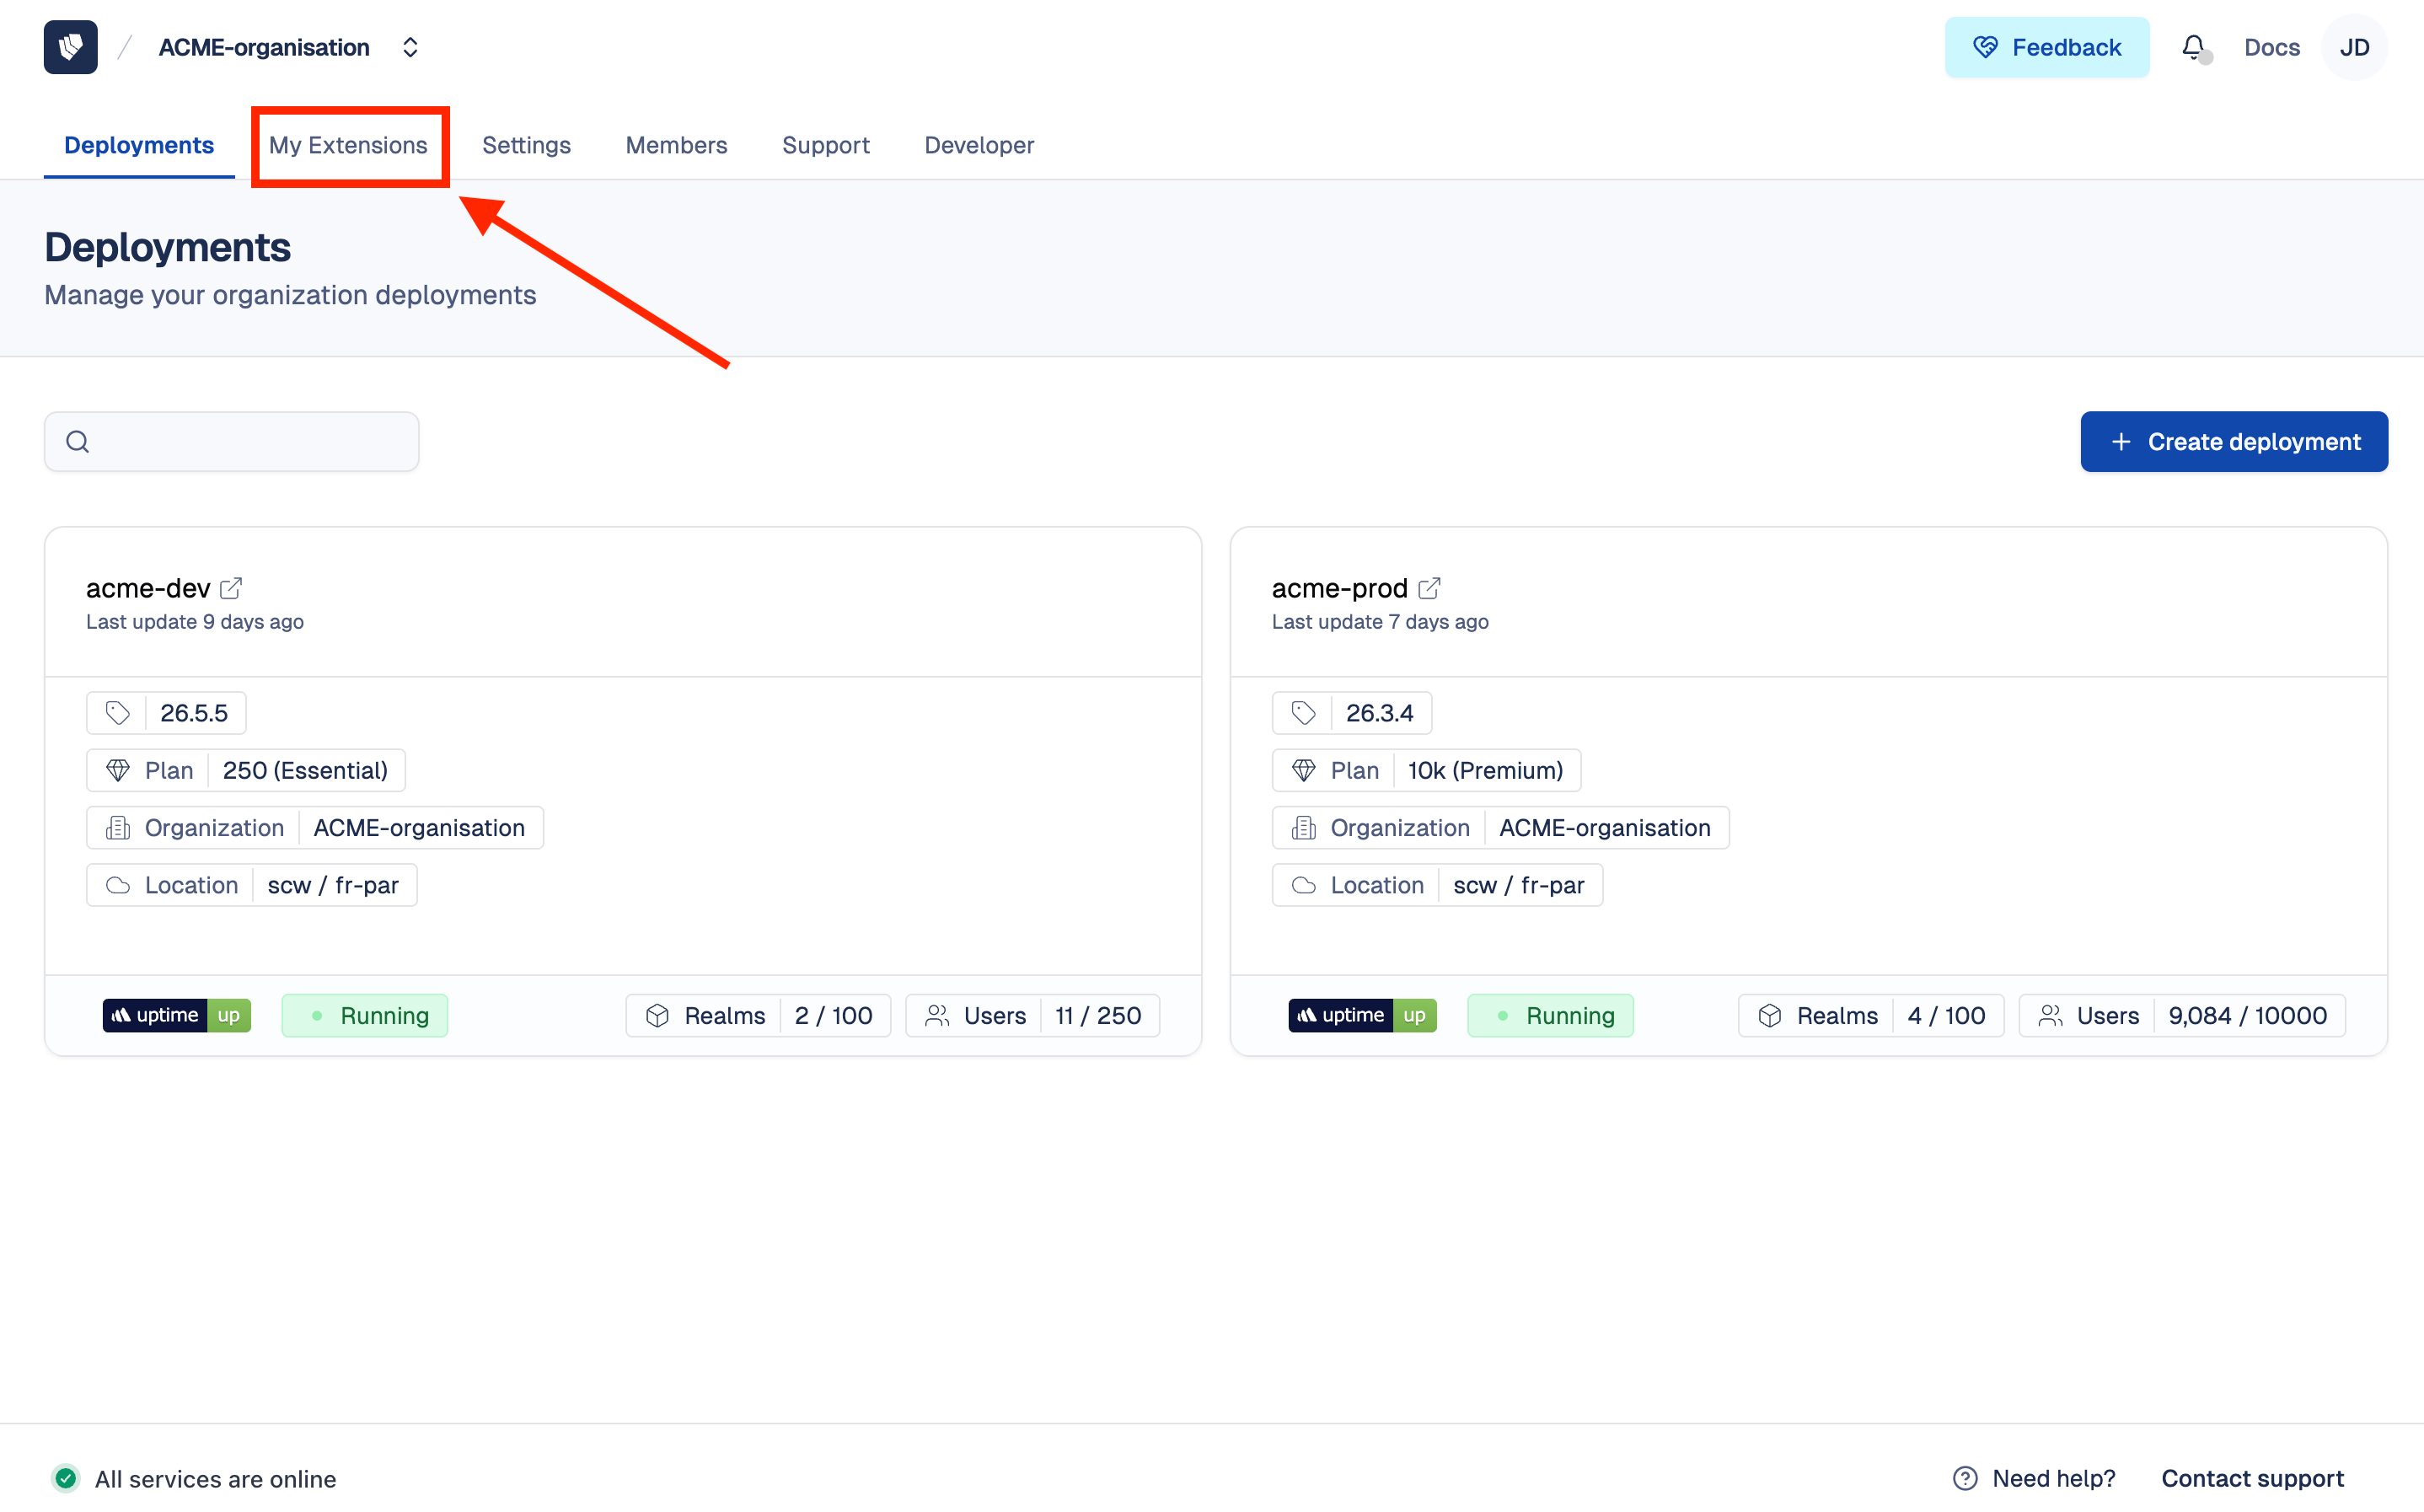
How to access My Extensions?
To manage your organization's custom extensions, access the My Extensions library from the Cloud-IAM Console.
- Open Cloud-IAM console (directly from the home page with the list of your deployment(s))
- Navigate to the
My Extensionstab
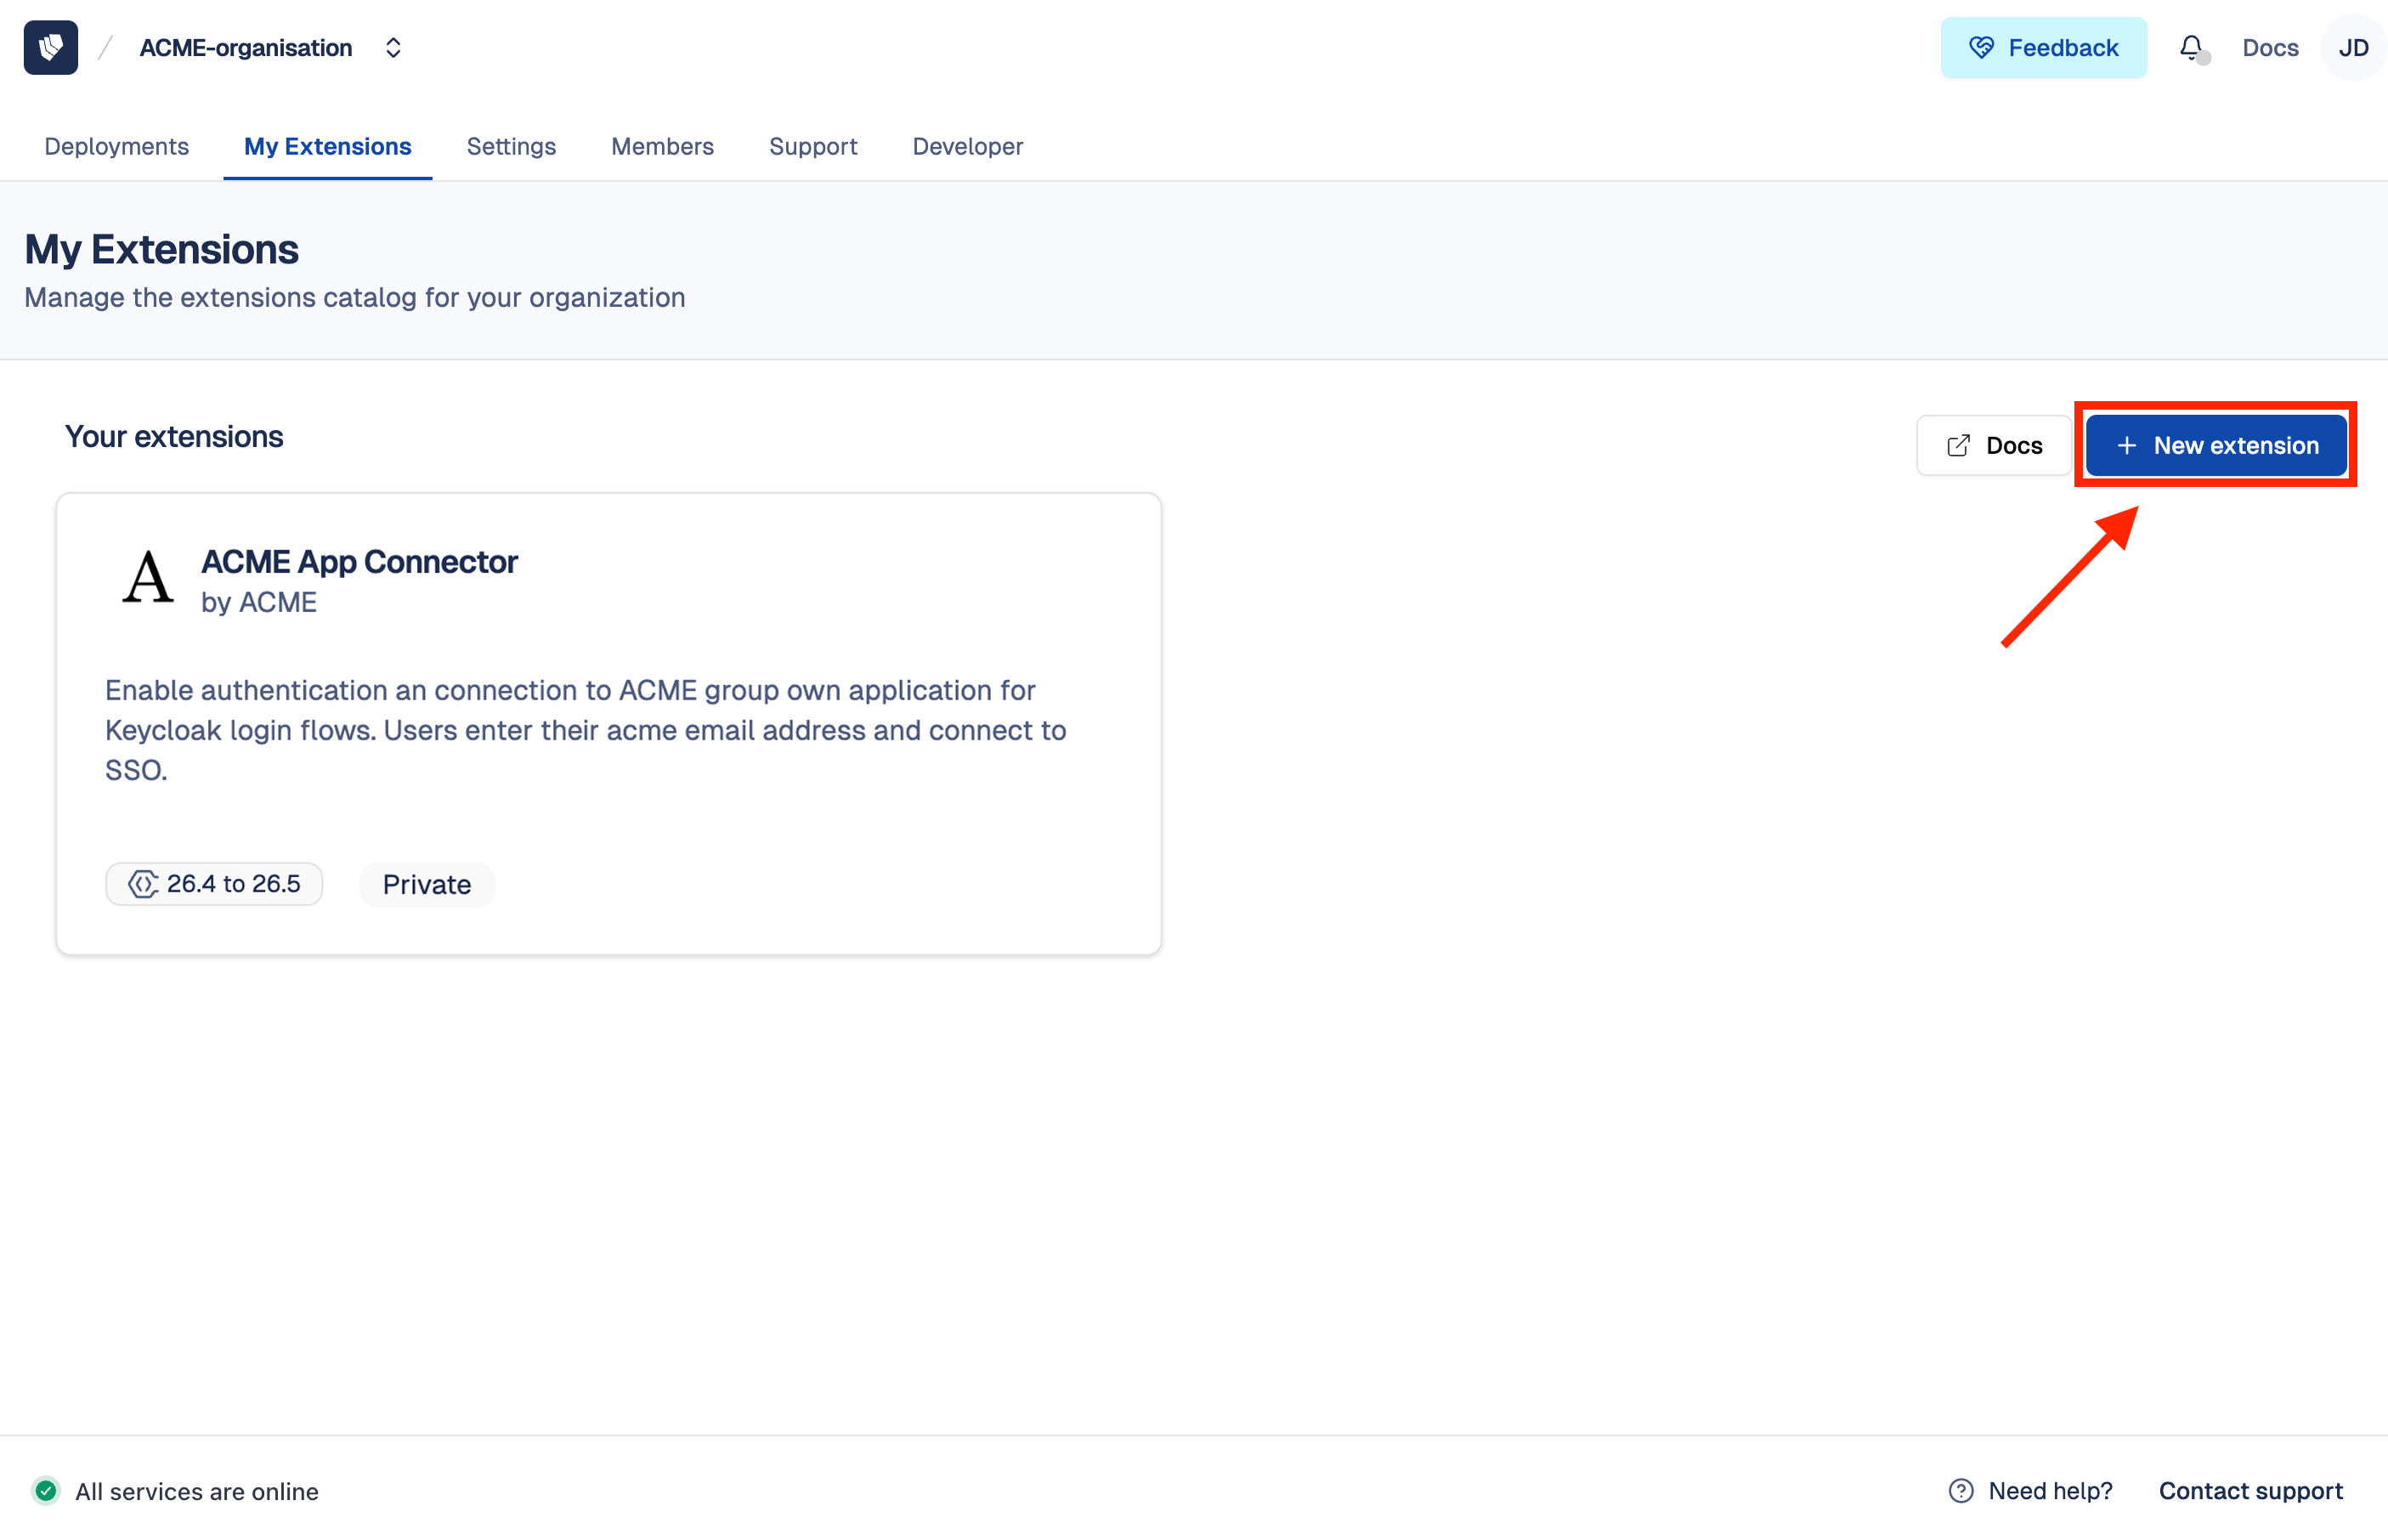
You will now see a list of all extensions created by your organization, along with their current status.
How to upload or create a custom extension on Cloud-IAM console?
You can upload your custom Keycloak extensions, packaged as Java .JAR files, directly through the Cloud-IAM Console. Once uploaded, your extension is stored in your organization's My Extensions library, where you can document it, validate it against specific Keycloak versions, and make it available for installation across all your deployments.
Follow these steps to create a new extension:
- Follow this tutorial to access My Extensions
- Click on the
+ New extensionbutton
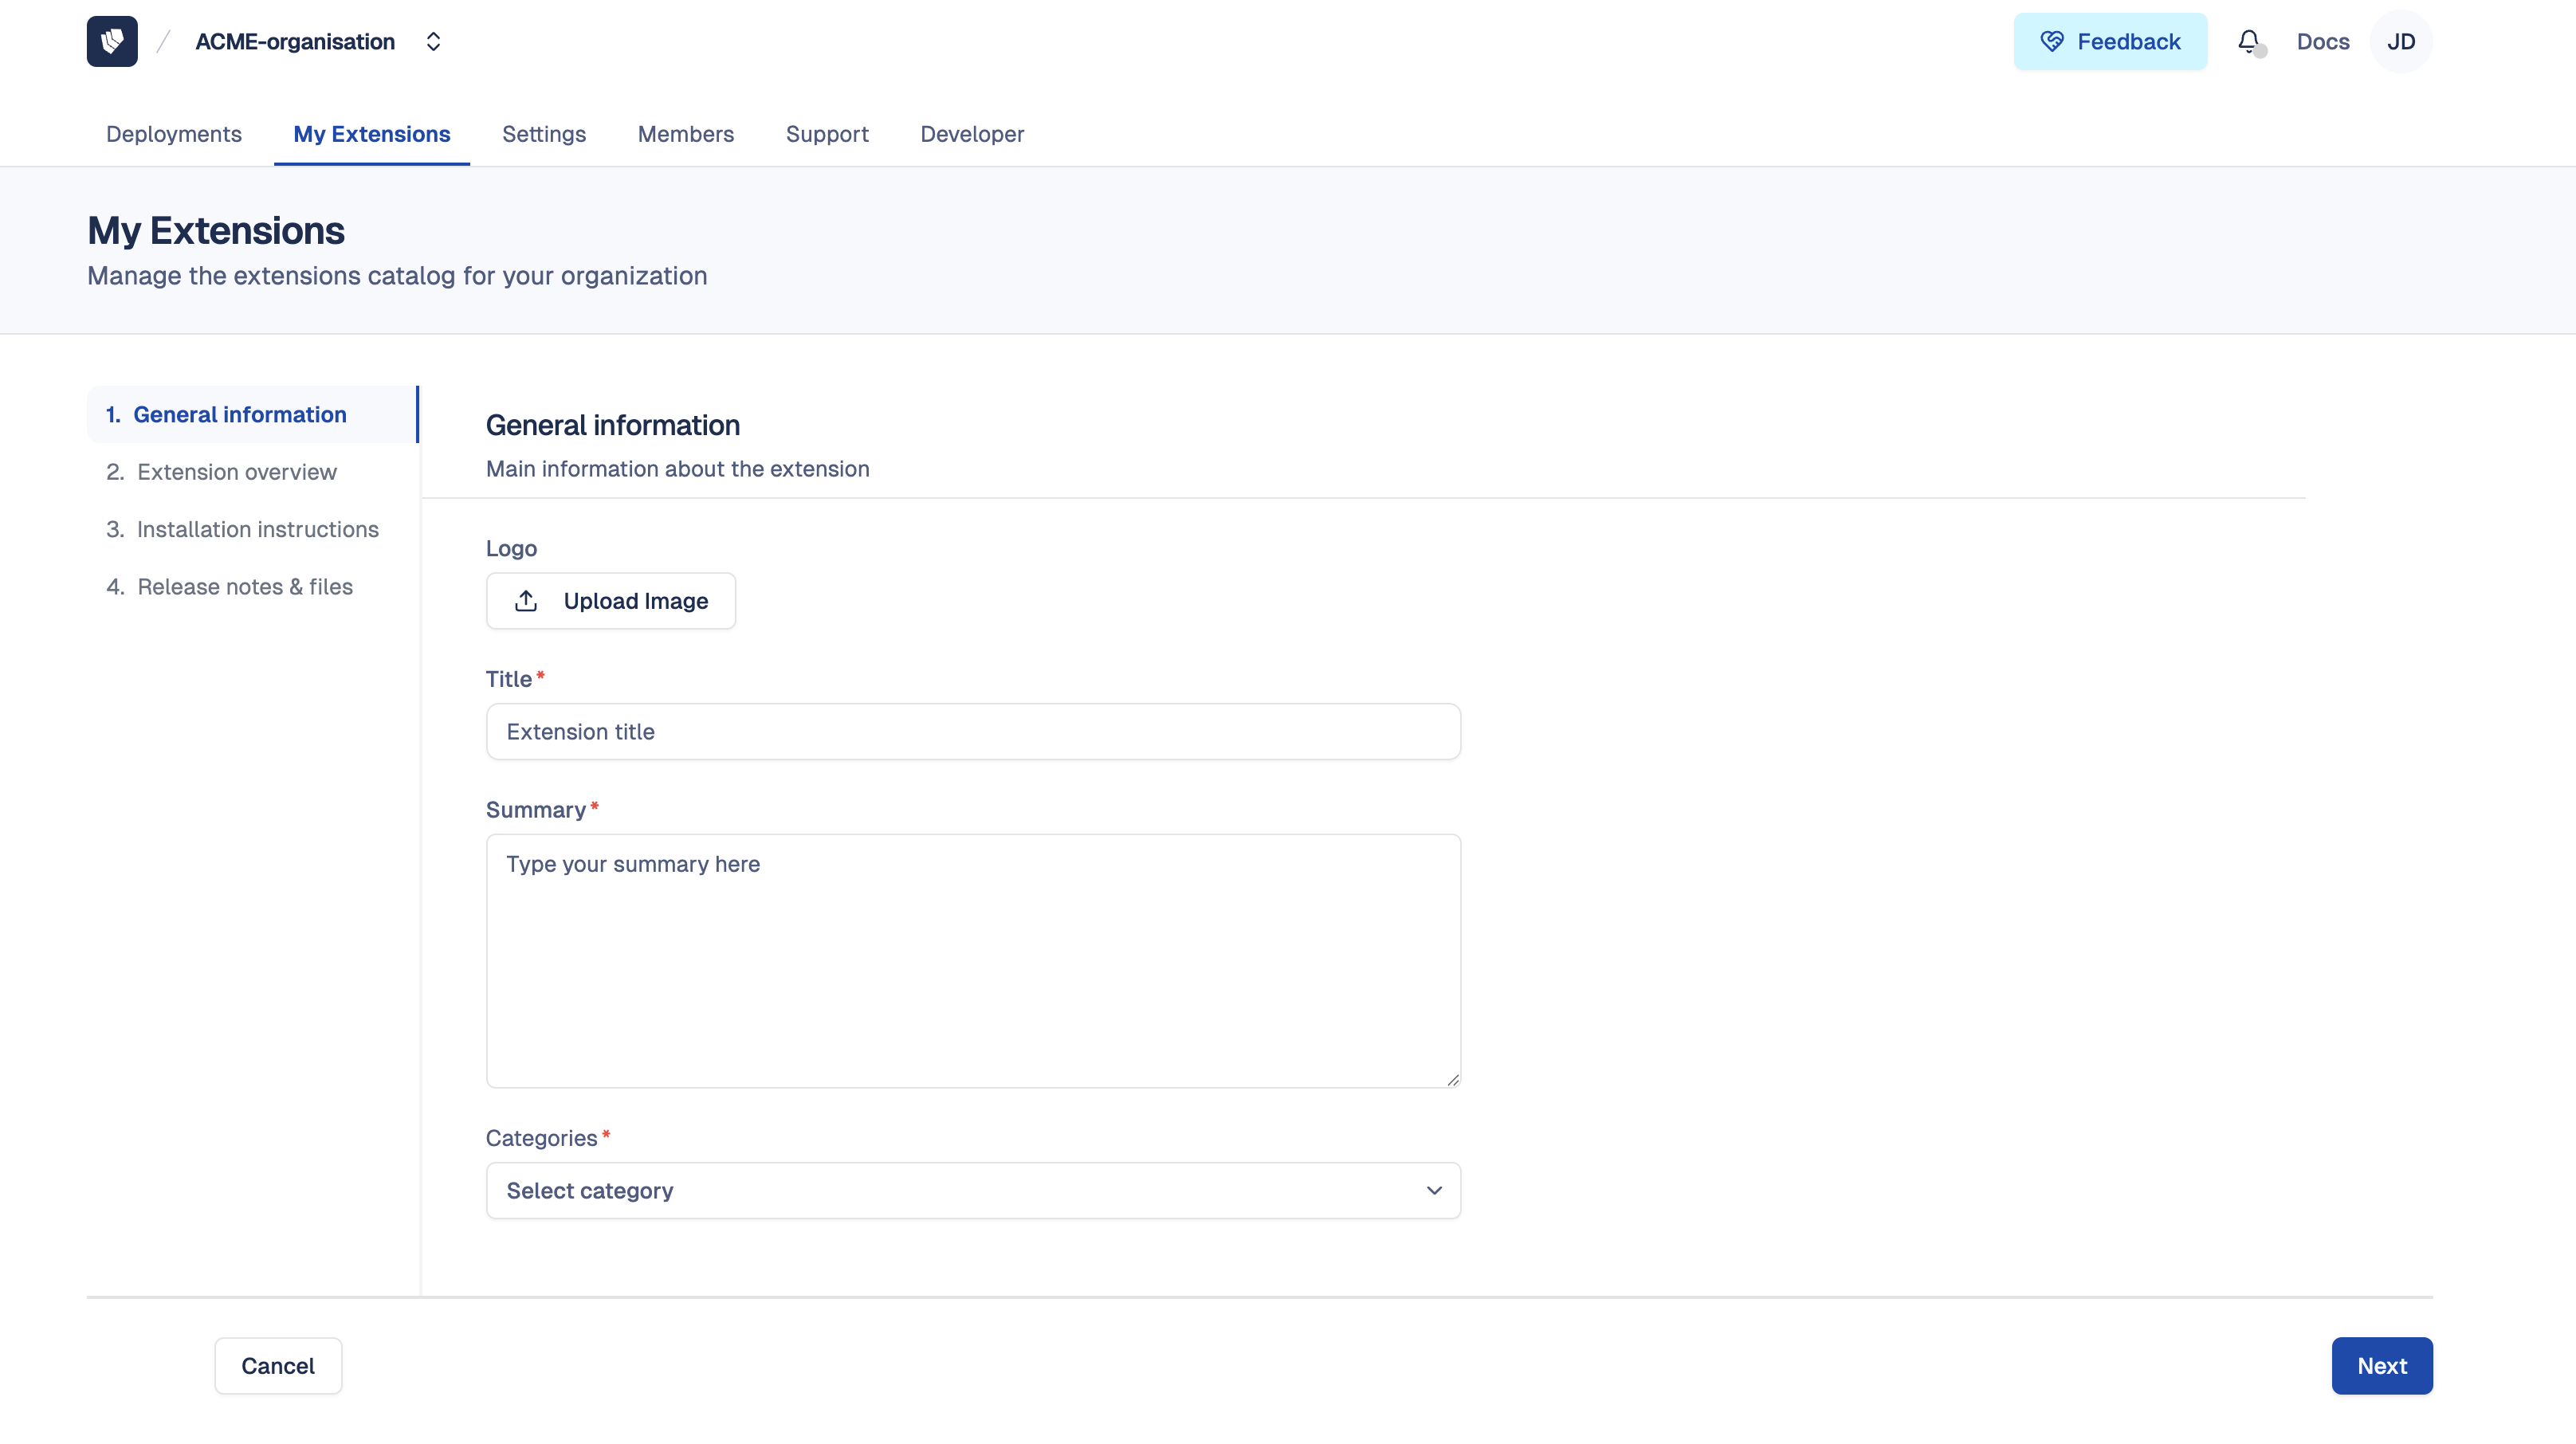
Step 1 — General information
- Register the extension name and summary
- Upload a logo for your extension
- Select one or more categories to which your extension belongs
These details help document your extension for yourself and other members of your organization.
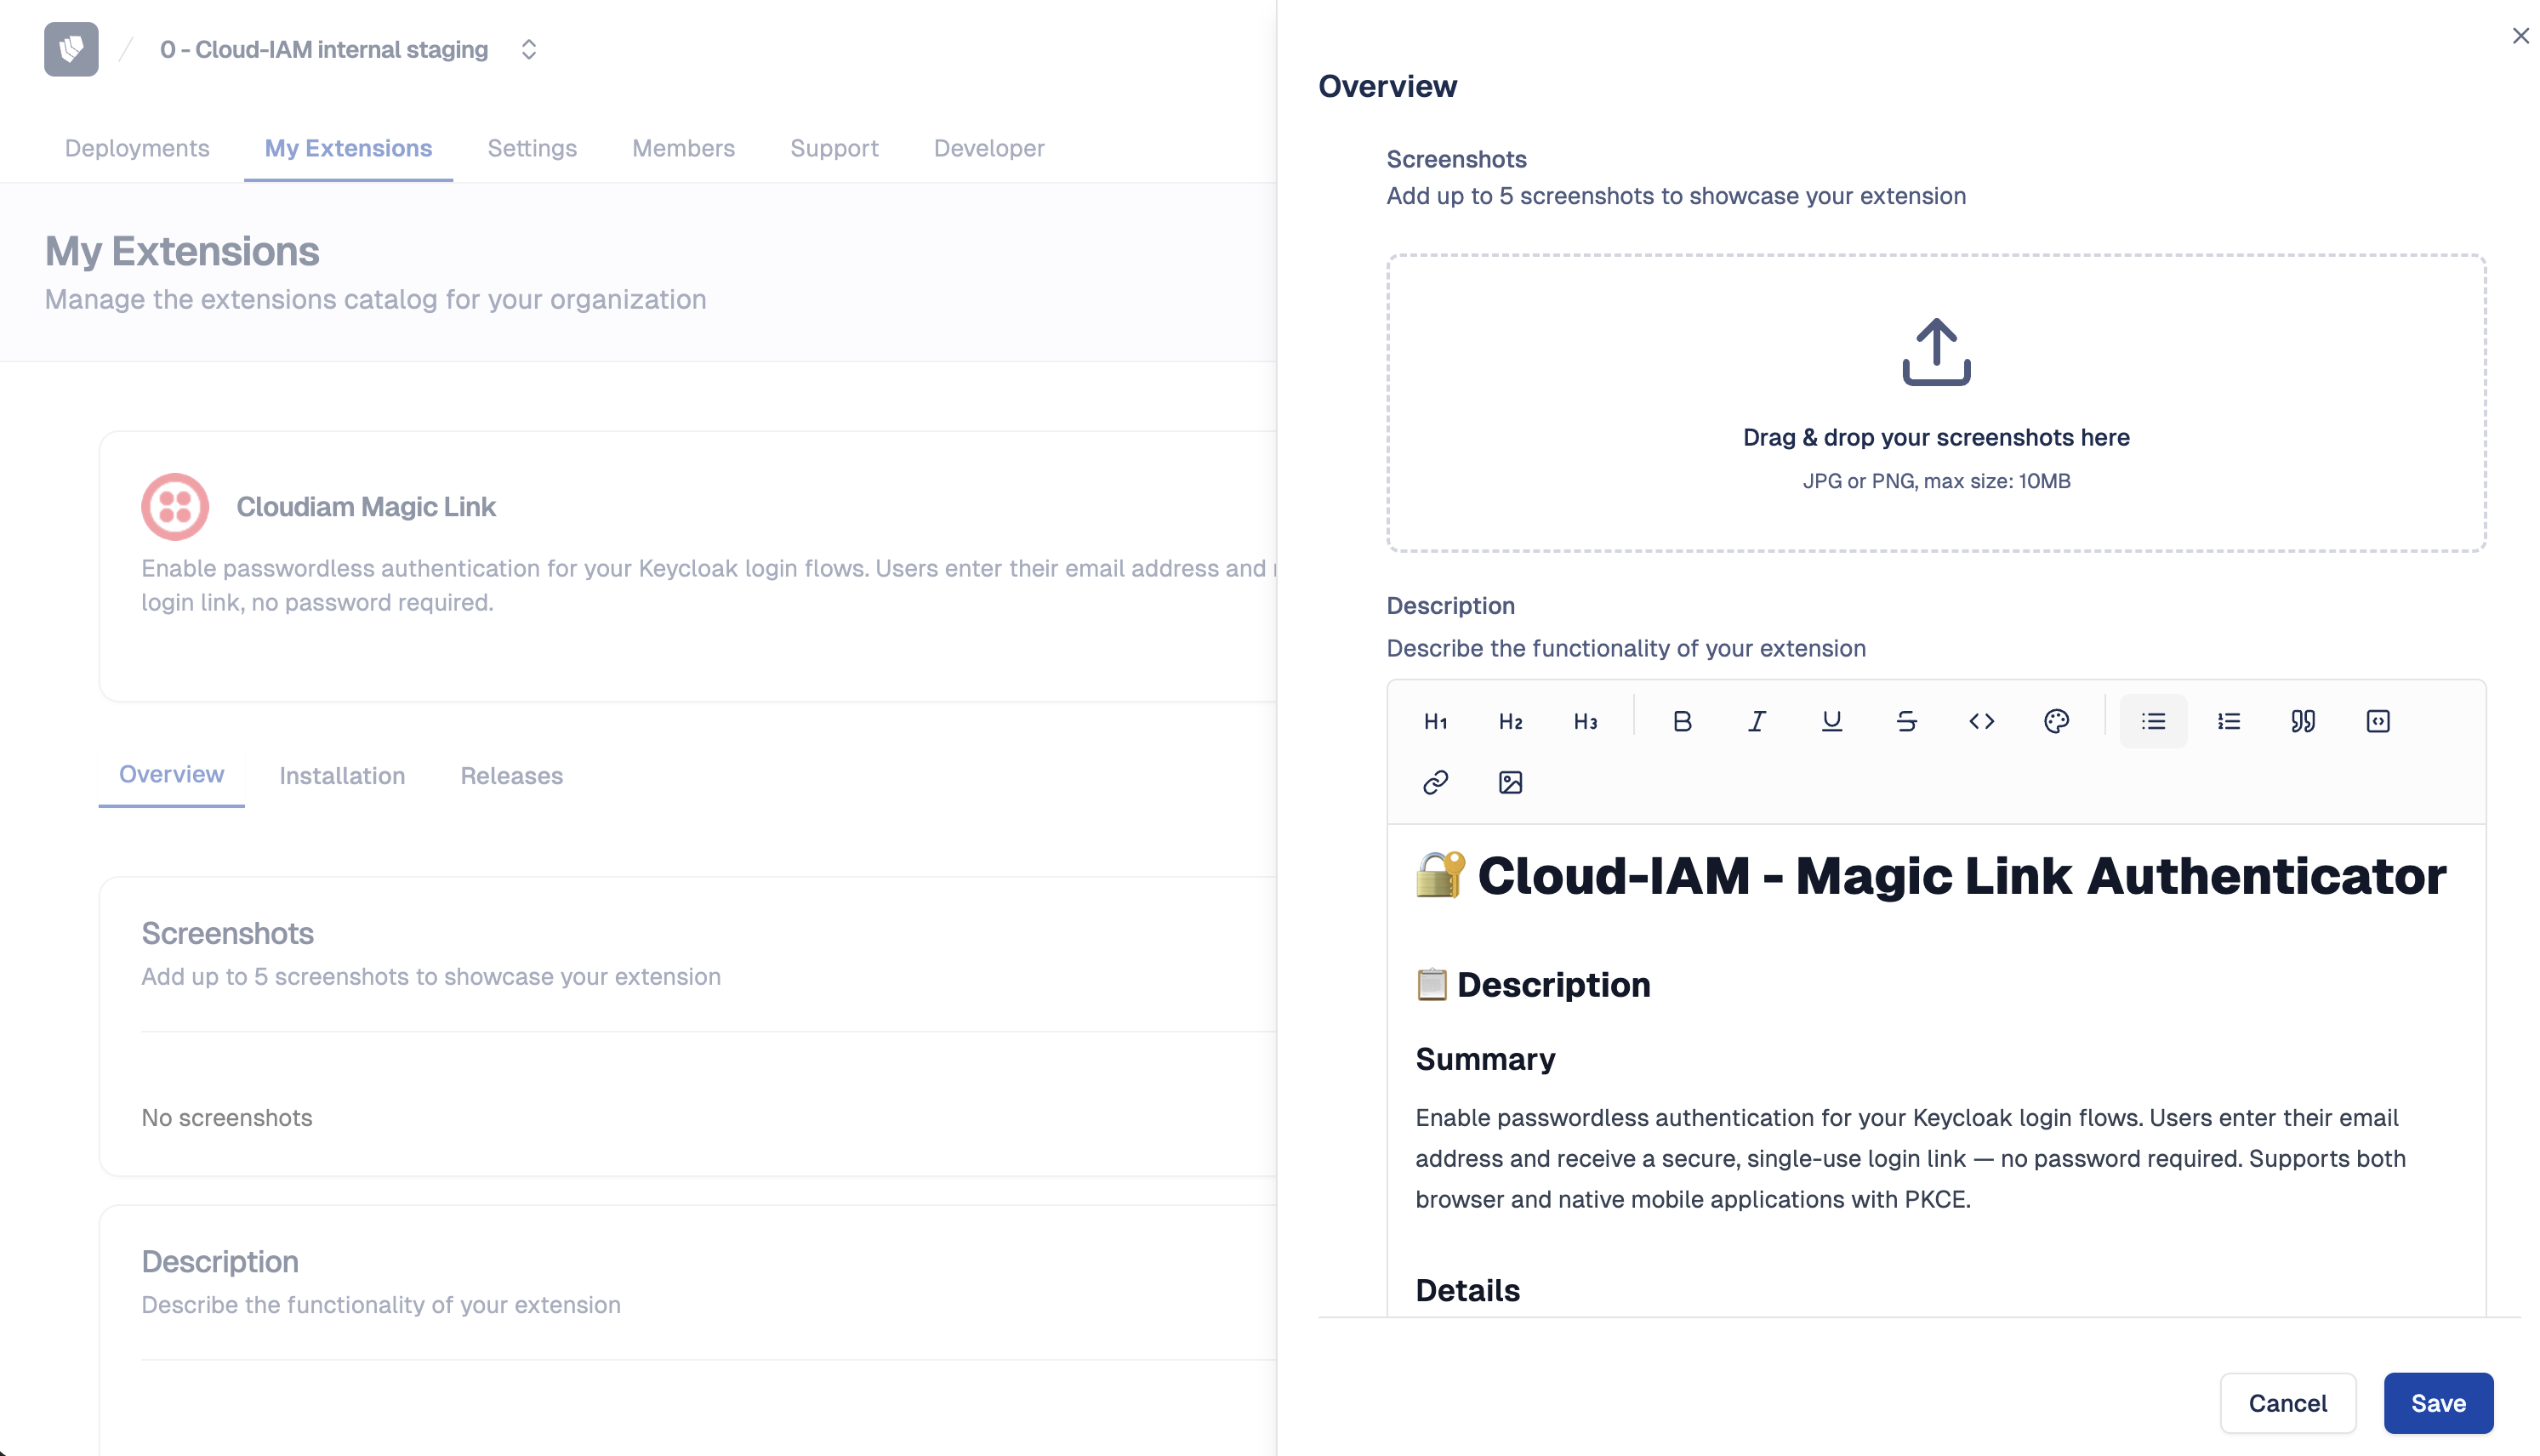
Step 2 — Overview
- Upload up to 5 screenshots to showcase your extension
- Write a detailed description of your extension: what it does, what it enables, and its key features. This description is visible to your entire organization if the extension is set to private, or to all organizations if set to public.

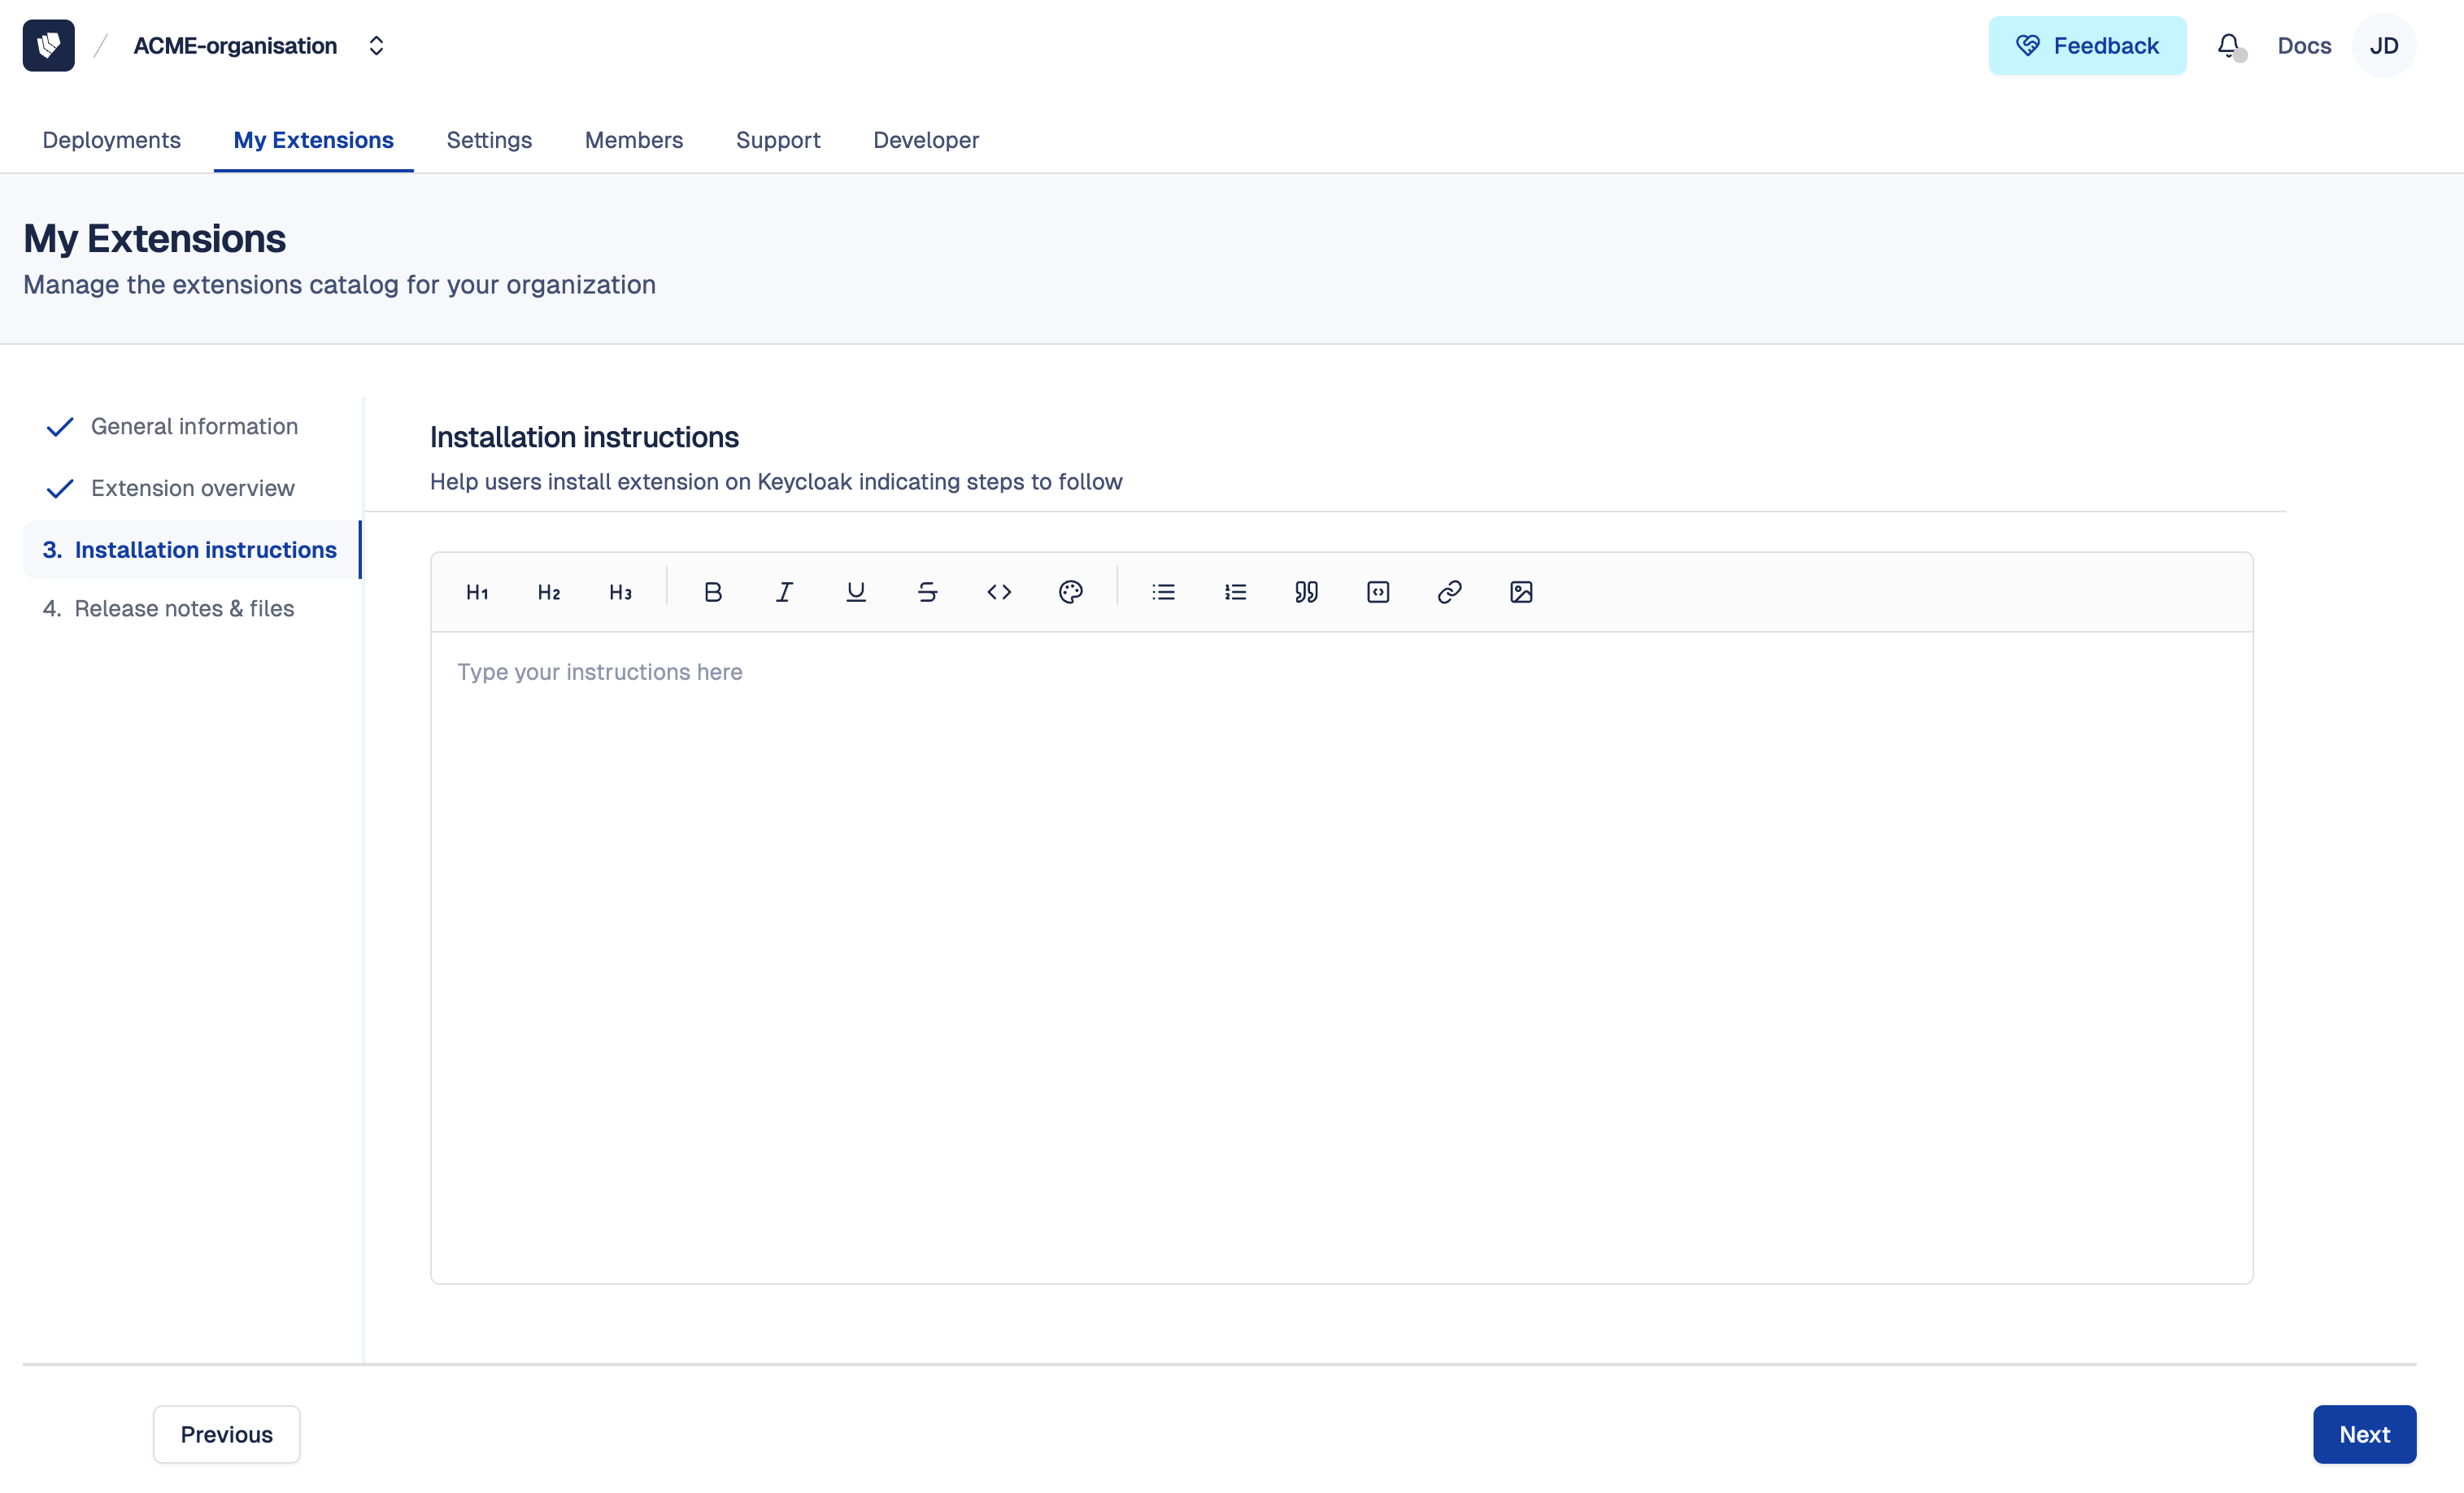
Step 3 — Installation instructions
- Provide a how-to-install guide to help your team or external users set up the extension after installation (for example, environment variables to configure or steps to follow in the Keycloak admin console)
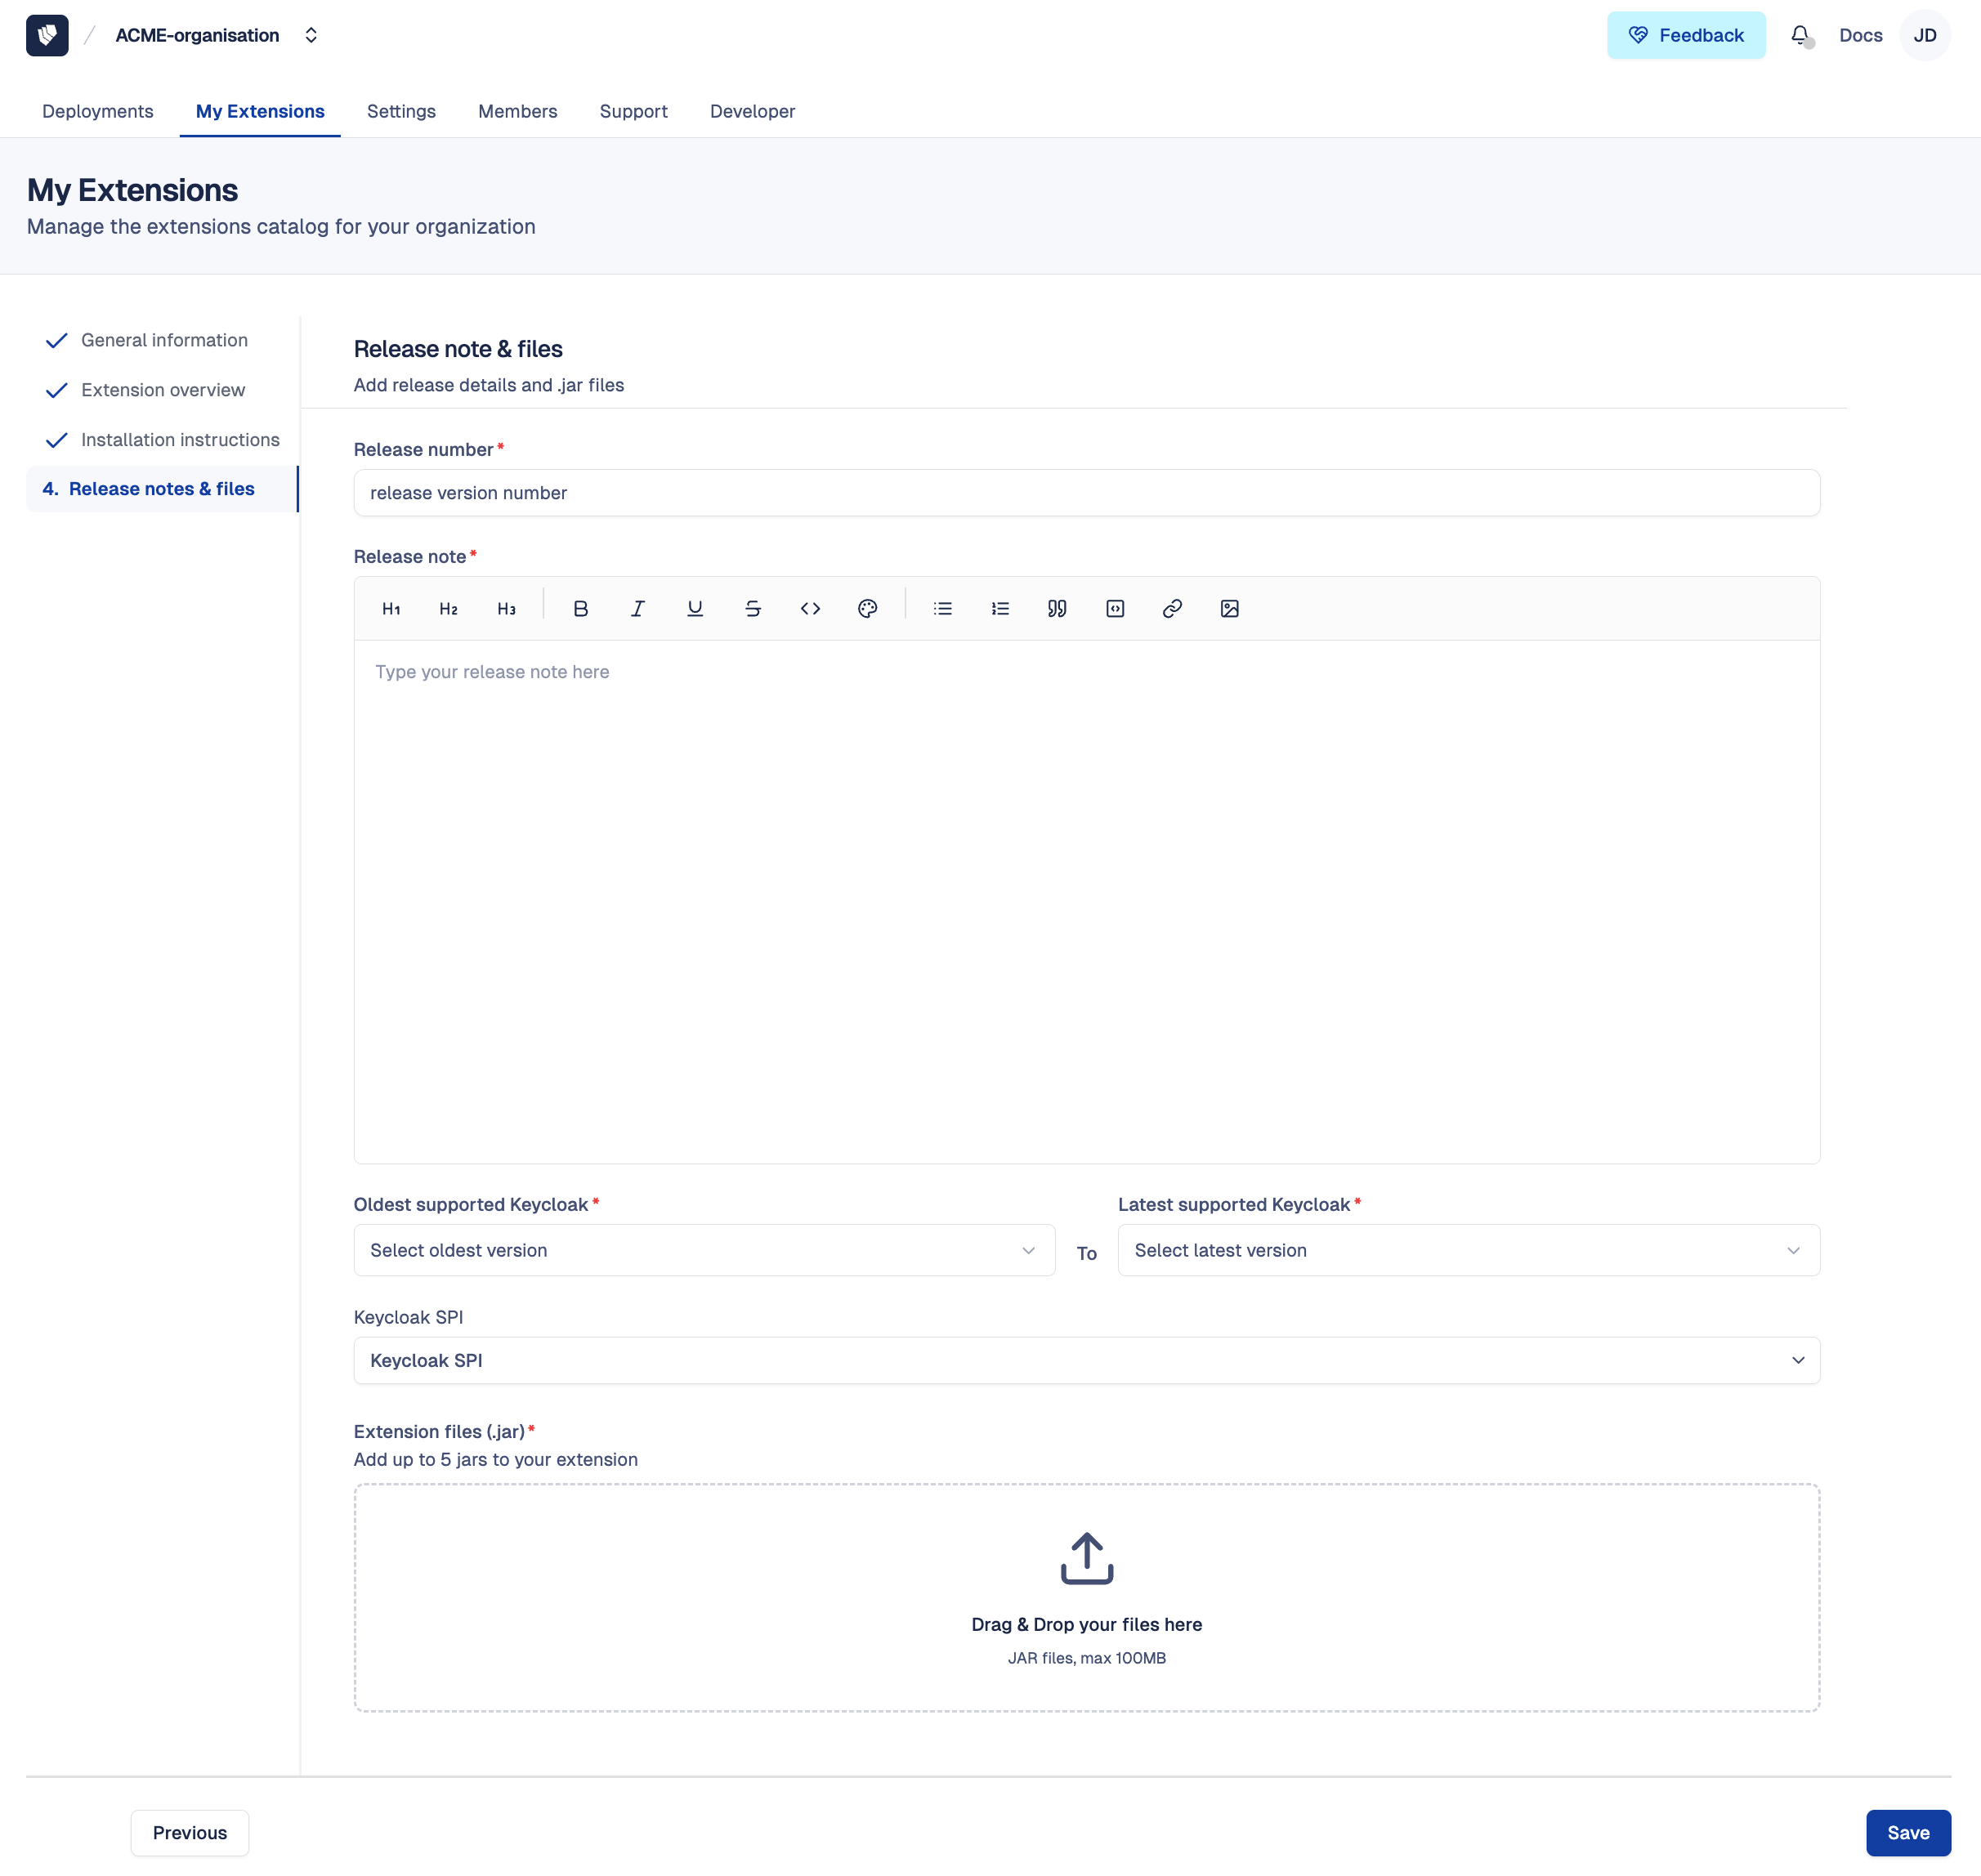
Step 4 — Release notes & files
- Set the version number
- Upload your JAR file(s) (up to 5)
- Select the Keycloak SPI(s) implemented by your extension
- Define the Keycloak compatibility range (oldest to latest supported versions)
- Add release notes to describe what changed in this version, such as new features, bug fixes, or breaking changes
Once submitted, your extension goes through an automated validation process before being available in your organization's library named My Extensions.
How to edit an extension?
- Follow this tutorial to access My Extensions
- Select the extension to edit
- From the extension detail page, you can edit:
- General information: name, summary, visibility, categories, logo
- Overview: description, screenshots
- Installation instructions: how-to-install guide
- Release: version number, release notes, Keycloak compatibility (JAR files cannot be modified on an existing release — create a new release instead)
How to manage extension visibility and availability
Every extension you upload is private to your organization and it is not visible to other Cloud-IAM organizations.
Once an extension has at least one validated release, it is automatically available for installation on every deployment in your organization where the release is compatible with the deployment's current Keycloak version.
When you install an extension on a deployment, the deployment is pinned to the release used at installation time. Publishing a new release in My Extensions makes it available on compatible deployments but does not automatically apply it, the update must be triggered manually from the deployment.
TIP
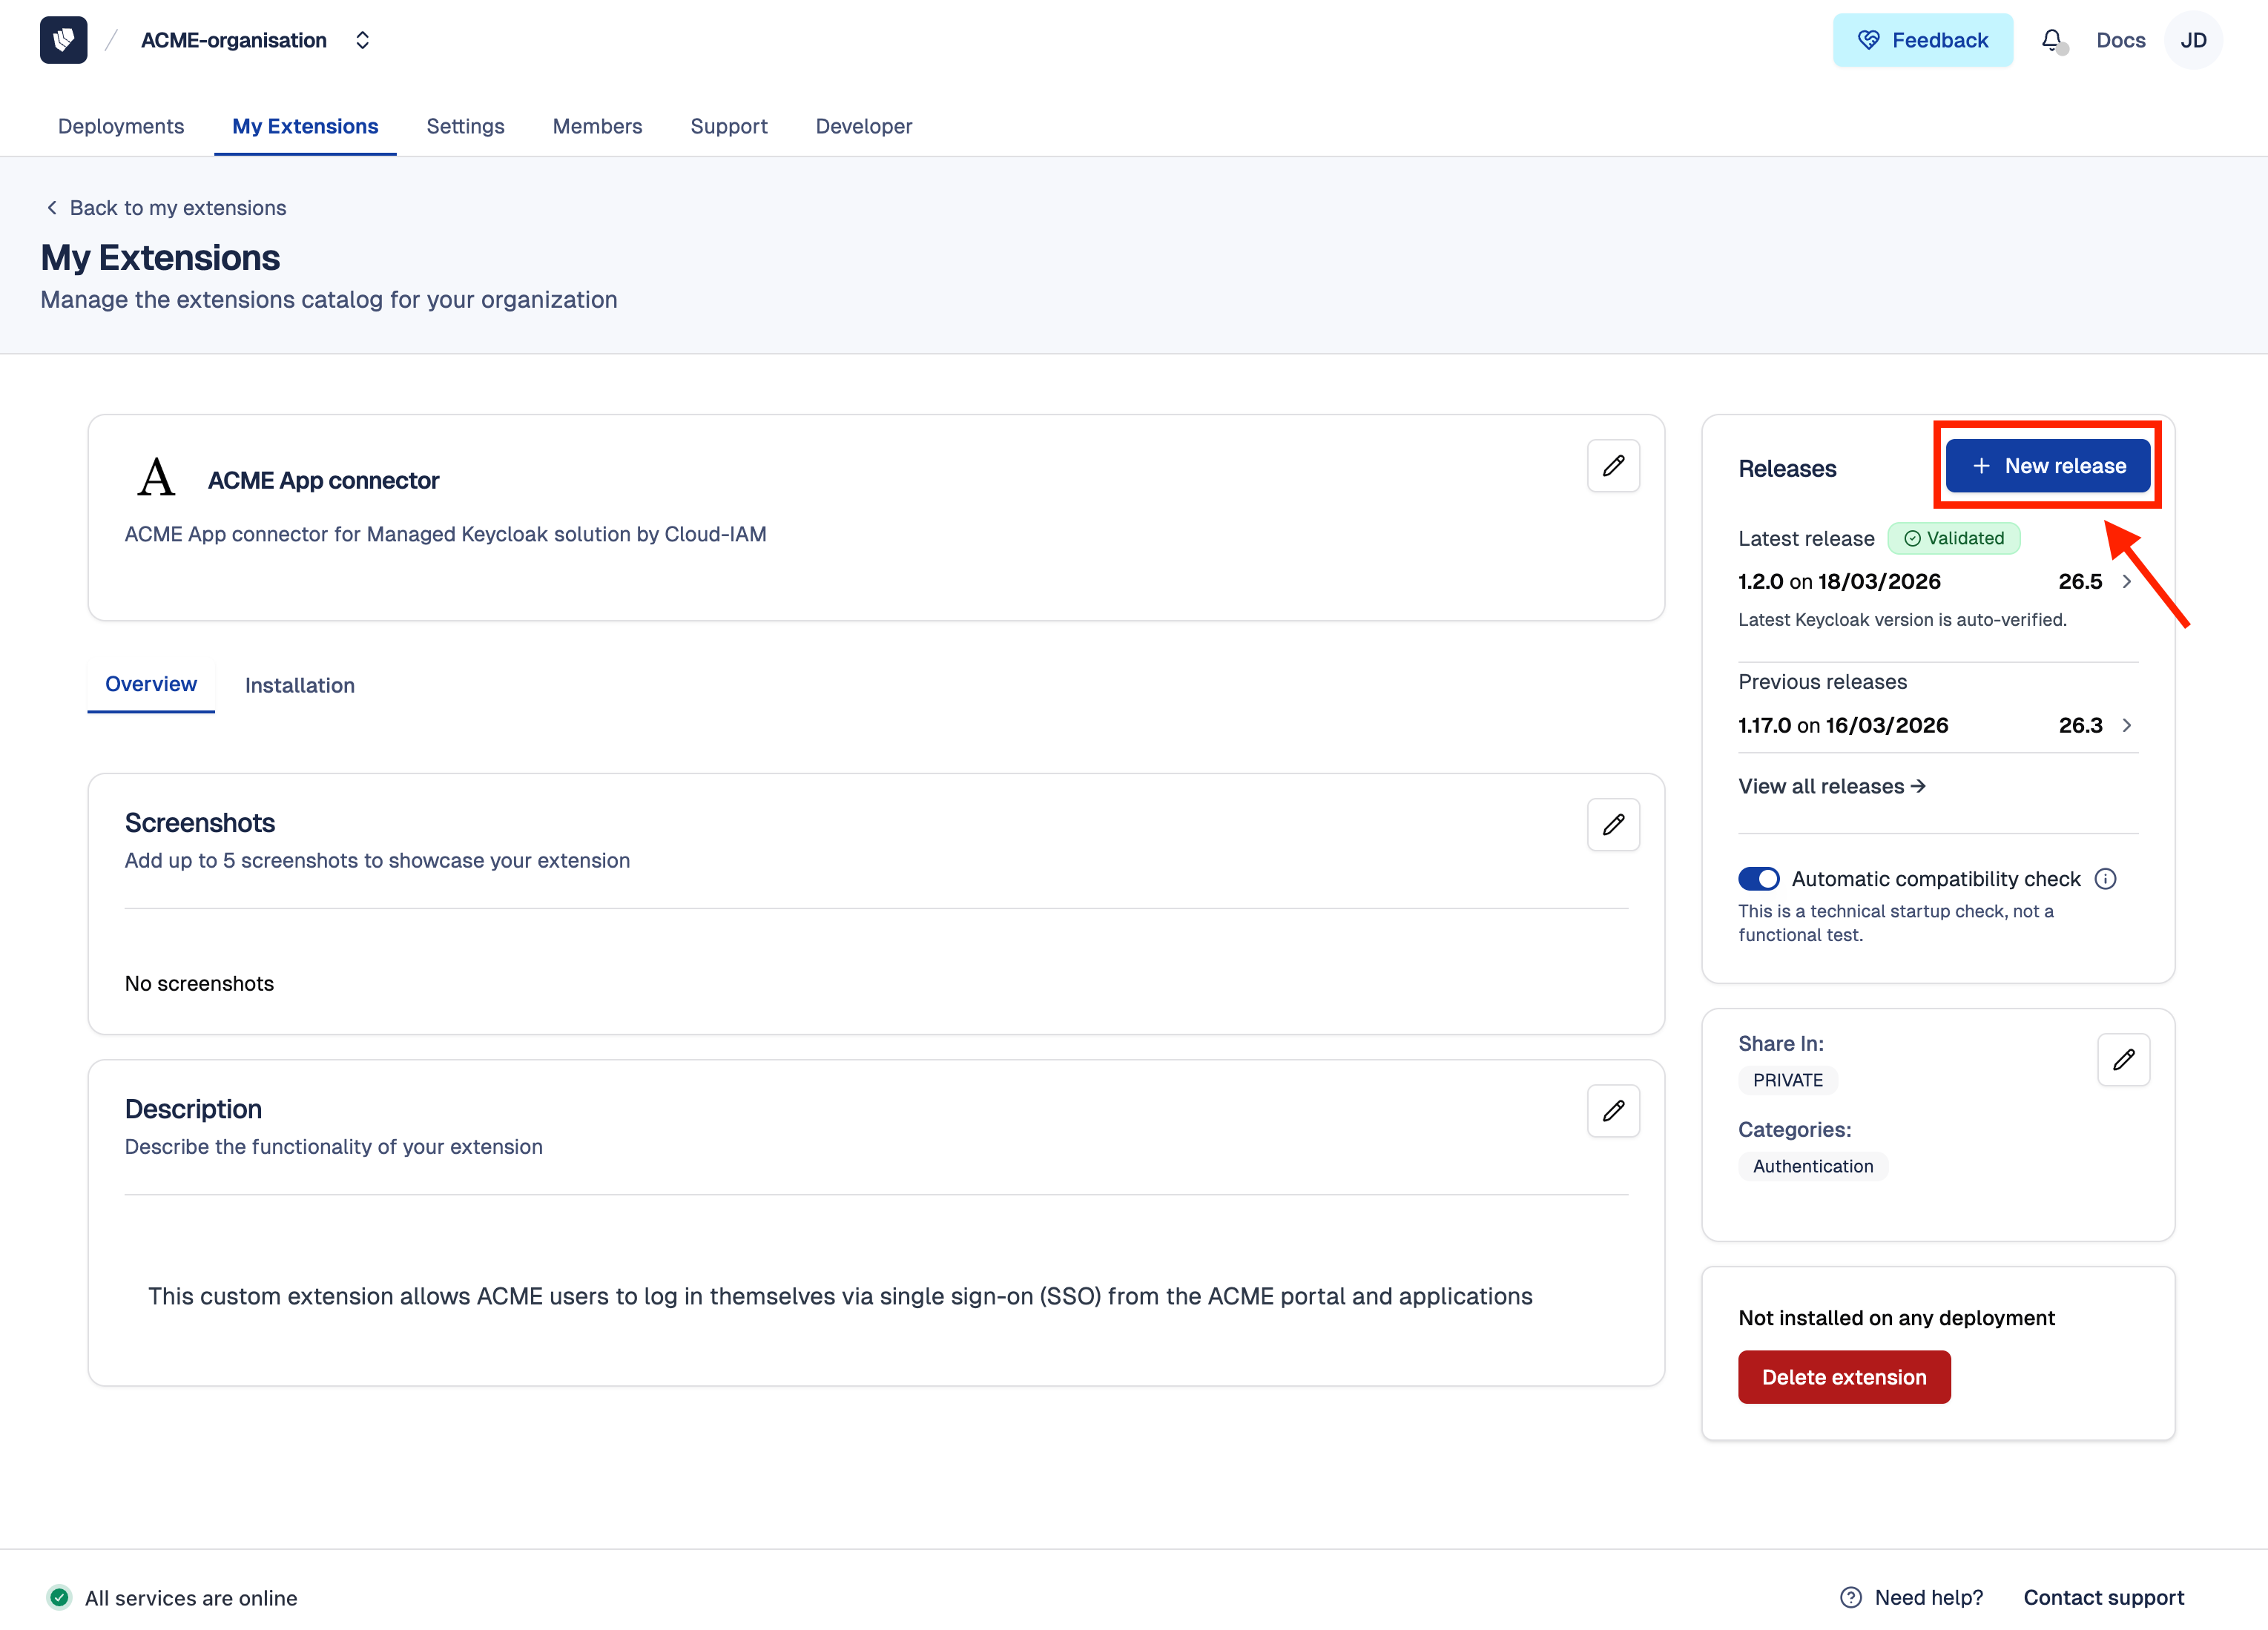
You can check which deployments are compatible with your extension's latest release from the extension detail page in My Extensions.
How to configure automatic compatibility checks?
Each time a new Keycloak version is released on Cloud-IAM, you would normally need to manually extend the compatibility range of each extension. Automatic compatibility checks remove this burden: Cloud-IAM automatically tests your extension against each new Keycloak version and updates its compatibility range if the validation passes.
When enabled, if your extension's latest release already supports the previous Keycloak version, Cloud-IAM will automatically run the technical validation process against the new version within 24 hours of its release. If the validation passes, the new Keycloak version is added to the release's compatibility range. If it fails, the compatibility range remains unchanged and you can review the validation details from the release page.
- Follow this tutorial to access My Extensions
- Select the extension to configure
- Toggle the
Auto compatibility checkoption
When should you enable this?
This is especially useful if your organization manages multiple extensions or maintains long-lived deployments that follow Keycloak upgrades closely. It ensures your extensions stay up to date without requiring manual re-validation after each Cloud-IAM Keycloak release.
What is an extension release?
A release is a specific version of your extension, packaged with its own JAR files and declared compatible with one or more Keycloak versions. While an extension represents what your customization does, a release represents a specific build of that customization at a point in time.
Each extension can have multiple releases, allowing you to:
- Maintain different versions for different Keycloak environments (development, staging, production)
- Track what changed between versions with dedicated release notes
- Roll out updates progressively across deployments
- Keep older versions available for deployments that haven't upgraded Keycloak yet
Releases are cumulative, not destructive, when you publish a new release, previous releases remain available and unchanged. Each release goes through an automated technical validation before it can be installed on a deployment. Deployments that are using an older release continue to use it until you explicitly update them. This means you can safely publish a new version without affecting any existing deployment.
Different custom code between environments?
If your extension contains different code between production and development (for example, a theme with environment-specific logic), create separate extensions in My Extensions — e.g., Theme (Prod) and Theme (Dev). This prevents accidentally deploying development code to production or vice versa. Only use multiple releases of the same extension when the code evolves linearly (bug fixes, new features, compatibility updates).

When would you create a new release?
Common reasons include:
- Bug fixes or security patches
- New features or enhancements
- Compatibility updates for newer Keycloak versions
- Performance improvements
- Configuration or SPI changes
How to create or submit a new extension release?
When your extension is ready to move from development to production, or when you need to ship a bug fix, a new feature, or a compatibility update, you create a new release. Each release carries its own JAR files, Keycloak compatibility range, and release notes, giving your team full traceability across environments and versions.
Previous releases remain available and unchanged, deployments using an older release are not affected until you explicitly update them.
Step 1 — Access release form
- Follow this tutorial to access My Extensions
- Select the extension to update
- Click on
+ New Releaseon release section
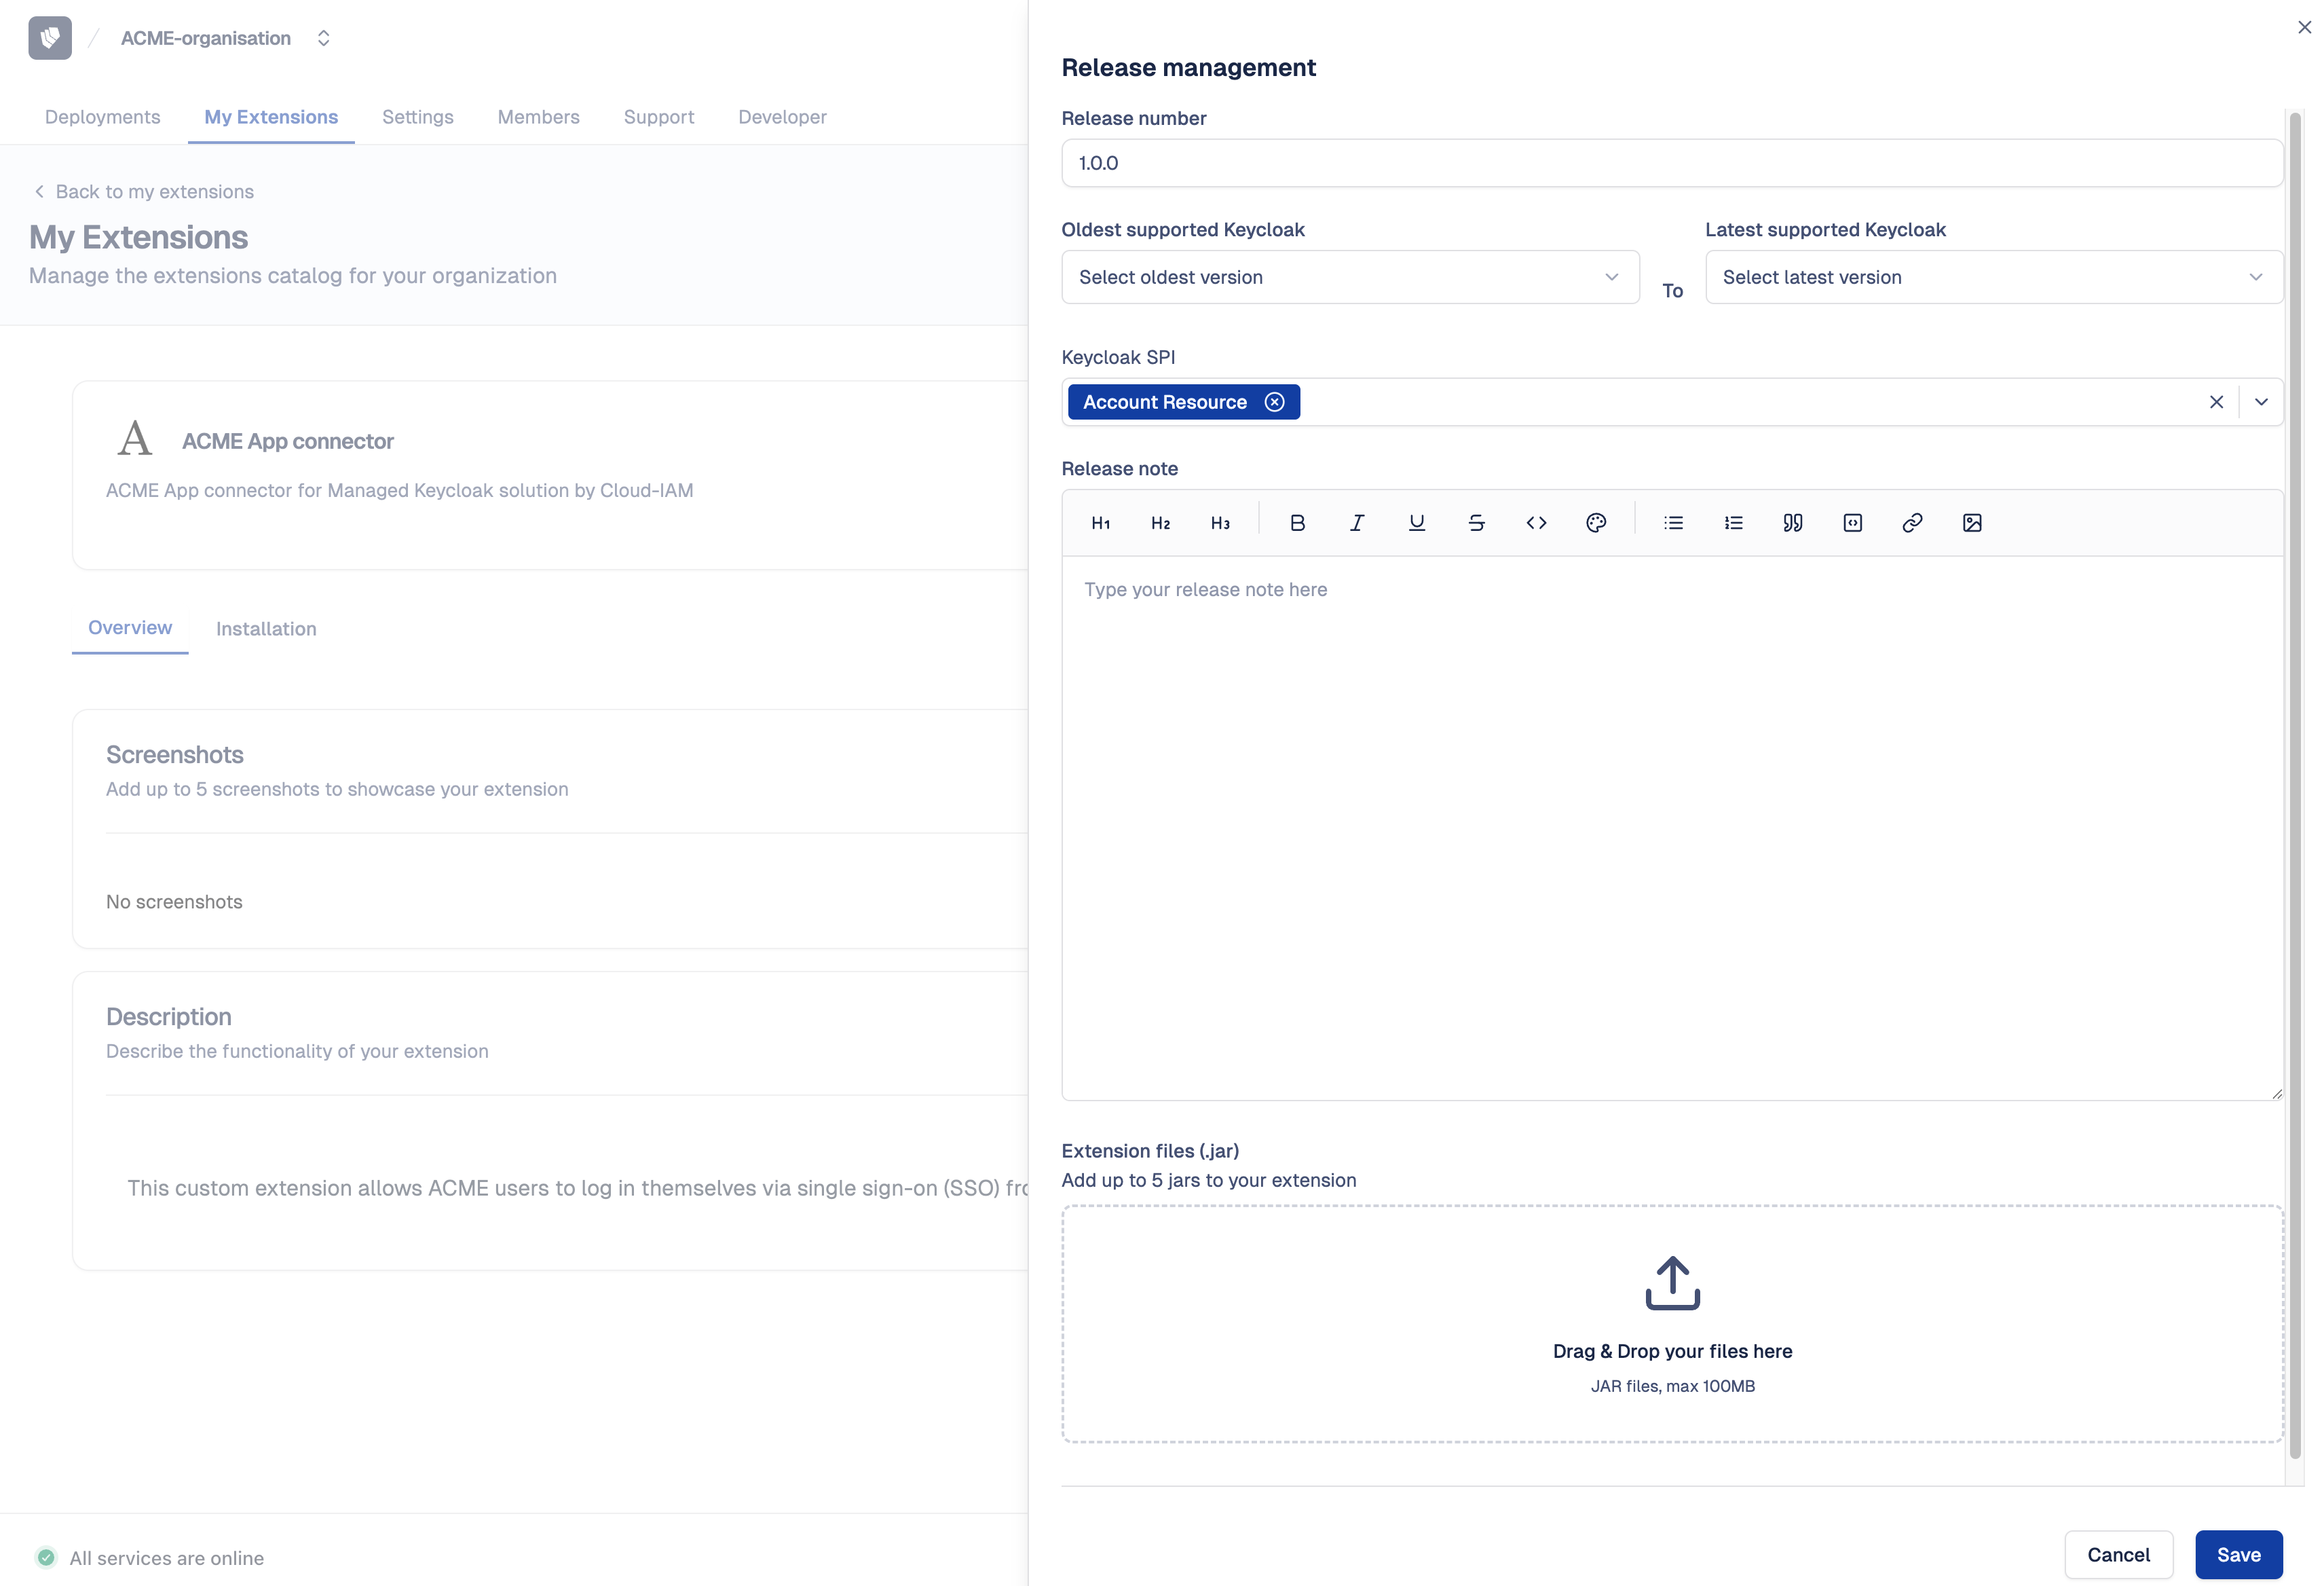
Step 2 — Complete and submit your release
- Fill in the release details:
- Version number
- Keycloak compatibility range (oldest to latest supported versions),
- Keycloak SPI(s) implemented by your extension
- Release notes to describe what changed in this version
- JAR file(s) (up to 5)
- Click on
Saveto submit your release
After submission, your release goes through an automated technical validation.
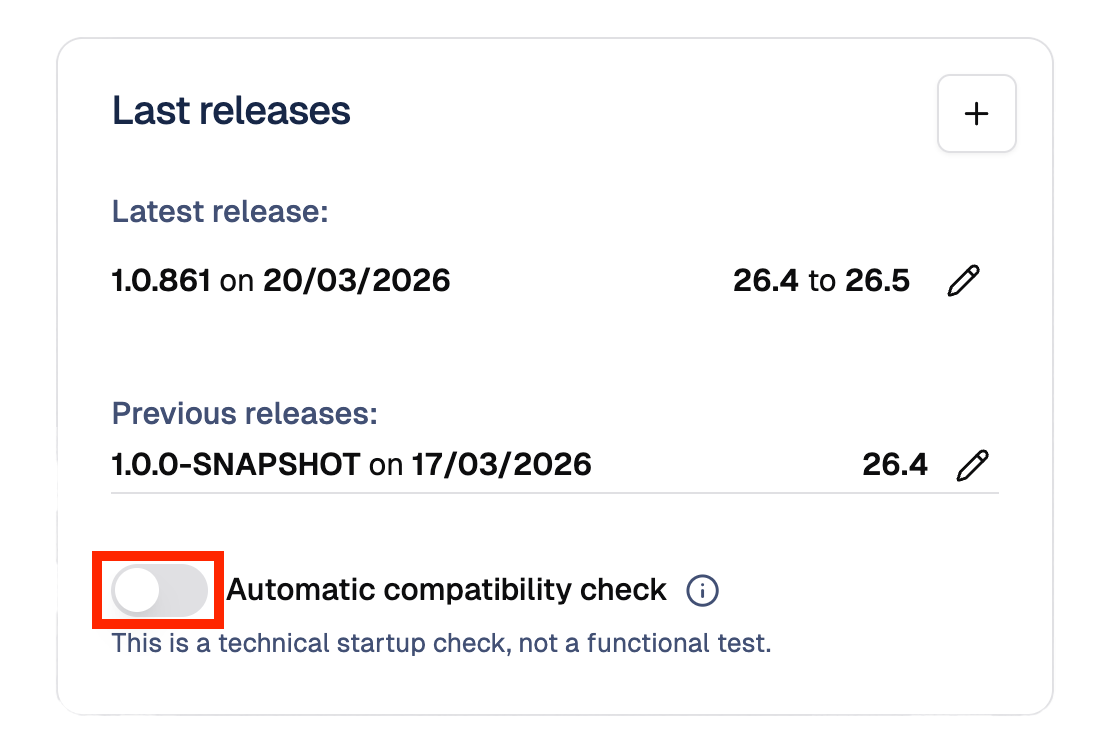
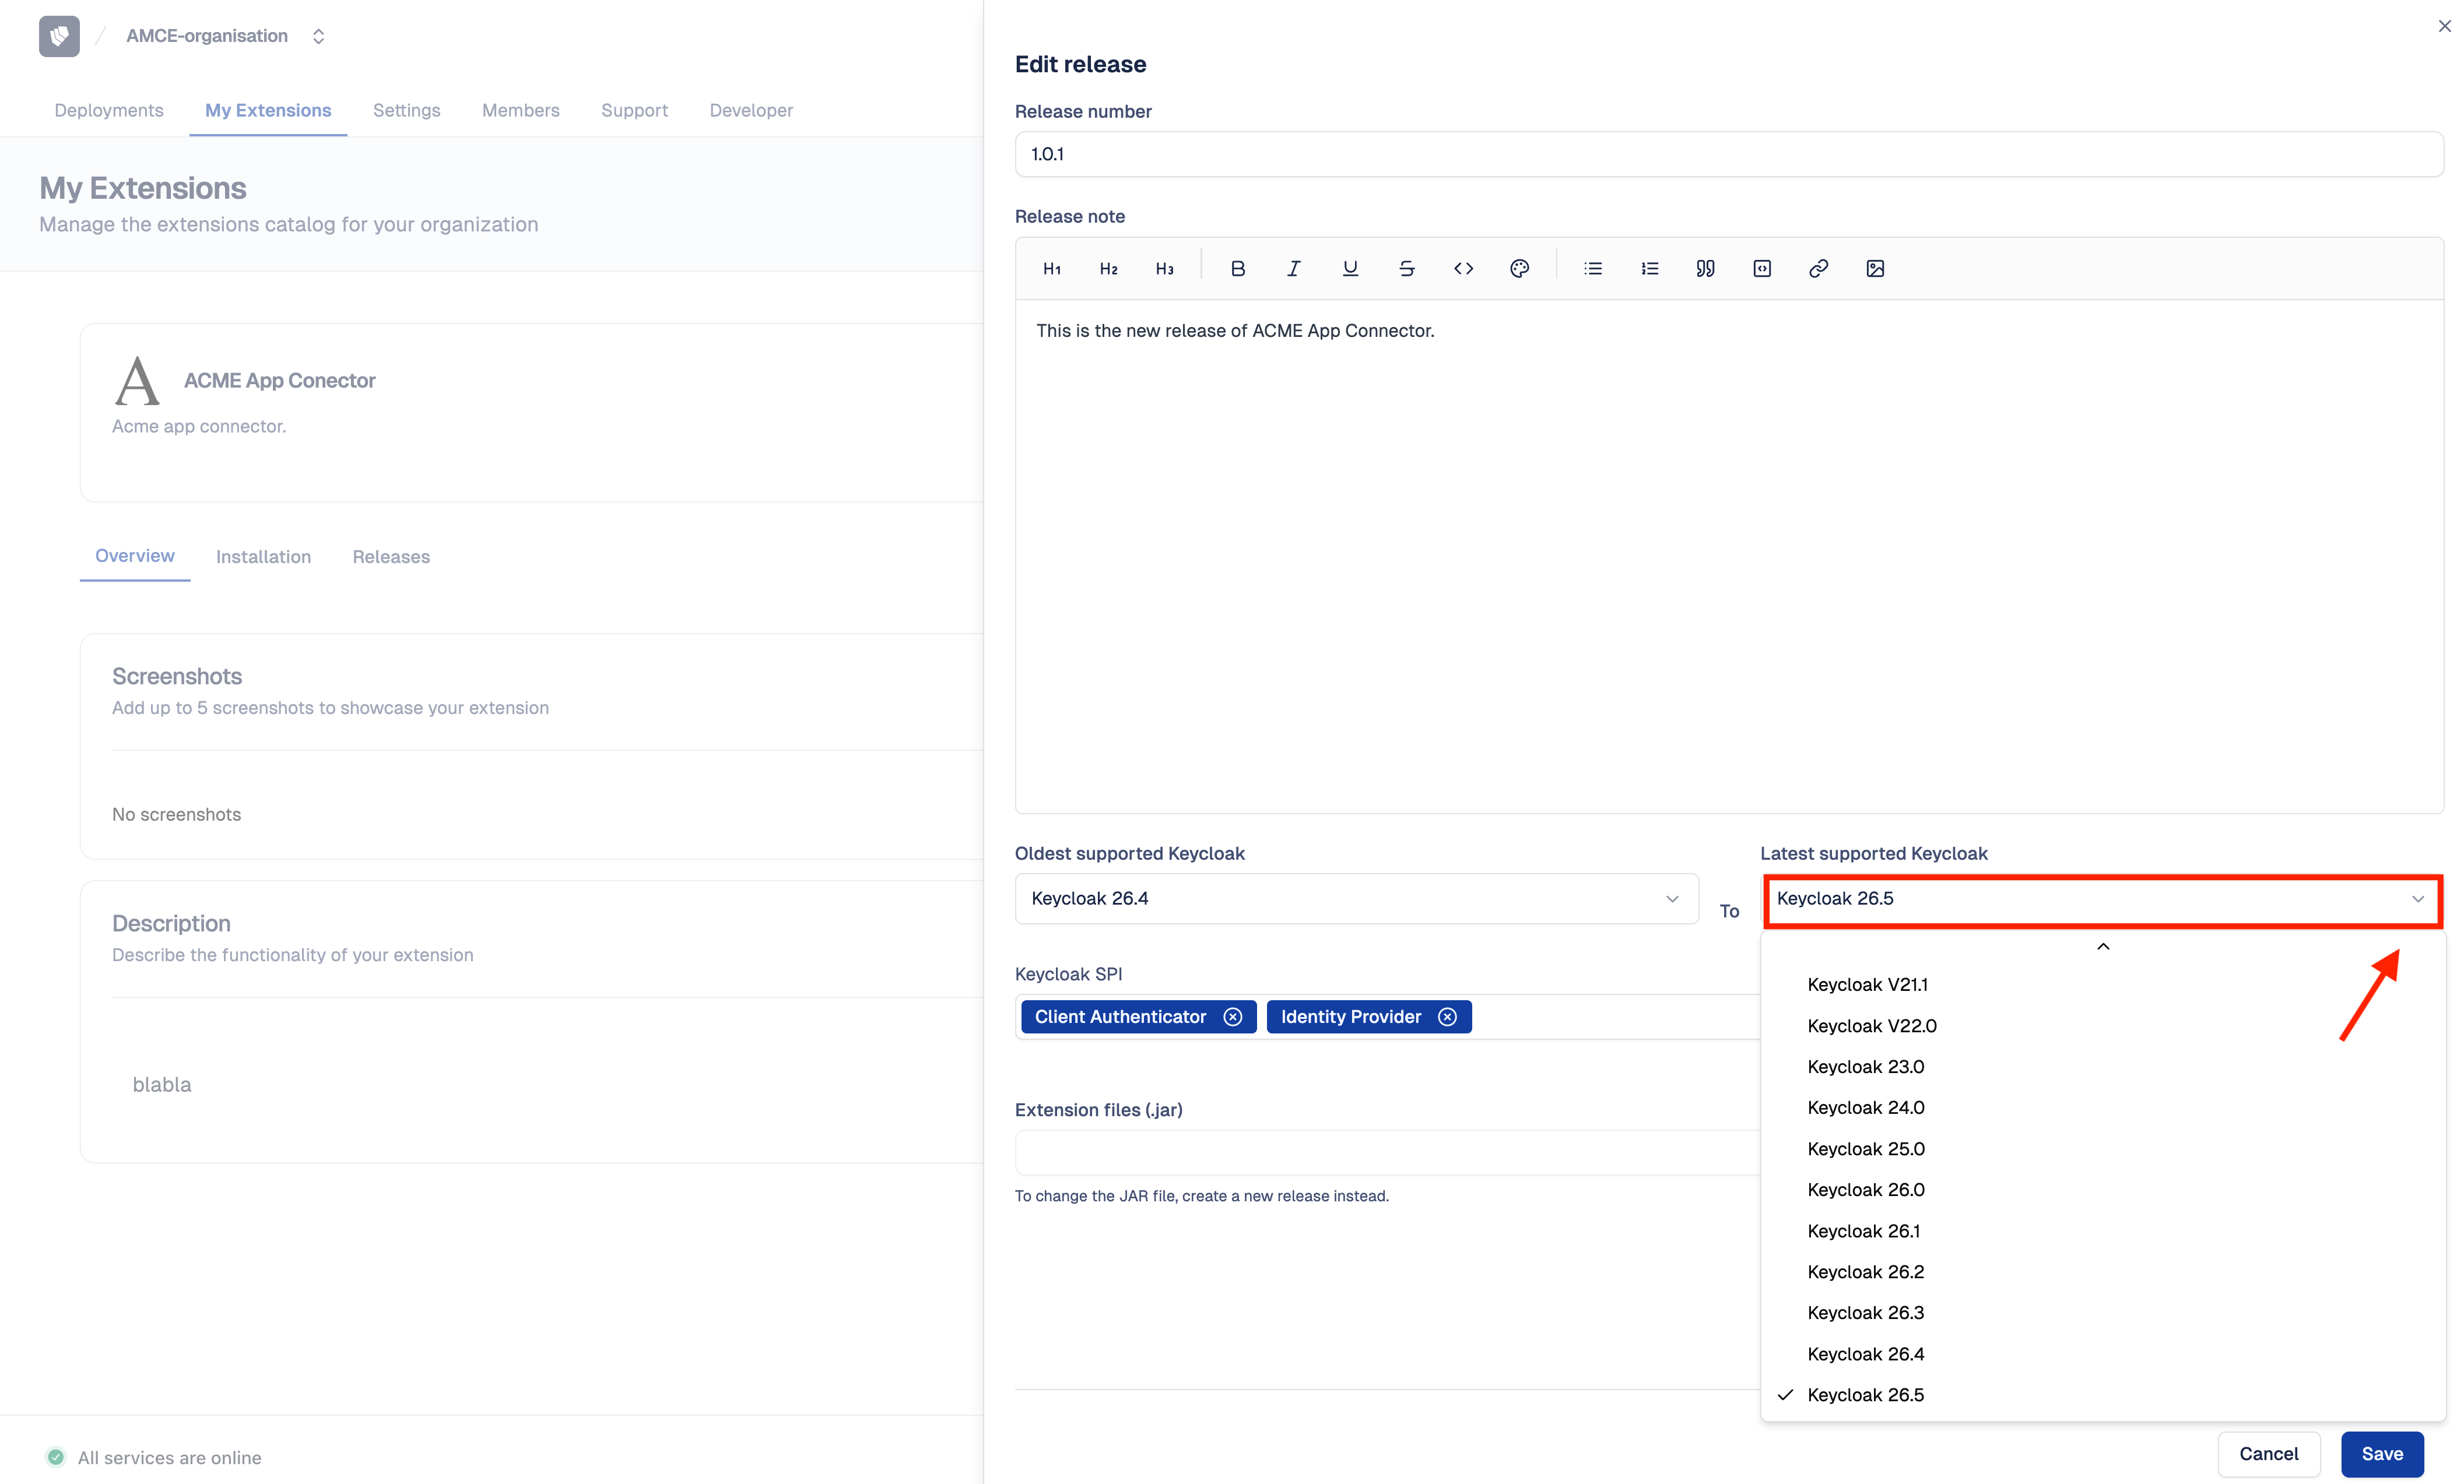
How to extend the Keycloak compatibility range of a release?
Before upgrading your Keycloak deployment with Upgrade on-demand, all installed extensions must have at least one validated release compatible with the target Keycloak version. If a new Keycloak version is available on Cloud-IAM and your extension's latest release does not yet declare compatibility with it, you need to extend its compatibility range.
- Follow this tutorial to access My Extensions
- Select the extension to update
- Navigate to the
Last Releasestab - Click on ✏️ (pencil icon) to open the edit release form
- In the
Latest supported Keycloakdropdown, select the new Keycloak version - Click on
Saveto confirm
After submission, your release goes through an automated technical validation. If the validation passes, you can proceed with upgrading your Keycloak deployment using the Upgrade on-demand feature.
Automate this with automatic compatibility checks
To avoid repeating this process manually after each new Keycloak release, enable automatic compatibility checks. Cloud-IAM will automatically test your latest release against new Keycloak versions within 24 hours of their release.
What is the extension release validation process on Cloud-IAM?
After submission, each release goes through an automated technical validation to verify compatibility with the declared Keycloak versions. The automated validation covers technical compatibility: correct loading, SPI registration, and absence of conflicts with the declared Keycloak versions. It does not cover functional behavior inside Keycloak, which remains the responsibility of the extension publisher.
For each declared Keycloak version, Cloud-IAM runs the following validation pipeline:
- Downloads the extension JAR files
- Loads them into the target Keycloak version
- Verifies Keycloak starts successfully with the extension loaded
- Checks SPI registration and absence of conflicts
- Reports the result back to the release page
The release status transitions through the following states:
| Status | Description |
|---|---|
| Created | Release submitted, waiting for validation |
| Validating | Automated compatibility checks in progress |
| Validated | Release passed all checks and is ready to be installed |
| Validated (forced) | Release passed manually and is ready to be installed |
| Unvalidated | Release did not pass validation |
Which Keycloak versions should I declare for validation?
To minimize validation time for private extension, declare only the Keycloak versions that match your actual deployments. For example, if your organization runs Keycloak 26.0.4 in production and Keycloak 26.1.0 in staging, select only these two versions rather than the full list of available versions.
How to list extensions through Cloud-IAM API?
You can retrieve the list of all custom extensions belonging to your organization programmatically using the Cloud-IAM REST API.
- Obtain a Bearer token using a Service Account
- Obtain your Organization ID
- Execute this command while replacing by your Organization ID.
curl -s \
  -H "Authorization: Bearer $TOKEN" \
  "https://api.cloud-iam.com/organizations/{organizationId}/marketplace/extensions"
Example response:
[
  {
    "extensionId": "550e8400-e29b-41d4-a716-446655440000",
    "name": "My Extension",
    "availability": "GA",
    "documentation": "# Documentation\nMarkdown content...",
    "summary": "Short description of the extension",
    "isPublished": true,
    "howToInstall": "Installation instructions...",
    "logo": "https://storage.example.com/logo.png",
    "categories": [
      {
        "categoryId": "cat-001",
        "name": "Authentication"
      }
    ],
    "screenshots": [
      {
        "extensionId": "550e8400-e29b-41d4-a716-446655440000",
        "rank": 1,
        "filepath": "https://storage.example.com/screenshot-1.png",
        "extension": "png"
      }
    ],
    "latestRelease": {
      "releaseId": "rel-001",
      "version": "1.2.0",
      "status": "VALIDATED"
    },
    "organizationId": "org-001",
    "organizationName": "My Organization",
    "visibility": "PUBLIC"
  }
]
Key response fields:
extensionId— unique identifier of the extensionname— display nameavailability—GA(generally available)isPublished— whether the extension is visible on my deploymentsvisibility—PRIVATE. In the initial phase, all extensions are set toPRIVATEand this value cannot be changedcategories— list of associated categorieslatestRelease— the most recent release (ornullif none)organizationId/organizationName— owning organization
TIP
The endpoint always returns 200 OK, even when the list is empty.
How to list releases for an extension through Cloud-IAM API?
You can retrieve the list of all releases belonging to a specific extension using the Cloud-IAM REST API.
- Obtain a Bearer token using a Service Account
- Obtain your Extension ID
- Execute this command while replacing by your Extension ID.
curl -s \
  -H "Authorization: Bearer $TOKEN" \
  "https://api.cloud-iam.com/marketplace/extensions/{extensionId}/releases?page=0&size=20"
Query parameters:
page— page number, 0-indexed (default:0)size— items per page (default:20)sort— sort field and direction (default:updated_at,DESC)
Example response:
{
  "content": [
    {
      "extensionId": "ext-001",
      "releaseId": "rel-001",
      "version": "1.2.0",
      "availability": "GA",
      "status": "VALIDATED",
      "jars": [
        {
          "jarId": "jar-001",
          "releaseId": "rel-001",
          "jar": "s3://bucket/path/to/extension.jar",
          "filename": "my-extension-1.2.0.jar"
        }
      ],
      "compatibility": ["25.0.0", "24.0.6"],
      "spis": ["org.keycloak.authentication.AuthenticatorFactory"],
      "releaseNote": "Bug fixes and performance improvements.",
      "updatedAt": "2026-03-20T14:30:00Z"
    }
  ],
  "page": {
    "size": 20,
    "totalElements": 5,
    "totalPages": 1,
    "number": 0
  }
}
Key response fields:
releaseId— unique identifier of the releaseversion— version numberstatus— current validation status (see Release validation process)jars— list of JAR files associated with the releasecompatibility— list of compatible Keycloak versionsspis— list of Keycloak SPIs implemented by the extensionreleaseNote— release notesupdatedAt— last modification timestamppage.totalElements/page.totalPages— pagination info
How to add a release for an extension through Cloud-IAM API?
Step 1 - Upload the release
- Obtain a Bearer token using a Service Account
- Obtain your Extension ID
- Prepare the
releaseDatafields:
| Field | Required | Description |
|---|---|---|
version | Yes | Release version number (e.g. 1.3.0) |
availability | No | Maturity level (default: GA) |
keycloakVersions | Yes | List of compatible Keycloak version IDs |
keycloakSpi | No | List of Keycloak SPIs implemented by the extension |
releaseNote | No | Description of changes in this version |
- Execute this command while replacing by your Extension ID.
curl -s -X POST \
  -H "Authorization: Bearer $TOKEN" \
  -F 'releaseData={"version":"1.3.0","availability":"GA","keycloakVersions":["kc-25.0.0","kc-24.0.6"],"keycloakSpi":["org.keycloak.authentication.AuthenticatorFactory"],"releaseNote":"Added multi-realm support."};type=application/json' \
  -F "jars=@my-extension-1.3.0.jar" \
  "https://api.cloud-iam.com/marketplace/extensions/{extensionId}/releases"
TIP
Returns 204 No Content on success.
Step 2 - Automatic validation
Once the release is created, the system automatically triggers a compatibility check pipeline for each declared Keycloak version. The pipeline verifies that the extension JAR is compatible with the target Keycloak image.
You can monitor the release status by polling:
- Obtain a Bearer token using a Service Account
- Obtain your Extension ID
- Obtain your Release ID
- Execute this command while replacing by your Extension ID & Release ID.
curl -s \
  -H "Authorization: Bearer $TOKEN" \
  "https://api.cloud-iam.com/marketplace/extensions/{extensionId}/releases/{releaseId}"
Step 3 - Force validation (optional)
If automatic validation fails or is not applicable, you can manually force-validate the release:
- Obtain a Bearer token using a Service Account
- Obtain your Extension ID
- Obtain your Release ID
- Execute this command while replacing by your Extension ID & Release ID.
curl -s -X PATCH \
  -H "Authorization: Bearer $TOKEN" \
  "https://api.cloud-iam.com/marketplace/extensions/{extensionId}/releases/{releaseId}/force-validation"
TIP
Returns 204 No Content on success. This sets the release and all its associated Keycloak version statuses to VALIDATED.
Troubleshooting custom extension issue
Caused by: java.lang.ClassNotFoundException
If the extension relies on a Keycloak class, this can lead to an error during the start of the extension such as Caused by: java.lang.ClassNotFoundException: org.keycloak.services.managers.XXXXXX because on Quarkus the class loaders are isolated for safety reasons.
This issue can be resolved by declaring explicitly the dependencies needed by the extension in the MANFIEST.MF file.
If for instance, the extension's pom.xml contains such a dependency:
    <dependency>
        <groupId>org.keycloak</groupId>
        <artifactId>keycloak-services</artifactId>
        <scope>provided</scope>
        <version>${keycloak.version}</version>
    </dependency>
Then the following declaration must follow to tell Quarkus to share the classes between the server and the extension.
    <plugin>
       <groupId>org.apache.maven.plugins</groupId>
       <artifactId>maven-jar-plugin</artifactId>
       <configuration>
           <archive>
               <manifestEntries>
                   <Dependencies>org.keycloak.keycloak-services</Dependencies>
               </manifestEntries>
           </archive>
       </configuration>
    </plugin>
Related pages
- Extensions Management — install your extensions on a deployment
- Cloud-IAM Extensions Catalog — ready-to-use extensions by Cloud-IAM
- FAQ — Extensions