JWKS in Keycloak
Overview
The JSON Web Key Set (JWKS) is a collection of public keys used to verify JSON Web Tokens (JWTs) issued by an authorization server. When using asymmetric signing algorithms such as RS256, the server signs the JWT with a private key, and client applications validate it with the corresponding public key provided in the JWKS.
Keycloak supports multiple algorithms for signing JWTs: RS256, RS384, RS512, and HS256.
- RS256/RS384/RS512 → Asymmetric (recommended)
- HS256 → Symmetric (less secure for multi-party integrations)
Keycloak implements the JSON Web Key (JWK) specification to represent and expose cryptographic keys. These keys are published as a JWKS (a set of JWKs), making them available for client applications to automatically fetch and use.
Configuration JWKS in Keycloak
This step-by-step guide explains how to configure JSON Web Key Set (JWKS) in Keycloak to ensure secure validation of JSON Web Tokens (JWTs). JWKS allows client applications to automatically retrieve and use the public keys required to verify signatures, reducing manual key management.
This tutorial does not cover all the necessary security best practices for a complete configuration.
Step 1 — Enable JWKS for a Client Application
- Login to your Keycloak as an admin
- Select the realm to be configured (here : acme-demo)
- Navigate to
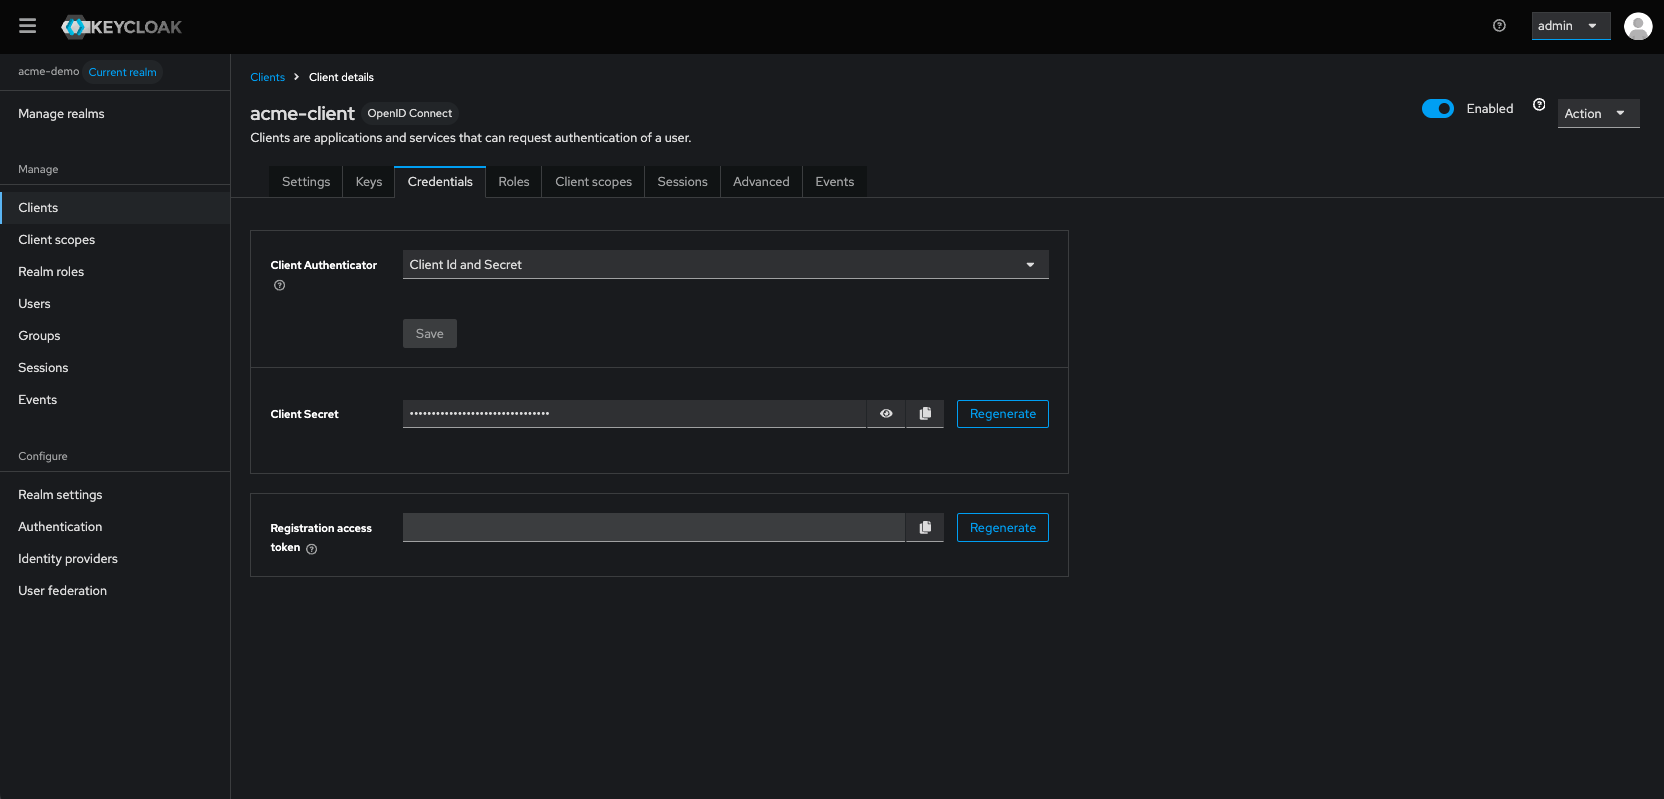
Clientsand detect the target Client. - Go to the
Credentialstab. - From the dropdown list select
Signed JWT - Click
Saveand confirm your configuration.
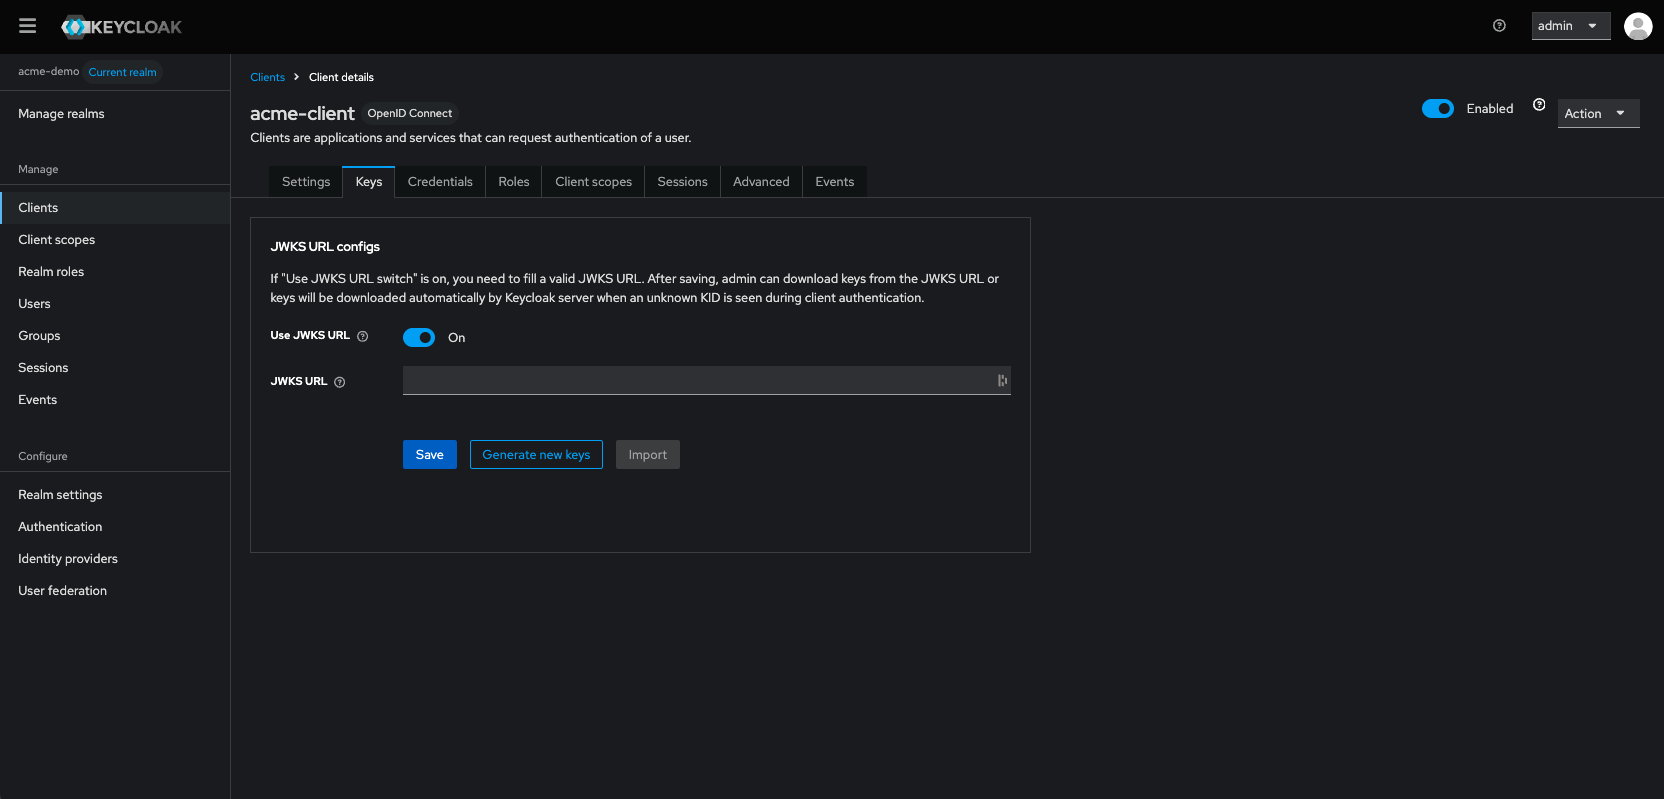
Step 2 — Configure the JWKS URL
- Go to the
Keystab. - Select
Use JWKS URLtoggle (Using a JWKS URL ensures that keys are automatically updated without manual intervention.) - Register the JWKS URL of your application (or upload a certificate if necessary).
- Click
Saveand confirm your configuration.
Step 3 — Retrieve the Realm JWKS URL
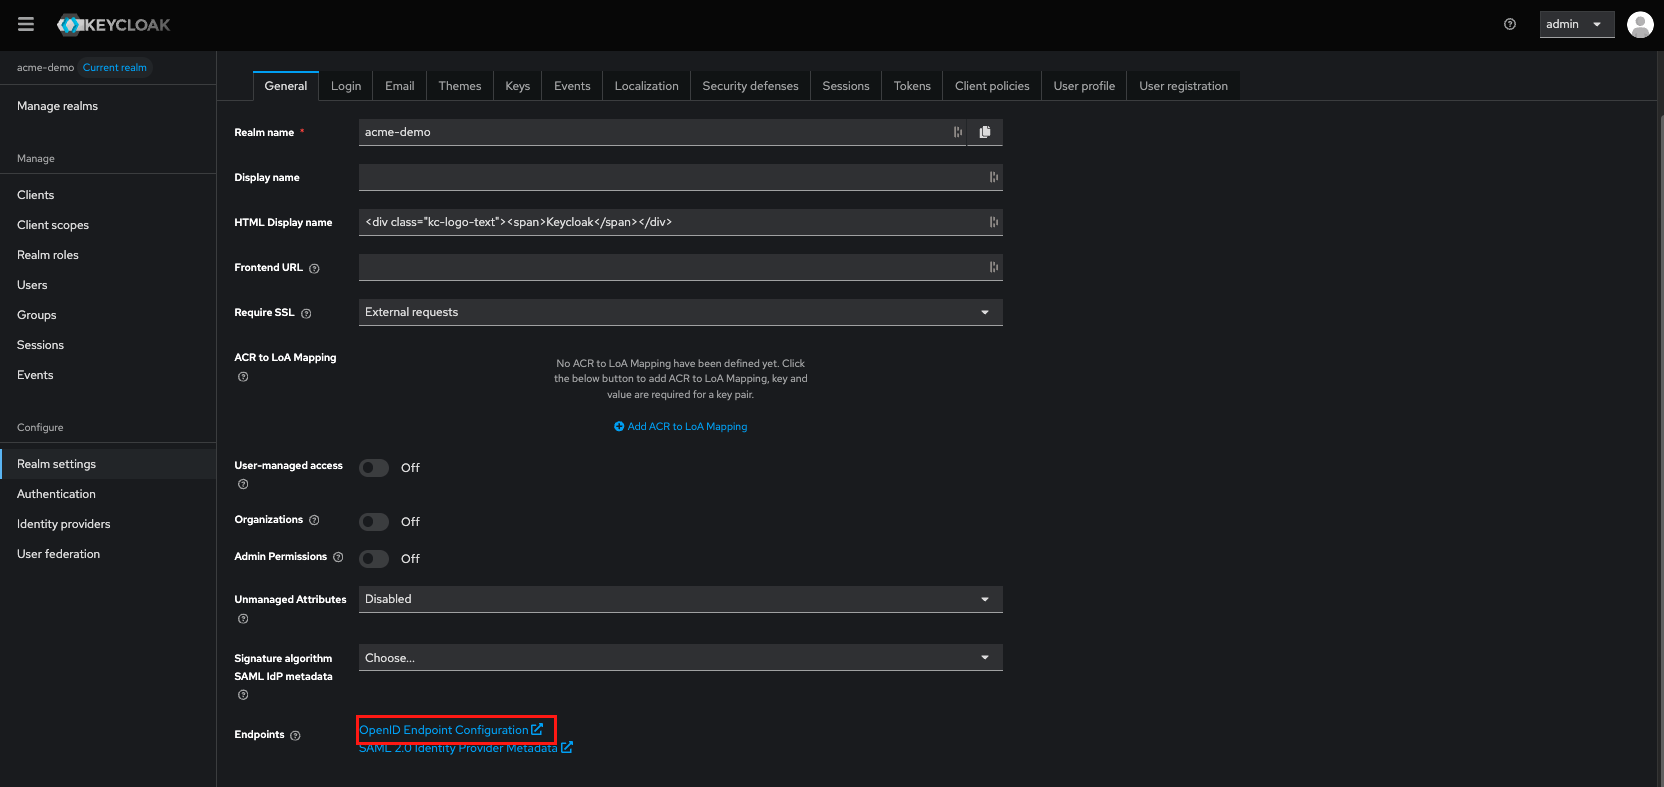
Keycloak exposes its JWKS through the OpenID Connect discovery endpoint under the realm settings page.
- Navigate to
Realm settings - Go to the
Generaltab - Scroll down until Endpoints section
This URL should be following this pattern: /realms/MY-REALM/.well-known/openid-configuration.
Step 4 — Configure your application
In your application (API, frontend, or backend), configure the JWKS endpoint URL retrieved in the previous step.
This ensures that JWT validation is performed securely against the trusted public keys provided by Keycloak.