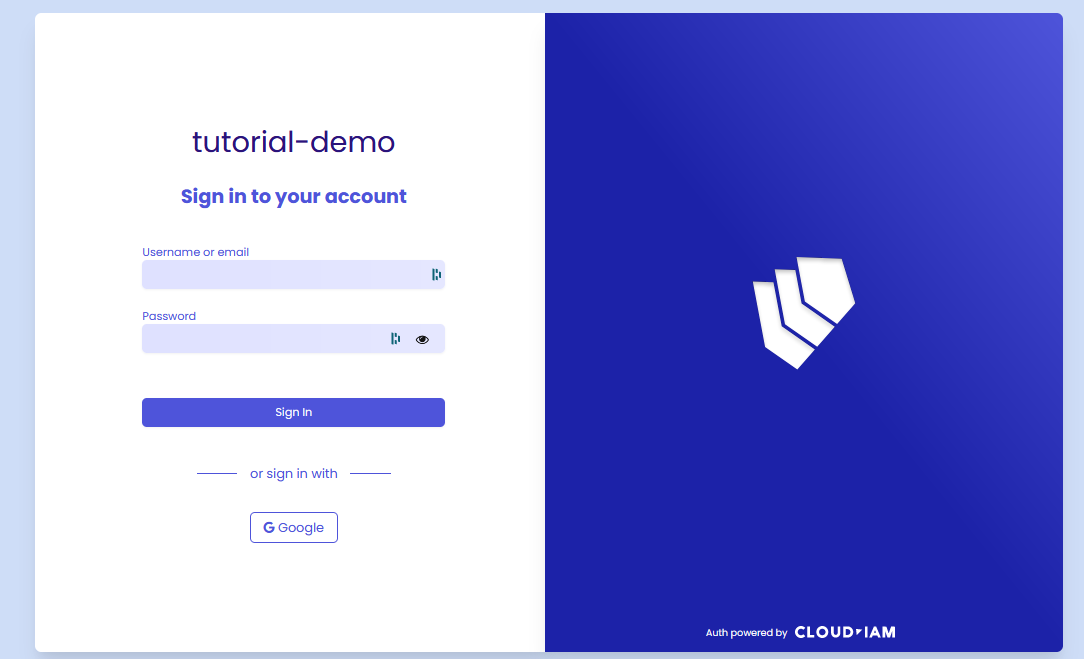
Social login
Overview
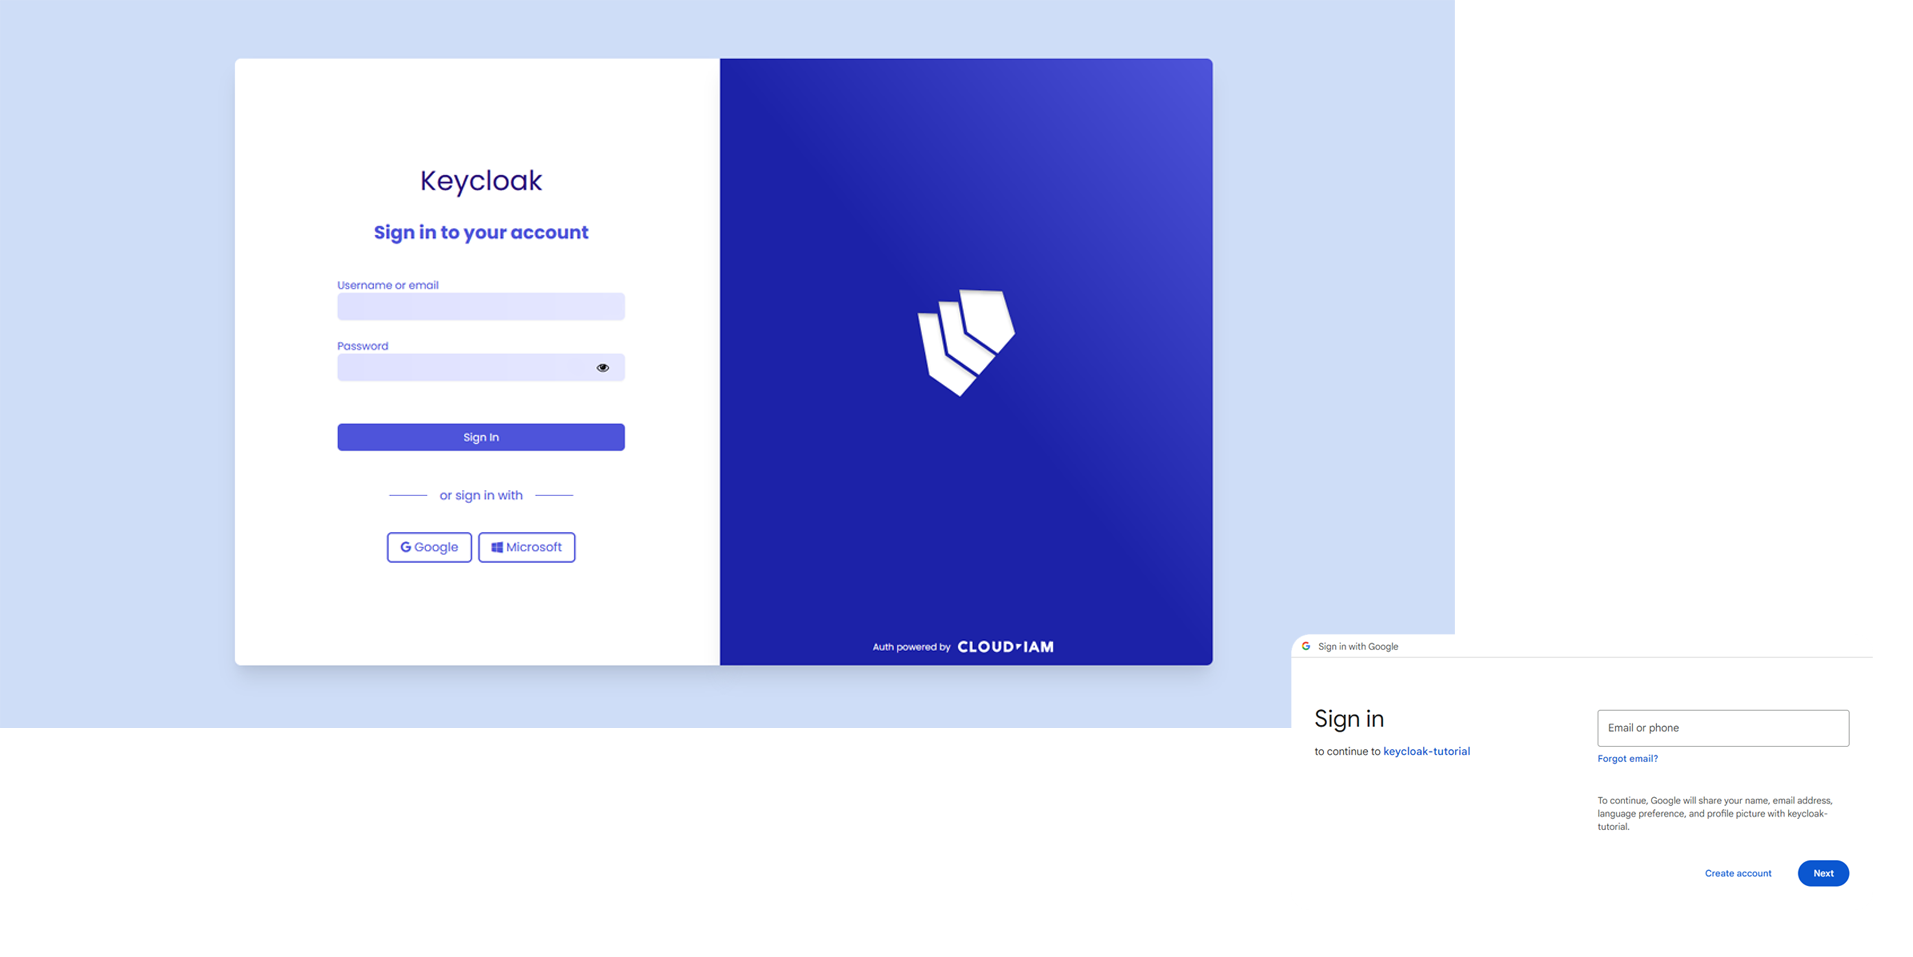
Social login allows users to log in to applications using their existing social media accounts (personal or professional), such as Google, Facebook, or Twitter. This provides a convenient and streamlined login experience for users while also enabling applications to leverage the user's existing identity from social platforms.
Use cases
CIAM
Social login is particularly valuable for customer-facing applications, where providing a seamless and user-friendly login experience is crucial for user acquisition and retention.
By offering social login options, businesses can attract users who prefer to use their social media credentials to access services, enhancing user satisfaction and trust. This integration of social login functionality into eCommerce websites not only improves user experience but also accelerates registration and checkout processes, expands user acquisition, enables personalized targeting, and enhances trust and security measures.
IdP broker
Social login also serves as an Identity Provider (IdP) broker, enabling users to authenticate through their professional social media accounts while providing a centralized authentication mechanism for applications.
This simplifies the authentication process for users and reduces the need for them to create and manage separate login credentials for each application.
Pros & Cons
Pros
- Enhanced user experience: Social login offers a convenient and familiar login process for users, reducing friction and increasing user engagement.
- Versatility: Suitable for a wide range of applications and use cases, providing flexibility and choice for users.
- Increased user acquisition: Social login can attract users who may be hesitant to create new accounts but are willing to sign in using their existing social media credentials.
Cons
- Privacy concerns: Social login requires users to share their social media account information with the application, raising privacy concerns about data sharing and user tracking.
- Dependence on external providers: Social login relies on external identity providers such as Google or Facebook, making authentication dependent on the availability and reliability of these services.
Supported by Keycloak
Yes, natively supported configurable on Managed Keycloak by Cloud-IAM
Configuration
How to configure Google Social Login / Google SSO on Keycloak
The following tutorial provides a quick example of configuring the "social login with Google account" method via Google Cloud Console (https://console.cloud.google.com/) to help you navigate Keycloak and to test it. This tutorial does not cover all the necessary security best practices for a complete configuration.
Google Cloud Console - Create New Project
- Go to Google Cloud Console
- Connect yourself with your Google account credentials
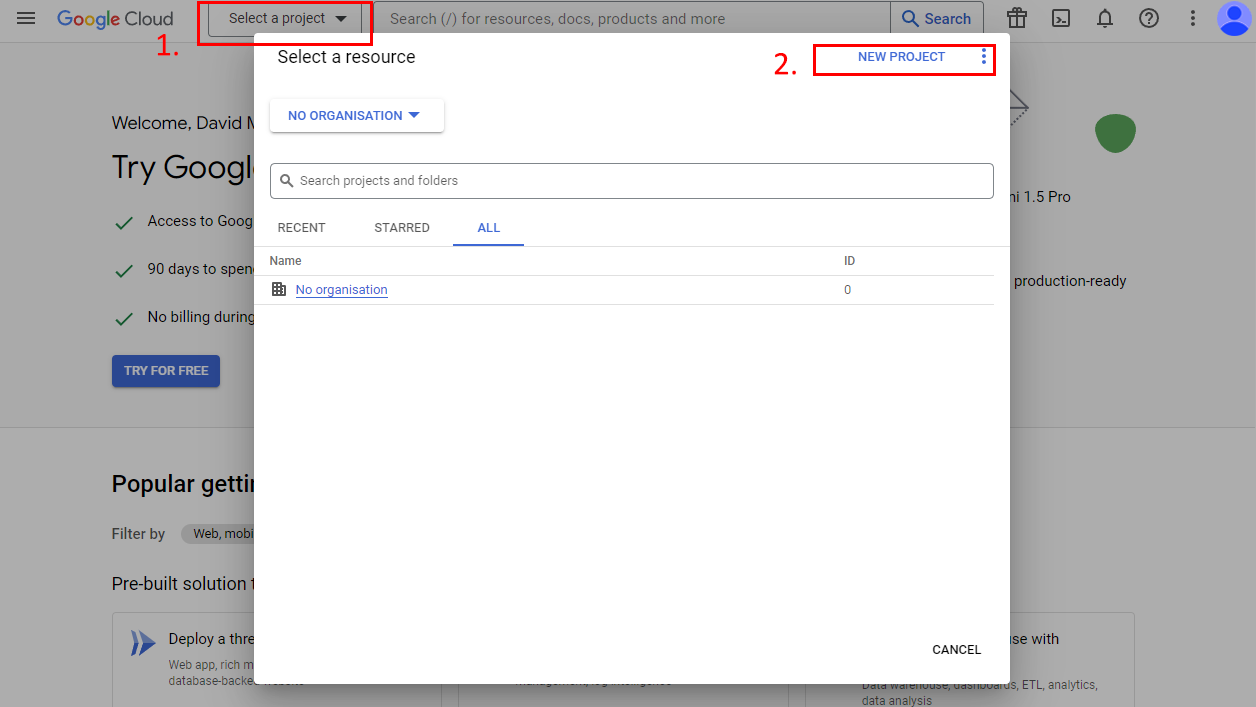
- Click on
Select project(1.) - Then click on
New Project(2.)
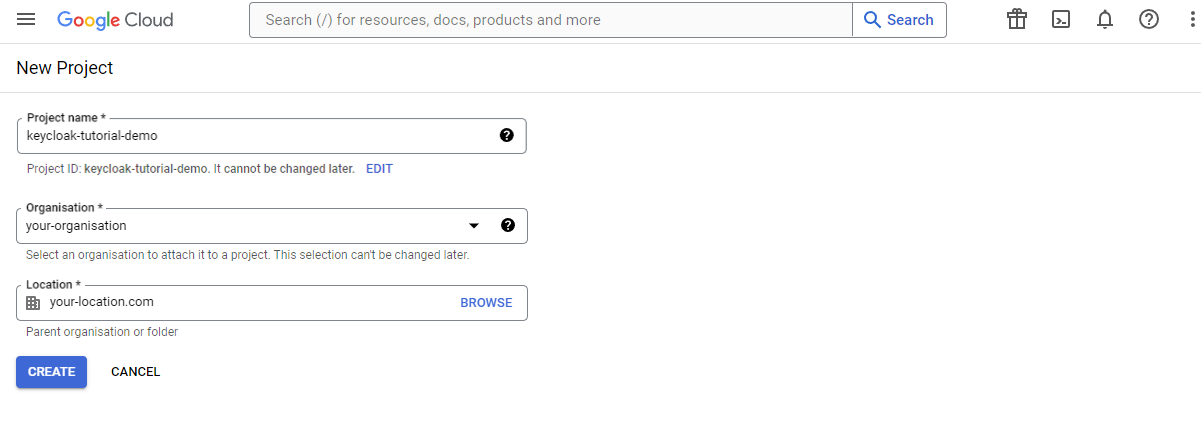
- Complete the form with
Name(here: keycloak-tutorial-demo )Organisation(here: your-organisation )Location(here: your-location.com )
Google Cloud Console - Configure client ID and client secret - Step 1
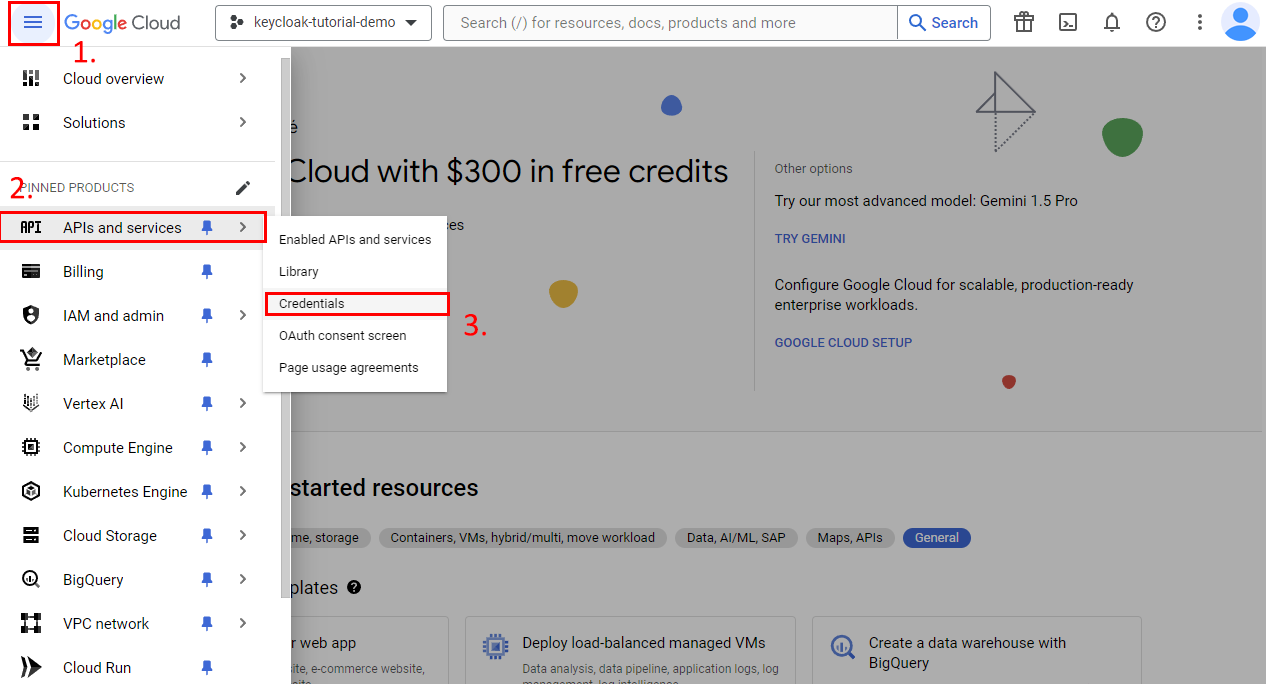
- Click on
Select projectand select the previously created project (here: keycloak-tutorial-demo) - Then click on
Menu,API and services,Credentials(you must be on this URL: "https://console.cloud.google.com/apis/credentials?project=*your-name-project*")
Google Cloud Console - Configure client ID and client secret - Step 2
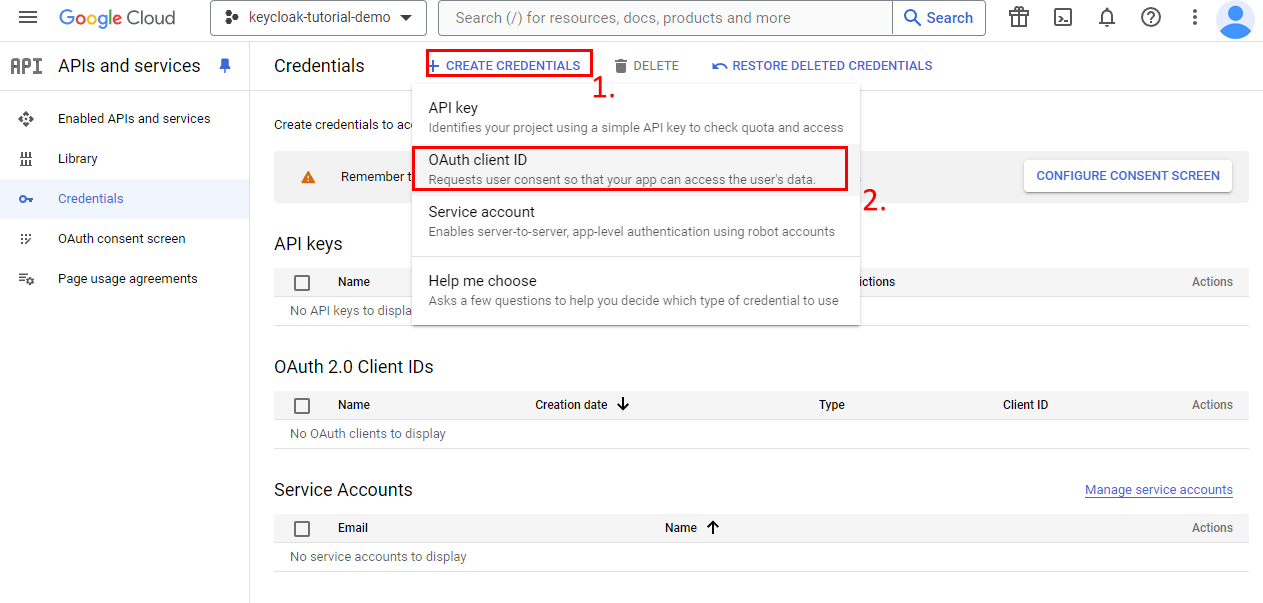
- Select
Create CredentialsandOAuth client ID(you must be on this URL: https://console.cloud.google.com/apis/credentials/oauthclient[...] )
Google Cloud Console - Configure client ID and client secret - Step 3
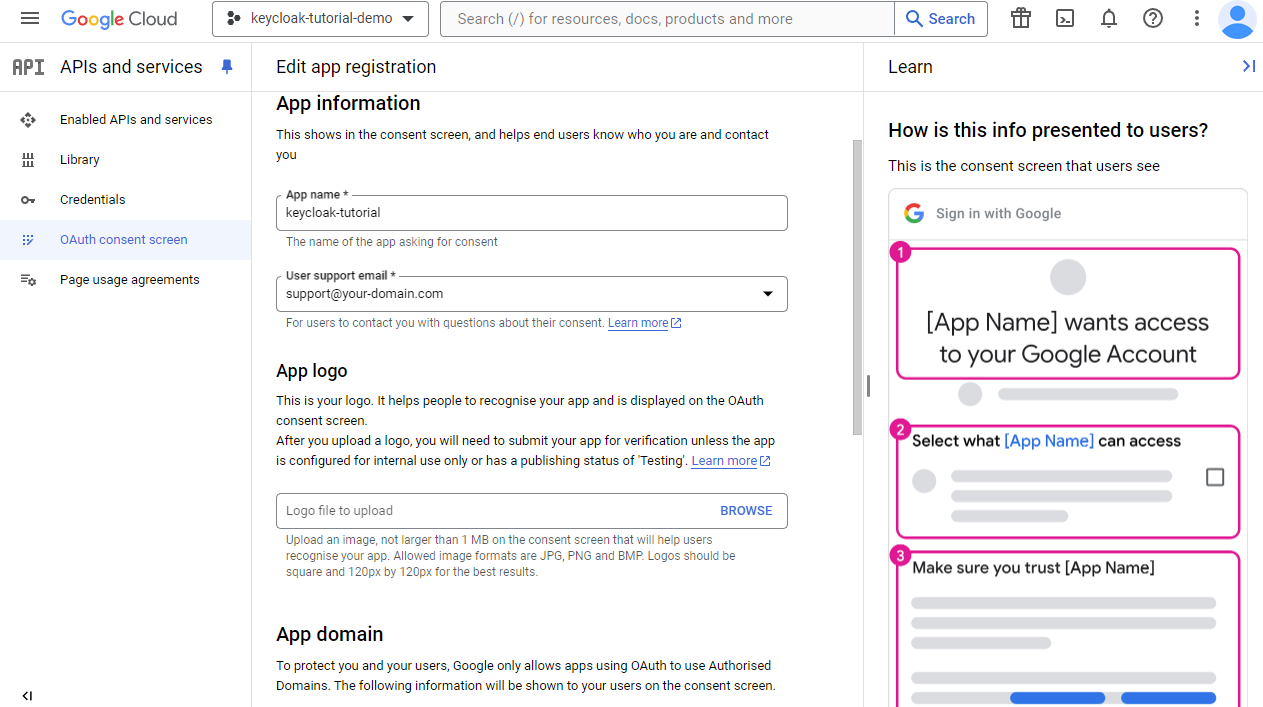
- Click on
Configure consent screen - Choose if you would like to provide this authentication method to your Google workspace only for
Internalor for every google accountExternal(for the tutorial I choose: Internal) - Complete with
App name(here: Keycloak-tutorial)Support emailto help user (here: support@your-domain.com)Developer contact information
- Click
Save and Continue - Then click
Save and Continue
You now have created your Consent screen.
Google Cloud Console - Configure client ID and client secret - Step 4
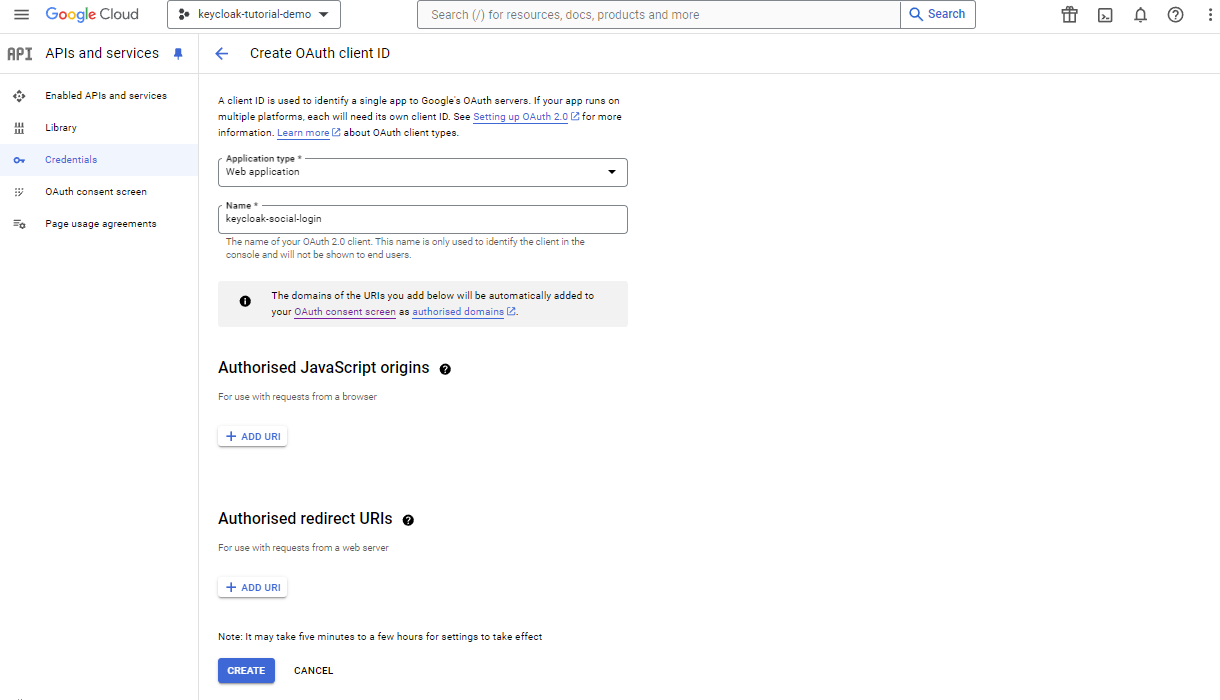
- Go back to
Credentials - Click on
Create CredentialsandOAuth client ID - Select
Web applicationon the list - Named your
Web client(here: keycloak-social-login ) - Click on
Create
You have know create your Oauth 2.0 Credentials for your keycloak with client ID and client secret.
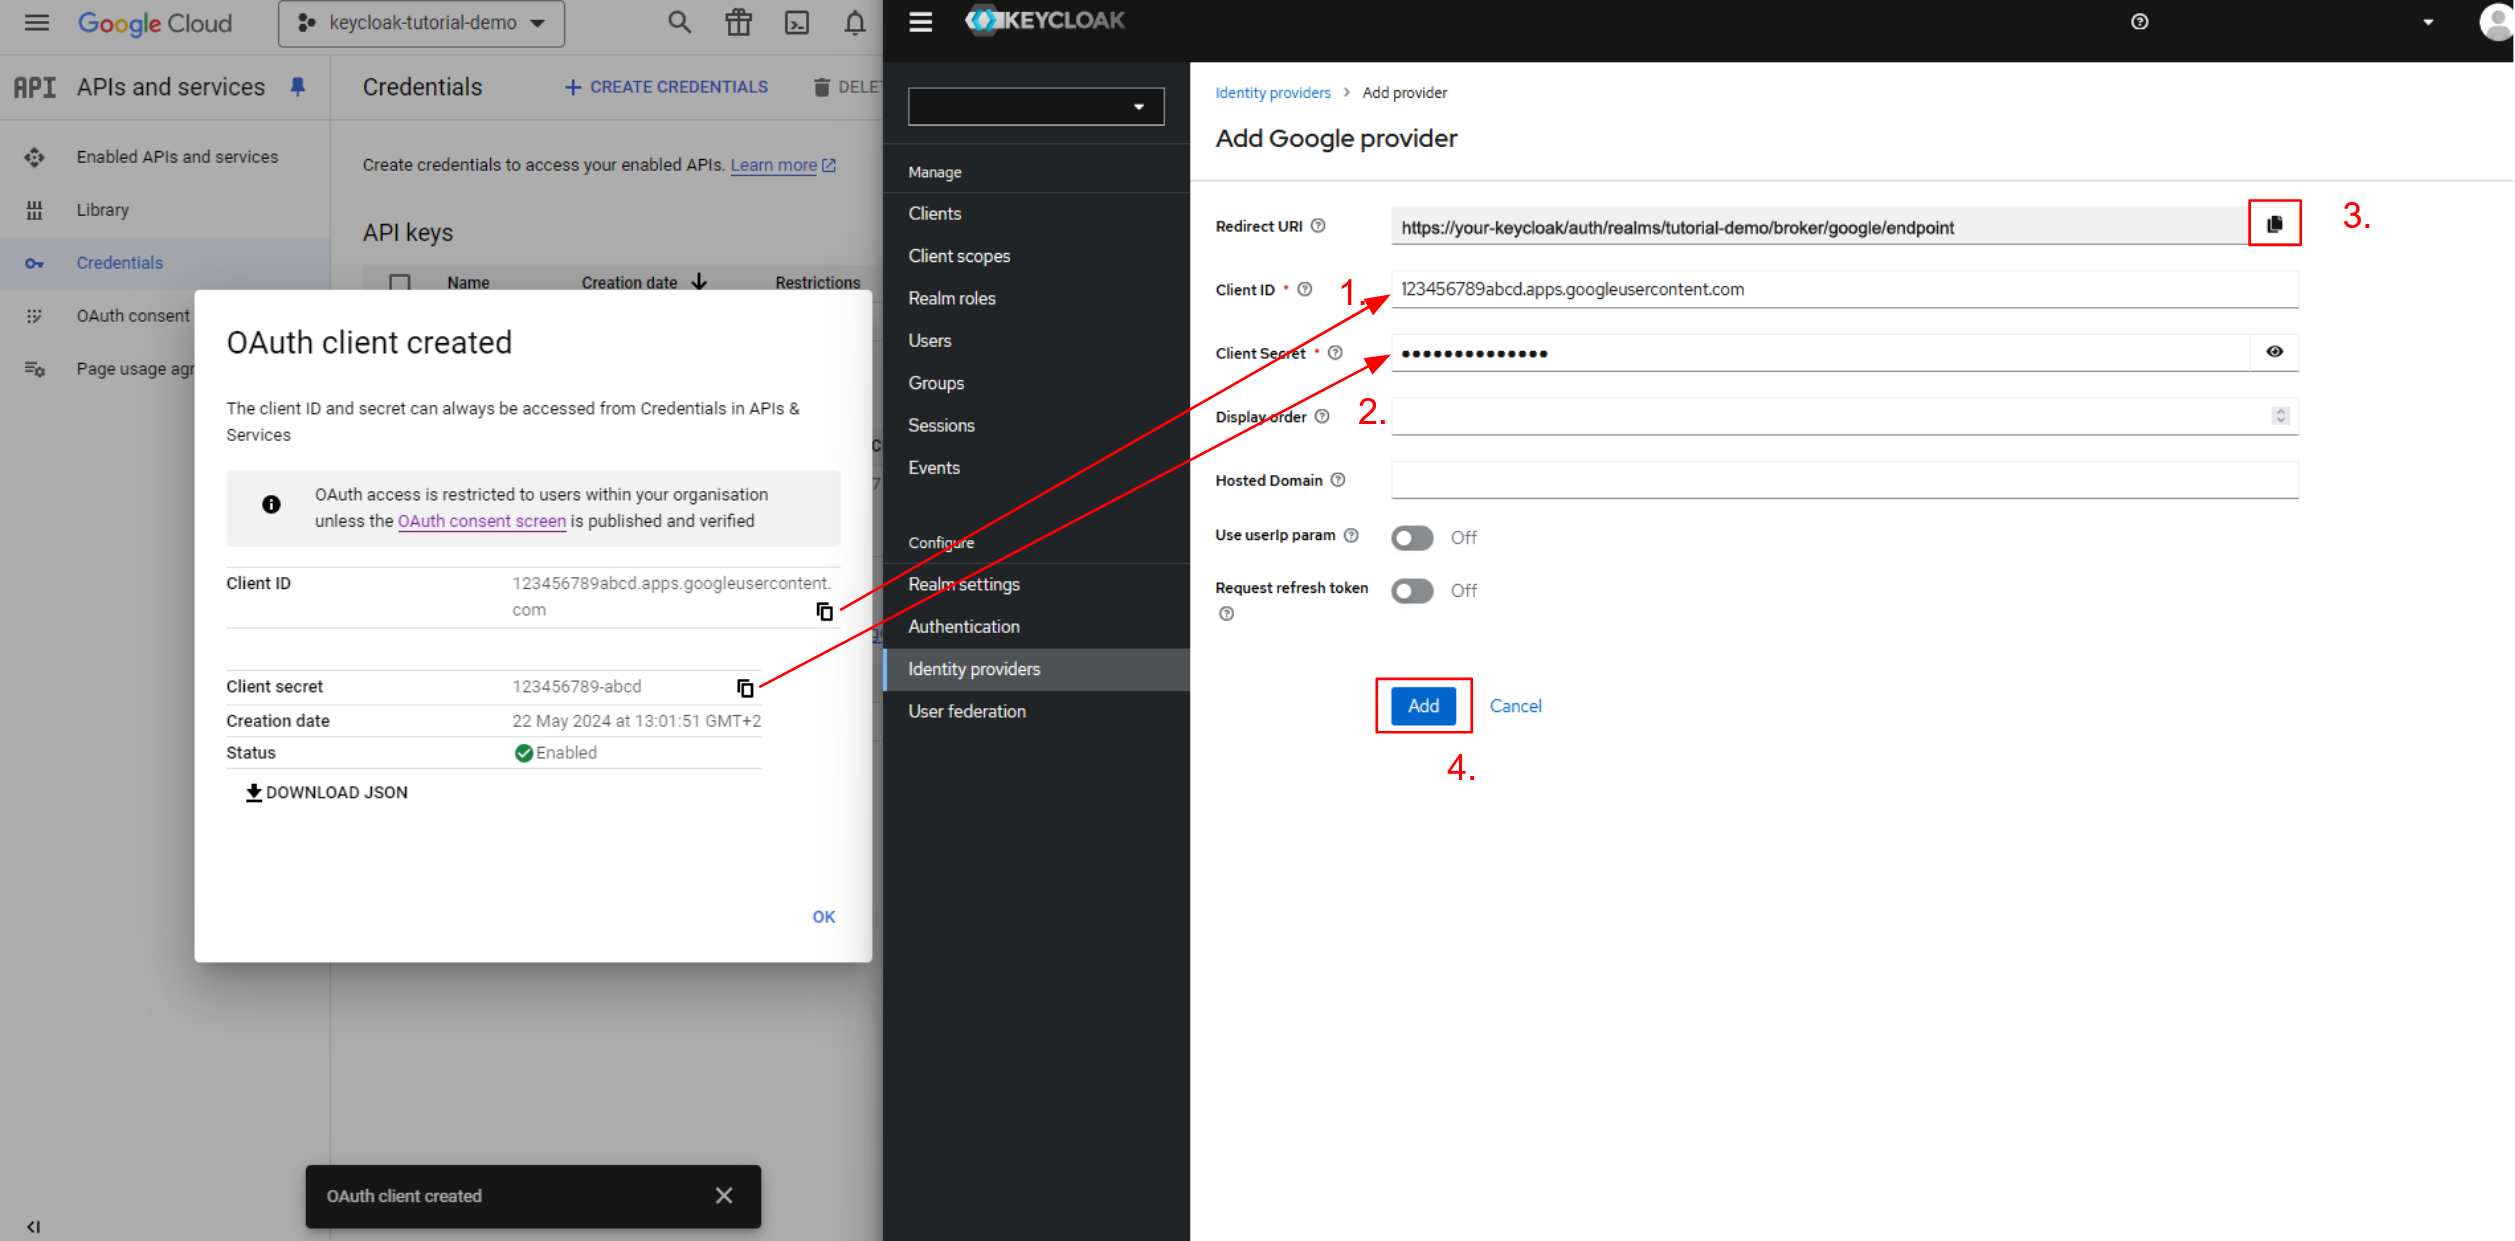
Keycloak Console - Add Google social login
- On another window browser open your Keycloak
- Click on
Identity Providerthen selectGoogle - Copy / paste the client ID and client secret previously created
- Copy the
Redirect URI(here: https://your-keycloak/auth/realms/tutorial-demo/broker/google/endpoint ) - Click on
Add
Google Cloud Console - Redirect URI
- Re-open the Google console window and select your
Oauth 2.0-Credentialspreviously created (here: keycloak-social-login) - Paste the
Redirect URIonAuthorized redirect URIssection - Click on
Save
You have now created social login authentication method with Google.
