Complete tutorial to deploy managed Keycloak
Introduction
This guide is designed for first-time users who are setting up their first Managed Keycloak deployment. It is also useful for anyone who wants to understand all configuration options and follow best practices. Developers and DevOps teams evaluating or customizing their setup on Cloud-IAM will also find it helpful.
By the end of this tutorial, you’ll know how to:
- Create your Cloud-IAM account
- Choose and Configure the right plan, cloud provider, region, and support level
- Launch a Managed Keycloak deployment
- Understand how the infrastructure is provisioned
- Log into your Keycloak admin console
- Apply initial best security practices to your Keycloak deployment
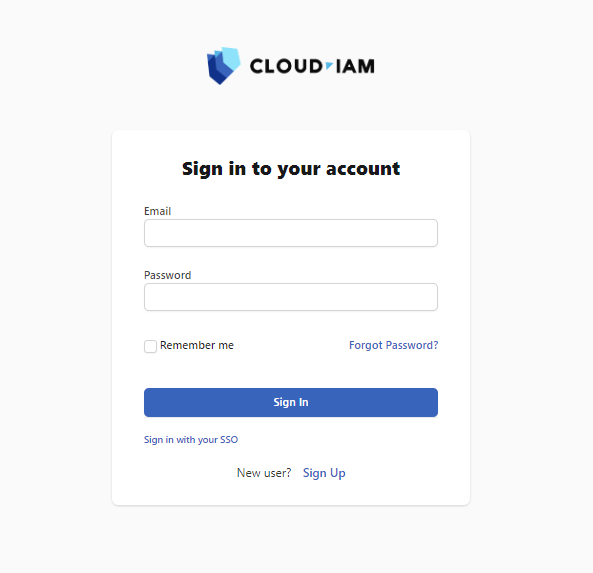
Step 1 - Access to Cloud-IAM console
To create a deployment, you must first access the Cloud-IAM Console:
- Create your account on Cloud-IAM
or
- Sign-In with your Cloud-IAM credentials
Step 2 - Create Keycloak deployment
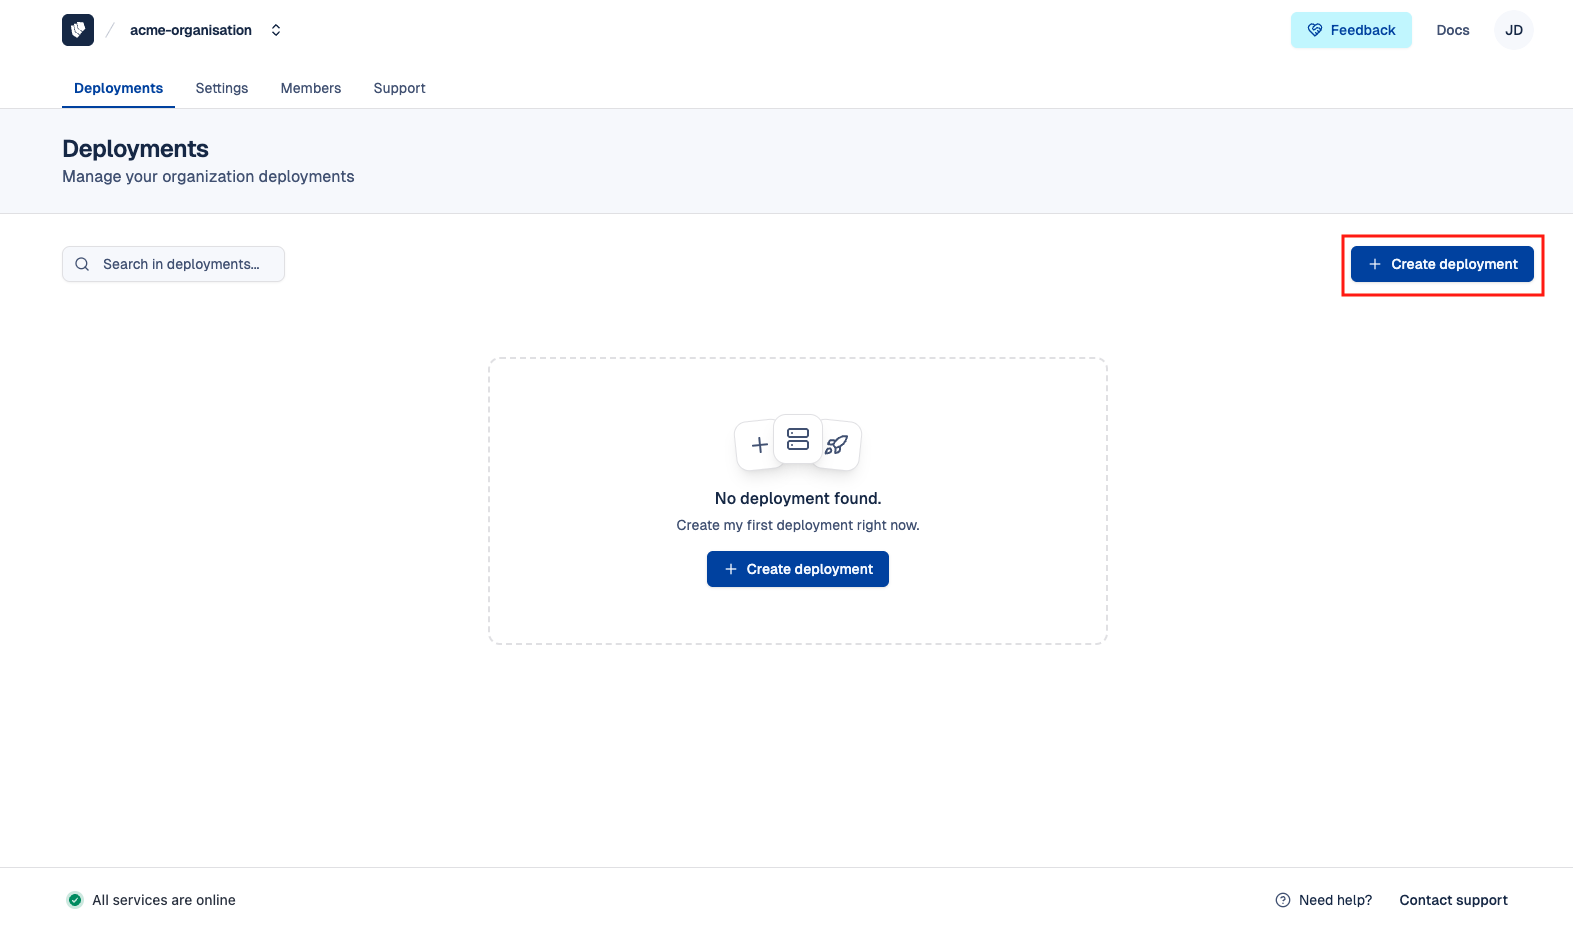
You are now logged into the Cloud-IAM console, and it's time to configure your Keycloak deployment based on your use case. From Cloud-IAM console to create a deployment you can either :
- Click on
+ Create deployment
or
- Go directly to the creation page to access the deployment setup form.
After selected one of these options, you will be redirected to Creation deployment page.
Step 3 - Configuration deployment page
You've now reached the deployment configuration page. Let's walk through each setting in detail to properly configure your Managed Keycloak deployment.
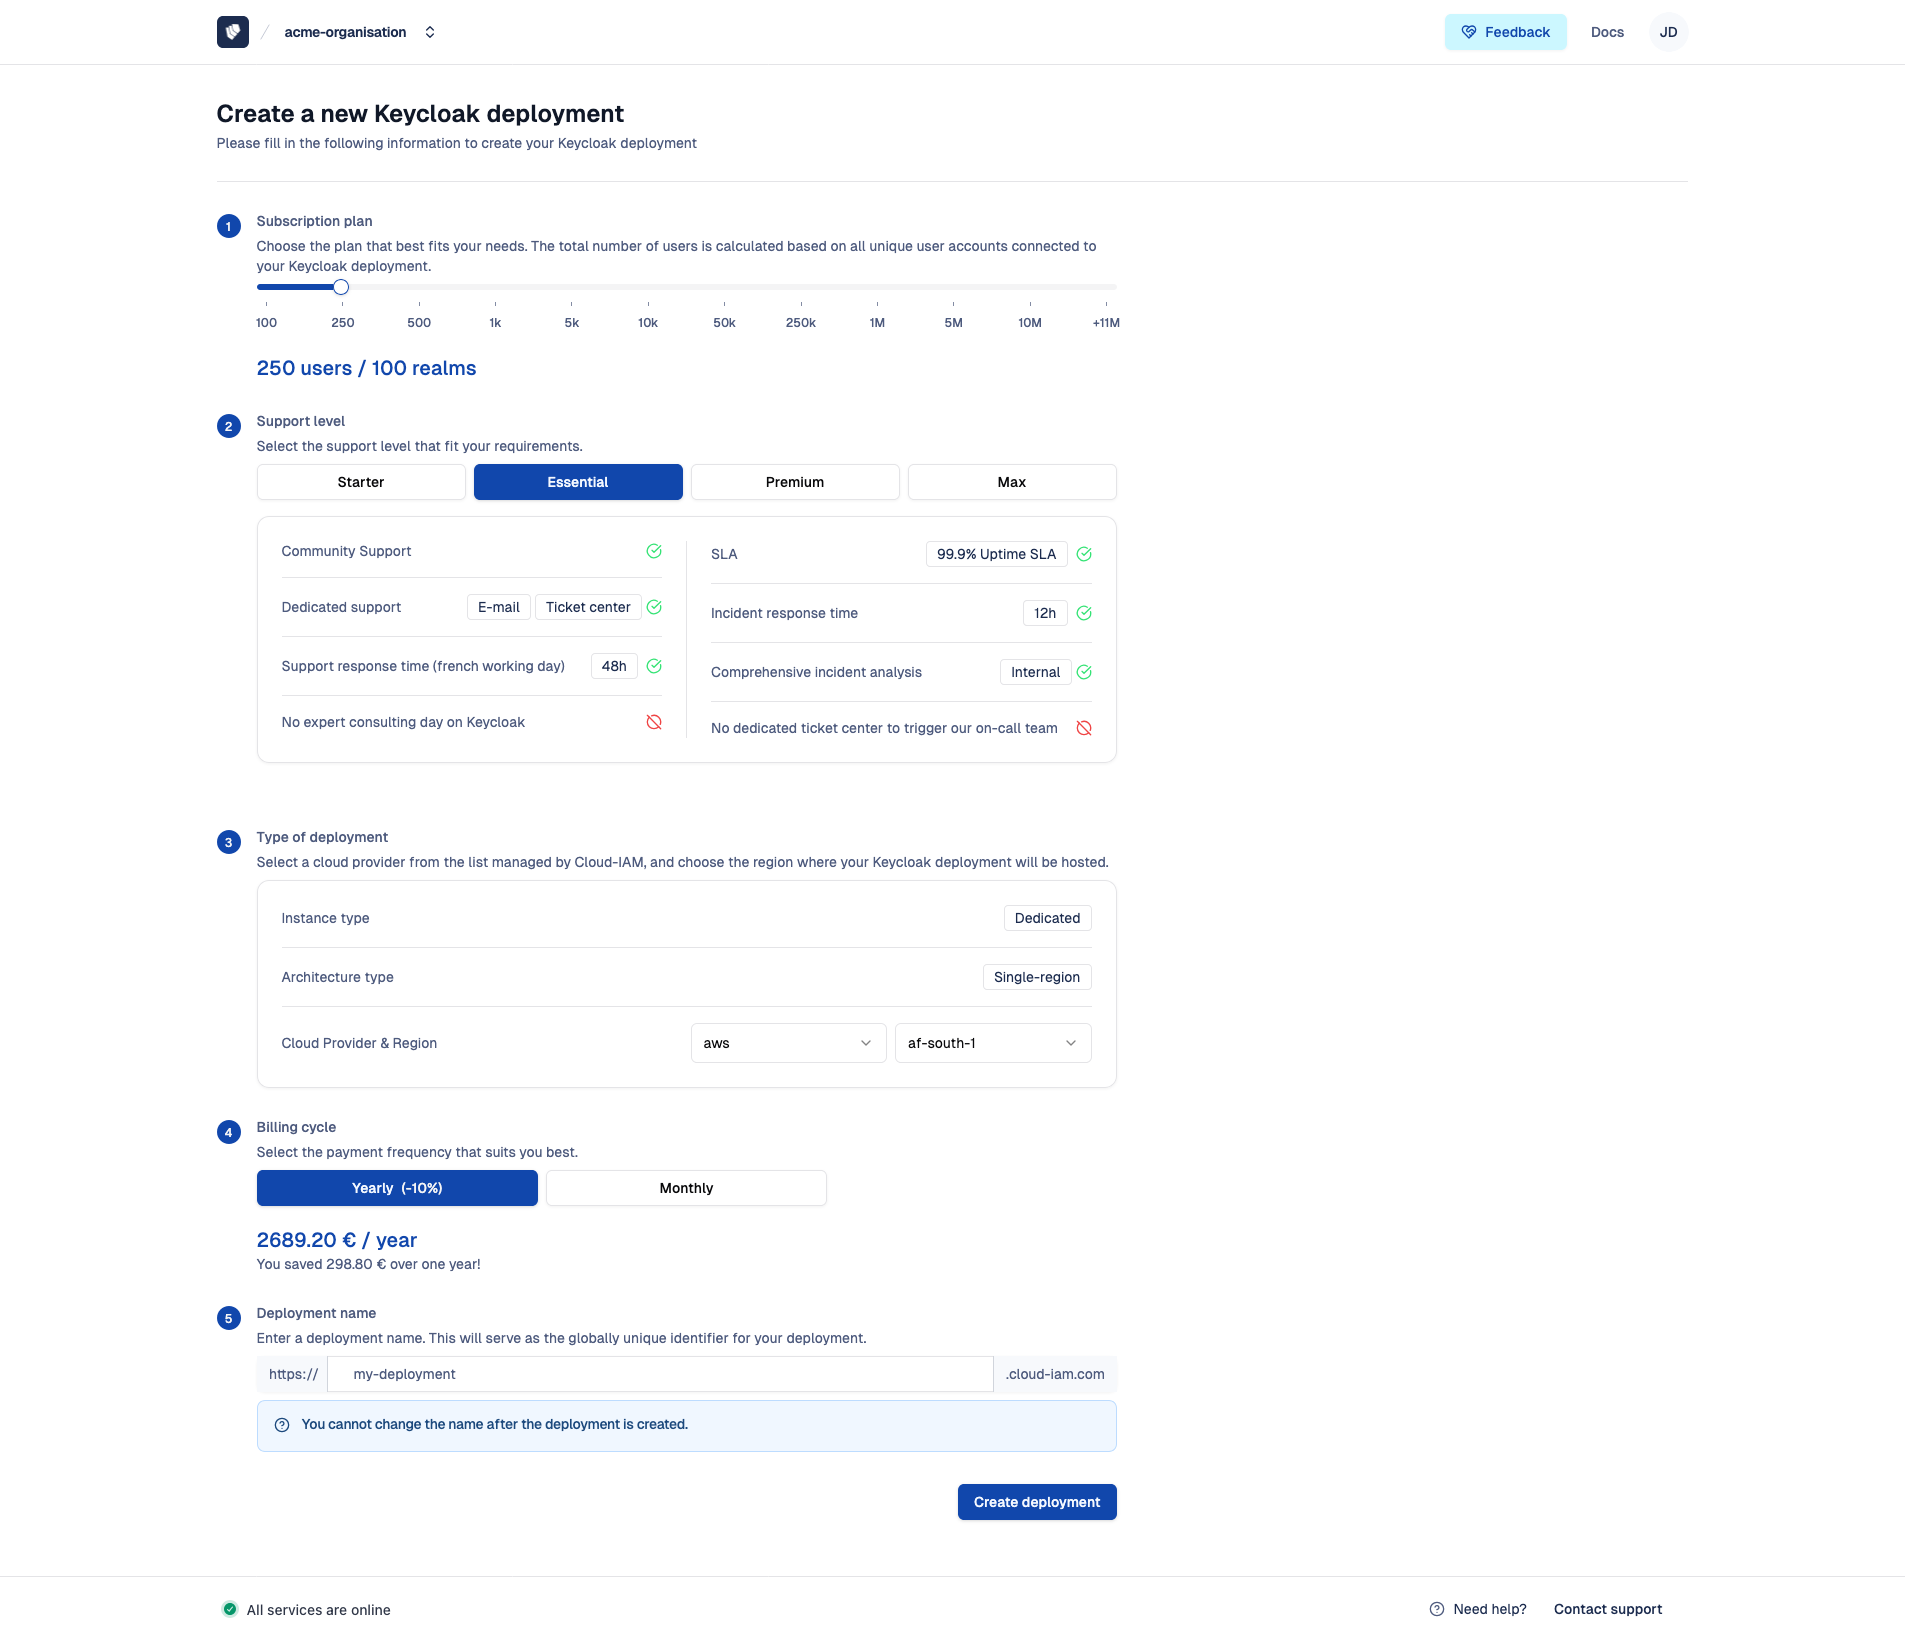
Step 3.1 - Choose your subscription plan
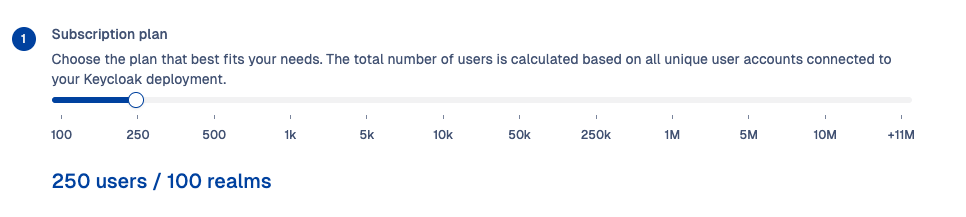
Several subscription plans are available, each offering a predefined number of total users and support for up to 100 realms. The total user count refers to the number of unique user accounts connected to your Keycloak deployment.
Use the slider on the configuration page to select the plan that best suits your current needs. Available plans scale from as few as 100 users to over 11 million users, making it flexible for both small projects and enterprise-level deployments.
If you’re unsure how many users your deployment will serve, or if you’re uncertain about which plan to choose, feel free to contact our support team. We’ll help you identify the plan that best fits your current needs and future growth.
Will anything break if I exceed my plan's quota?
No, if you go beyond your plan’s limits, you won’t be blocked or auto-scaled. Cloud-IAM applies soft limits.
If usage exceeds your current plan, our support team will reach out in the following days to assess whether the spike is temporary (e.g.: testing, import before purge, etc.) or sustained, and work with you to adjust accordingly.
Step 3.2 - Choose Your Support Level

Cloud-IAM offers five support levels: Freemium, Starter, Essential, Premium, and Max. Simply select the level that matches your plan and needs by clicking directly on the corresponding option during the deployment configuration.
Each support level includes different types of assistance—ranging from basic email support to premium 24/7 incident handling—along with features like:
- Scope of support (Cloud-IAM console, Keycloak configuration, incident response)
- Console features access (e.g. Custom extension, Backups scheduling,etc.)
- Communication channels (email, ticket center, on-call escalation)
- Uptime SLA, RTO, and RPO
- Incident communication procedure
- ... and more, detailed in Cloud-IAM Service Level Agreement
For a full comparison, check out our detailed Plan Comparison Table, which outlines the services and guarantees included with each tier.
If you're unsure which level is right for your project, feel free to contact our support team. We're happy to help you choose the best match based on your technical requirements and business needs.
Can I upgrade my support level in the future?
Yes, you can upgrade your support level at any time. We recommend starting with a tier that matches your current needs. But you can begin with a lower level (e.g., during testing or development) and upgrade to a higher tier as you move toward production.
Step 3.3 - Select your Cloud Provider and the region

At this step, you’ll see a summary of the infrastructure configuration for your Keycloak cluster. These settings are automatically defined based on the plan and support level you selected earlier and cannot be modified manually.
- Instance type: mutualized or Dedicated (All paid plans are deployed on dedicated infrastructure by default, for enhanced security and isolation.)
- Cluster architecture: Single-region or Multi-region (Multi-region high availability is only available on the MAX support level.)
Cloud-IAM allows you to host your Keycloak deployment on the cloud provider and region that best suits your needs. Regardless of the provider, Cloud-IAM ensures a seamless experience, giving you the flexibility to align your infrastructure with internal policies or compliance requirements.
You can choose from 5 different cloud providers:
- European providers:
- Global providers:
For a full list of supported providers, available regions, and certifications, visit the Cloud Providers page.
To configure your Keycloak location:
- Select your Cloud Provider from the dropdown menu
- Then, choose the Region where your cluster will be deployed (i.e. each deployment is deployed across multi-AZ, see the Architecture page for more details.)
Is region selection important for performance?
Yes - The region you choose can directly impacts login and API response times. To reduce latency and improve user experience, we strongly recommend selecting a region closest to your primary user base.
Step 3.4 - Choose your billing granularity
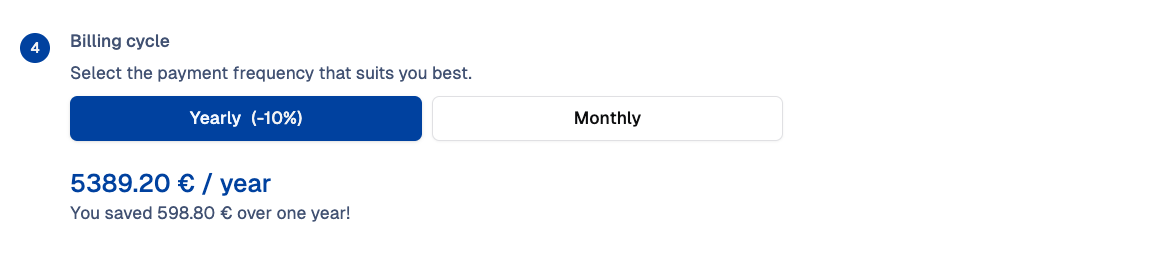
At Cloud-IAM, your payment frequency determines your subscription commitment and associated benefits. In this step, you have to choose the billing cycle that best fits your needs:
- Monthly – Flexible and great for short-term use or initial testing
- Yearly – Includes an automatic 10% discount, with visible savings applied to your invoice
Can I start with a monthly subscription to test Cloud-IAM?
Yes – You can begin with a monthly subscription to evaluate whether Cloud-IAM meets your requirements.
If satisfied, you can upgrade to a yearly plan at any time to benefit from the discount. Please note: the discount is not retroactive and only applies from the moment the yearly plan is activated.
Step 3.5 - Name your deployment

At Cloud-IAM, the deployment name serves as the globally unique identifier for your deployment.
It will be used as the subdomain in your Keycloak URL, formatted like this:
- For paid deployment -
https://*deployment_name*.cloud-iam.com - For freemium deployment -
https://lemur-X.cloud-iam.com/auth/admin/*deployment_name*
In this step, you must choose a clear and memorable name for your deployment.
⚠️ Important
Once your deployment is created, the name cannot be changed.
Please choose carefully!
Step 3.5 - Create your deployment and subscribe
Congratulations! You have successfully configured your deployment. Please take a moment to review and ensure everything aligns with your use case.
When ready, click on Create deployment, you will then be redirected to the Stripe payment page.
TIP
If you have selected the freemium plan, you can proceed directly to step: Step 5 - Confirmation of deployment creation
Step 4 - Stripe payment Page
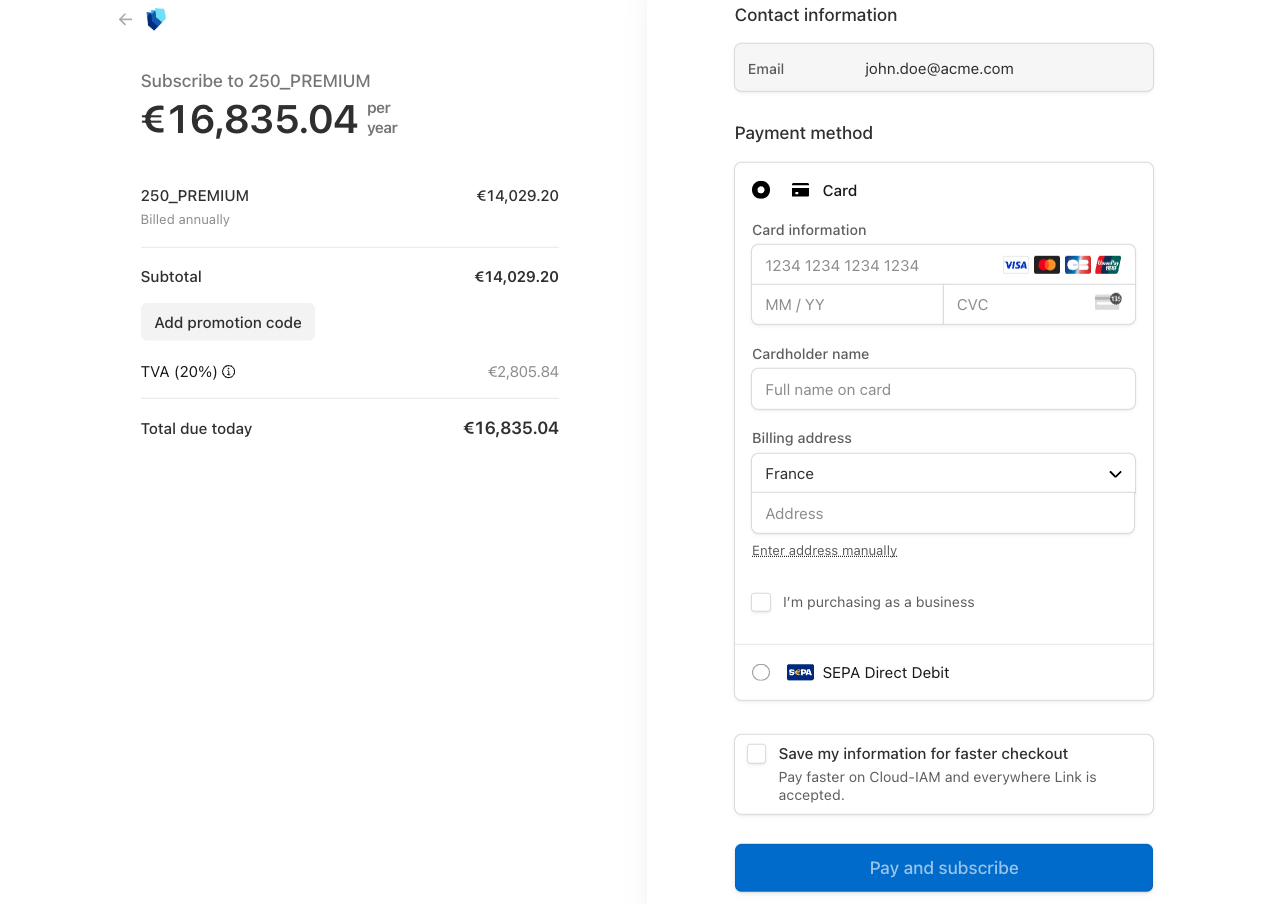
You are now on the Stripe payment page, where you can find on the:
- Left side: A summary of your deployment, pricing based on your subscription, VAT applicable to your country, and a field to enter a promotional code.
- Right side: Your email, billing information form (Credit Card or SEPA Direct Debit), and business billing section.
The available payment methods are:
- Credit Card
- SEPA Direct Debit
In this step, enter your payment details (Credit Card or SEPA Direct Debit) and proceed, to complete the payment, click on Pay and Subscribe. After this step you will be redirected to the Cloud-IAM console.
If you experience any issues during payment, please don’t hesitate to contact our support team.
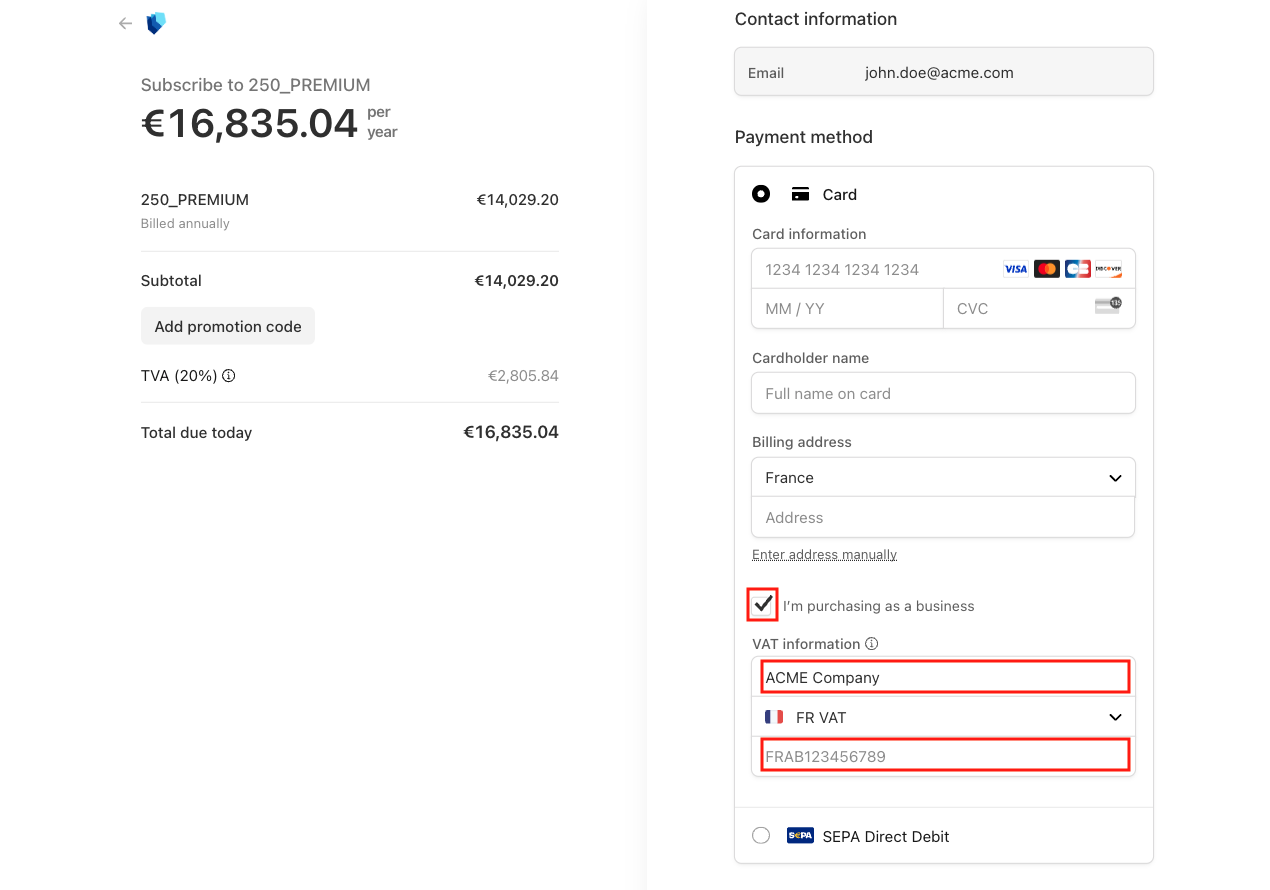
Business billing and VAT
If you require the invoice to be issued in your company’s name, select “I'm purchasing as a business”. This will open additional fields to enter your company name (for invoicing) and your VAT identification number (for European customers).
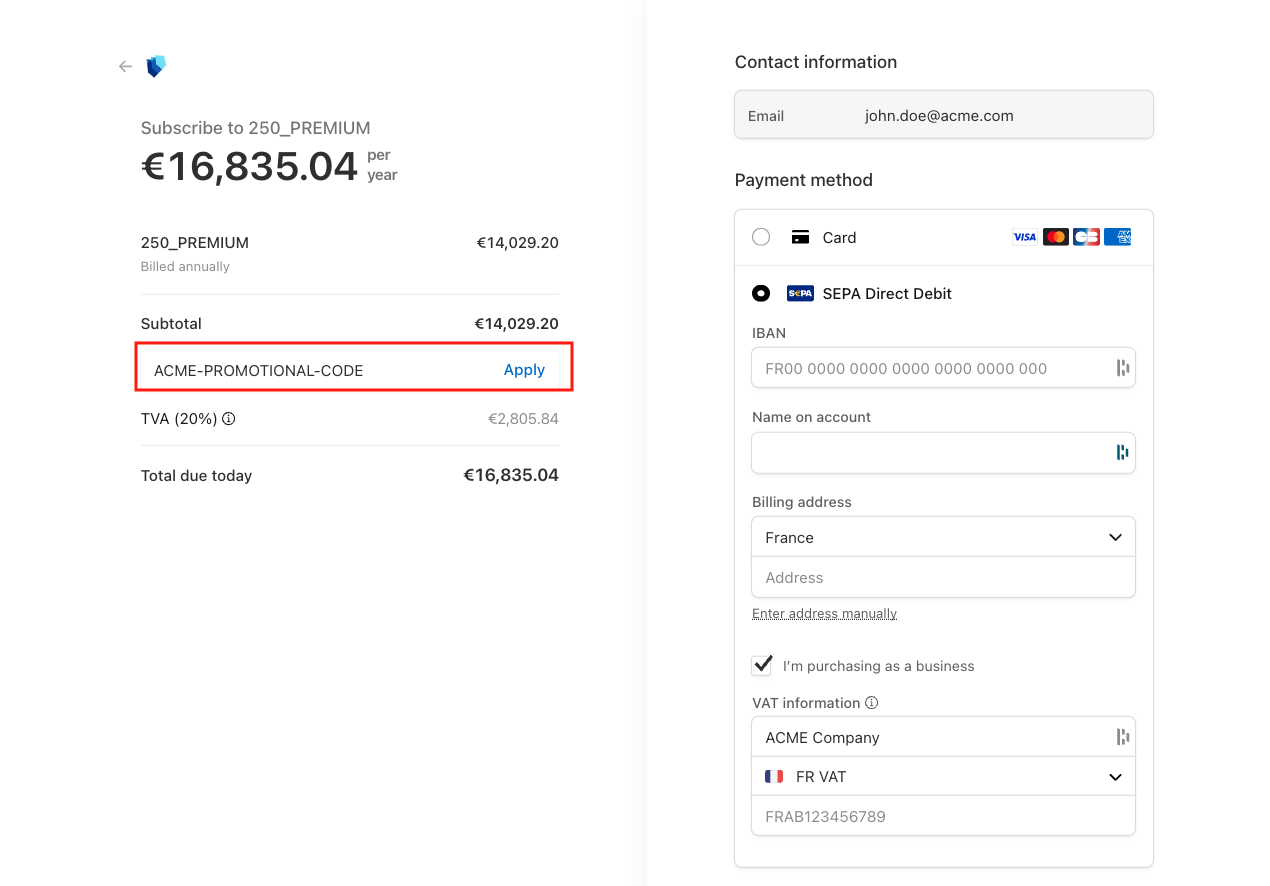
Have a promotional code?
Register your code in the designated section and click on Apply to apply your discount.
Step 5 - Confirmation of deployment creation
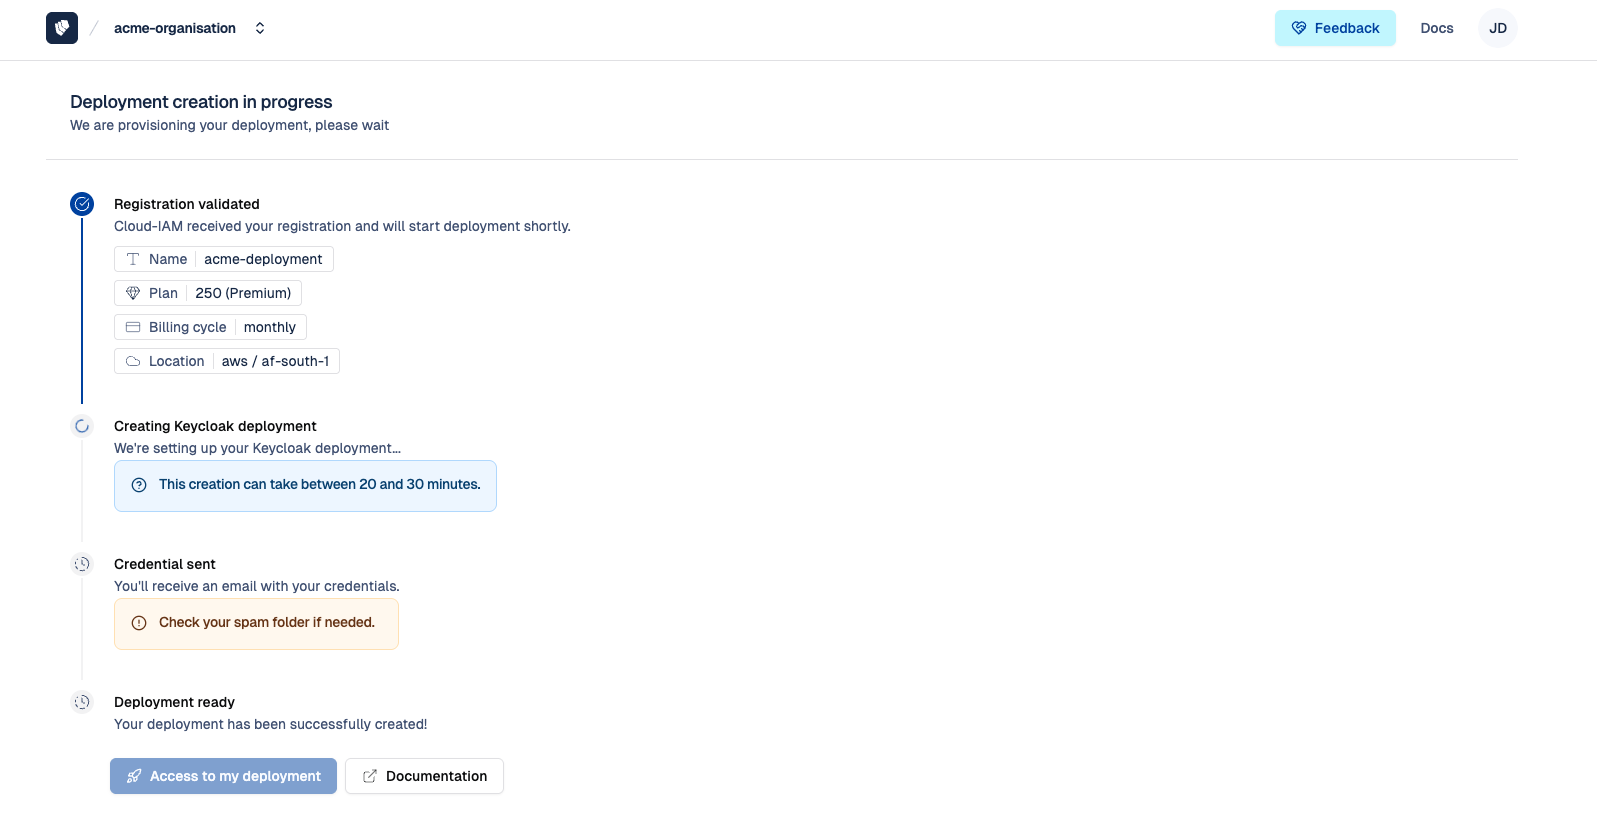
Congratulations, you have just created your Keycloak deployment ! 🎉
Once the payment is confirmed, your cluster creation will begin automatically, and you’ll be redirected to a confirmation page indicating that the process has started. This redirection informs you that your deployment is currently being created.
From our side, this will trigger the automatic creation of your cluster. This automated process typically takes 20–30 minutes, depending on the cloud provider and selected region.
Emails confirmation
Once your deployment is fully created from Cloud-IAM, you will receive 2 emails:
- One for your payment confirmation from Stripe with the bill.
- One confirming that your Keycloak is ready to use. From Cloud-IAM named : “[Cloud-IAM] deployment your deployment name has been completed 🎉”.
Didn’t receive any emails?
Please double-check your spam folder.
Step 6 - Access to Keycloak console
Your Keycloak deployment is now created, configured according to your needs, and available. Here are the various methods to access it:
Confirmation email
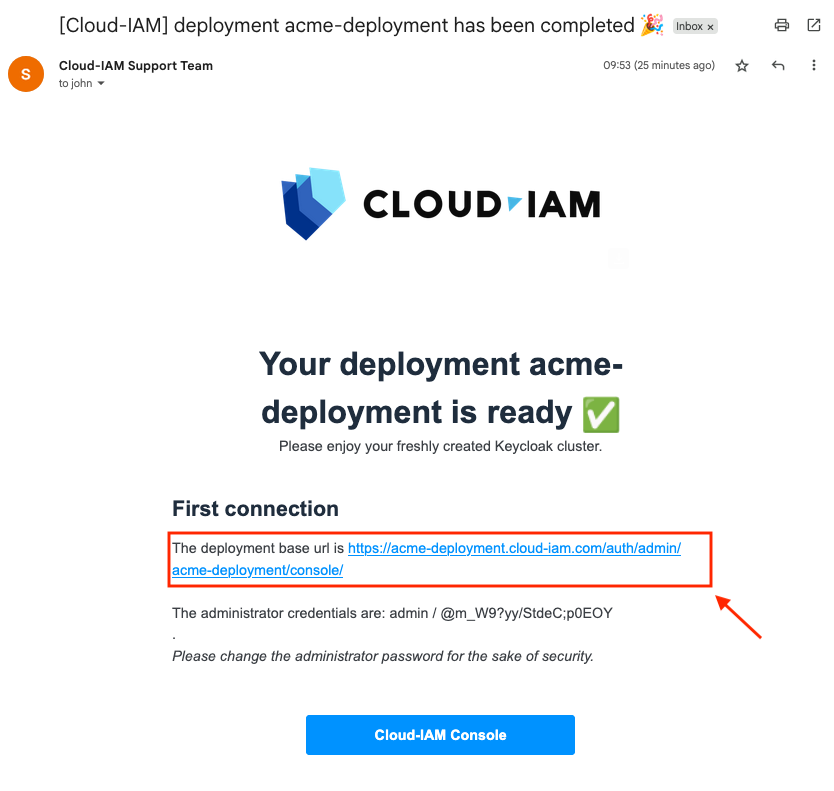
From the confirmation email "[Cloud-IAM] deployment your deployment name has been completed 🎉".
Click on the URL displayed after "The deployment base URL is." you will be redirected to your Keycloak deployment.
Cloud-IAM console
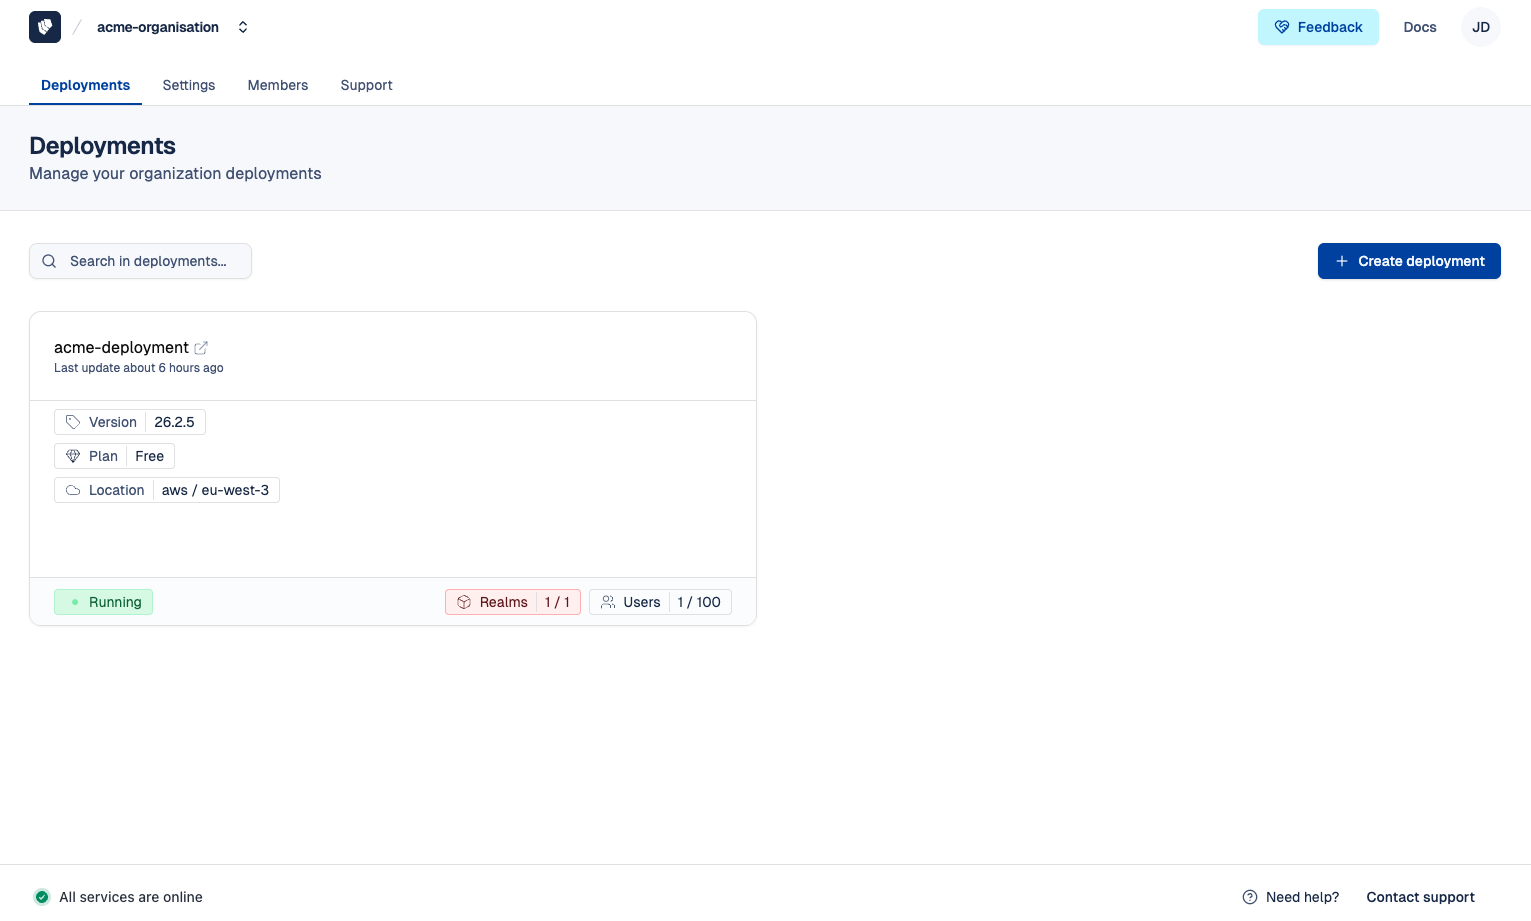
- From the Cloud-IAM console, on Deployments section. A new entry appears with the name of your deployment.
- Click on your
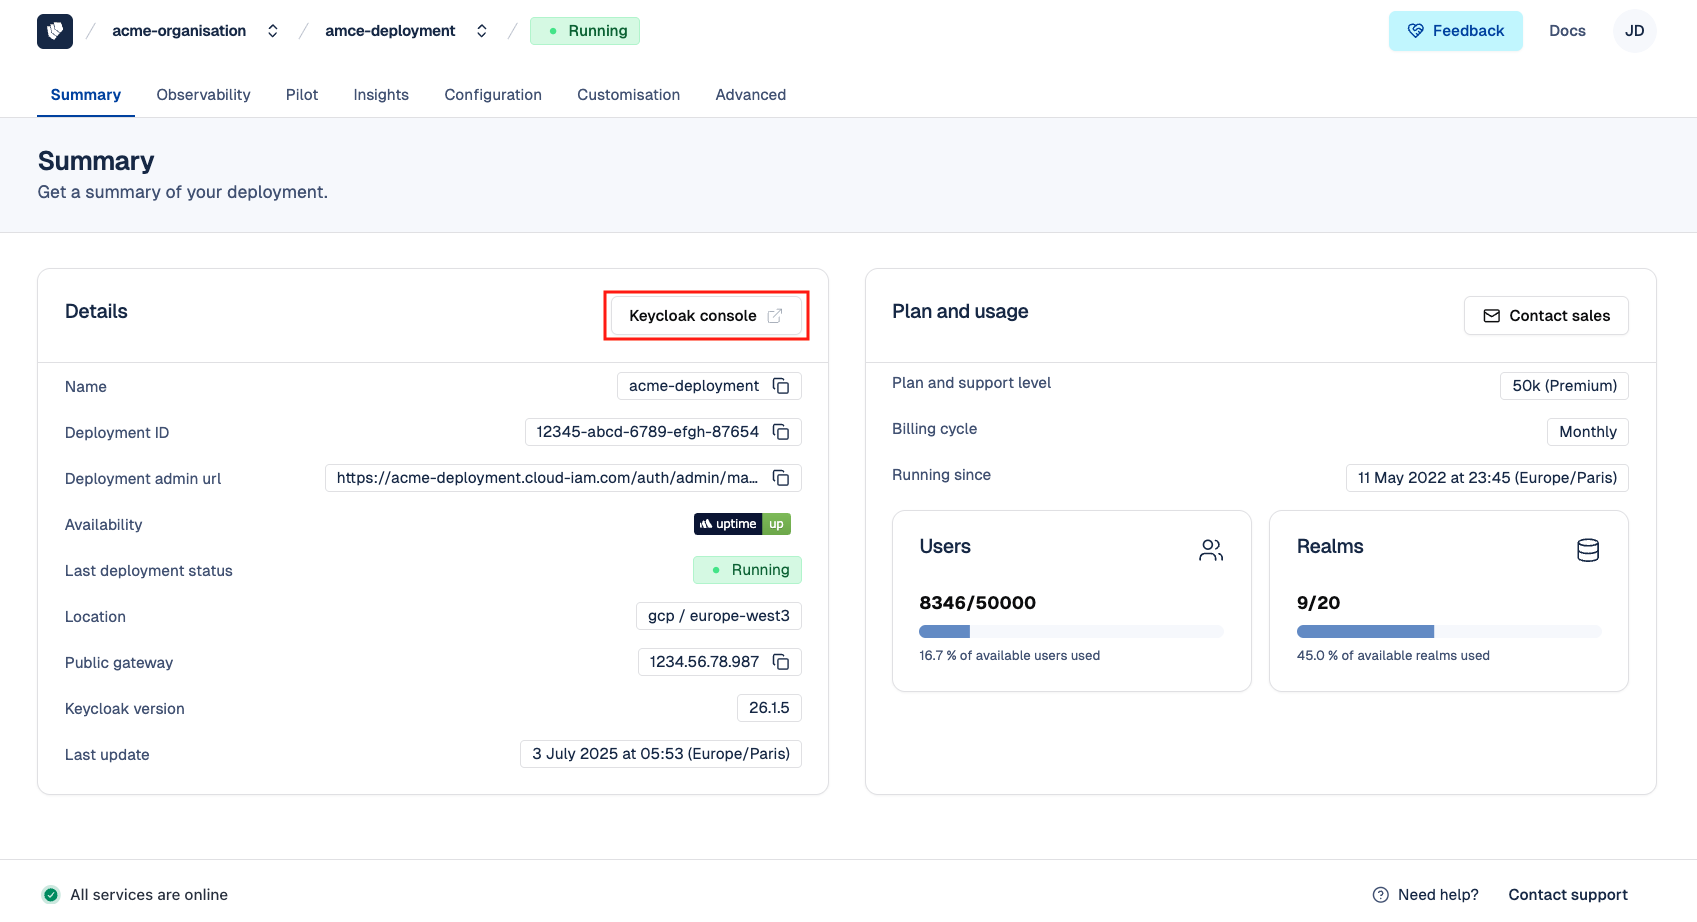
deployment_nameto open the details. - From Summary page of your deployment choose
Keycloak console 🔗.
You will be redirected automatically to the Keycloak Admin Console login page.
Step 7 - Keycloak First Log-In
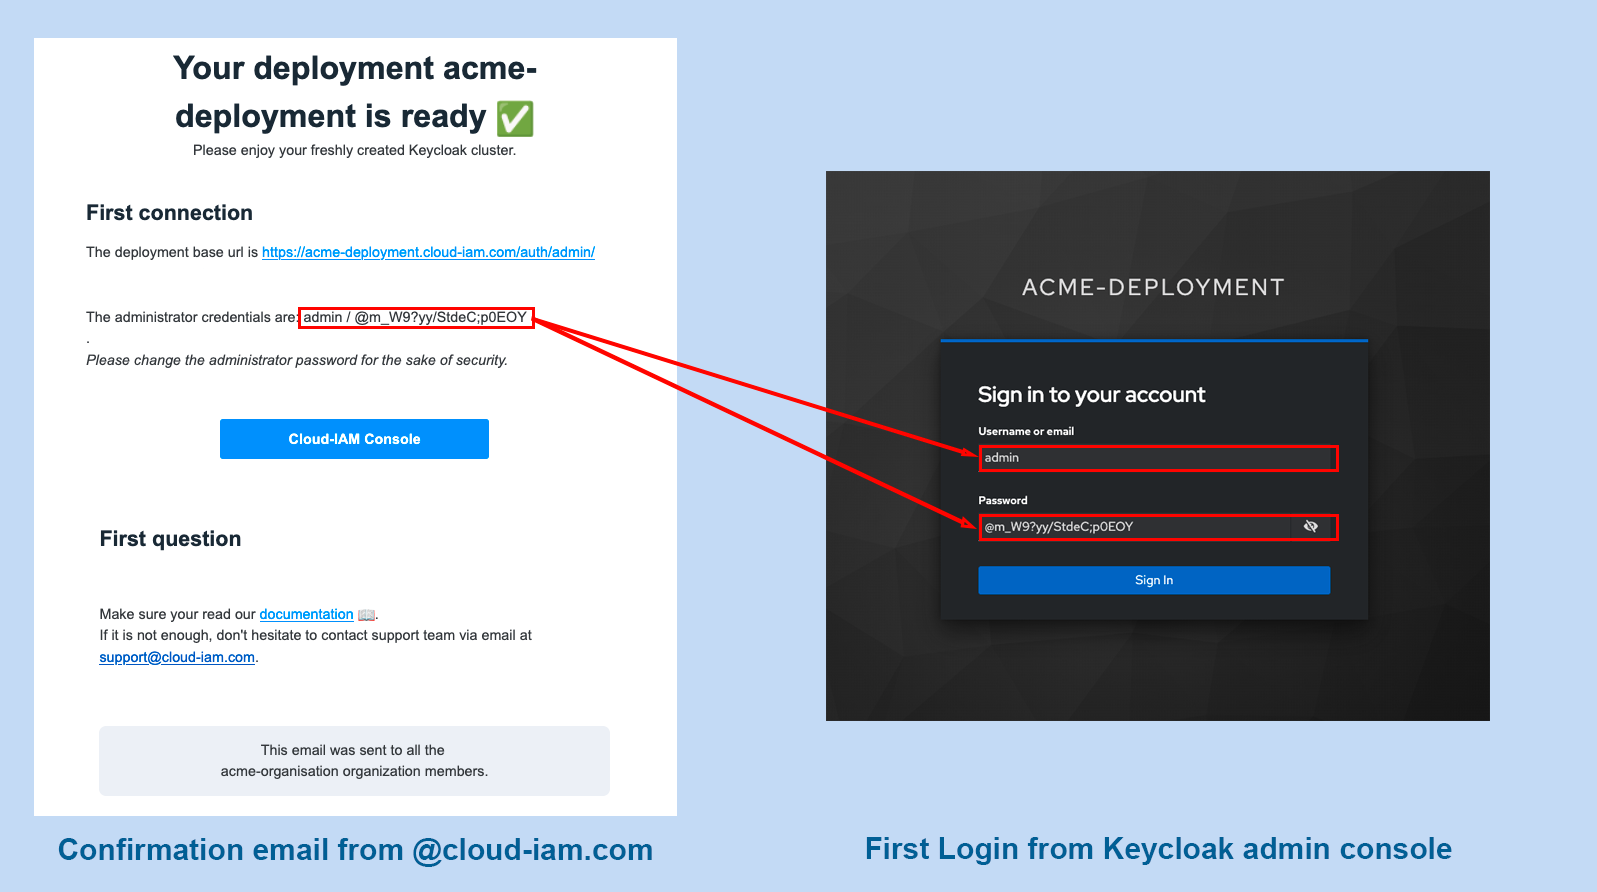
From the Keycloak console, your first login uses the credentials provided in the confirmation email titled "[Cloud-IAM] deployment your deployment name has been completed 🎉." Copy the username and password exactly as it appears in the email. Every character counts, including the last one, even if it is a dot (.), comma (,), or semicolon (😉.
Once the fields are filled, click Sign In to access your Keycloak deployment.
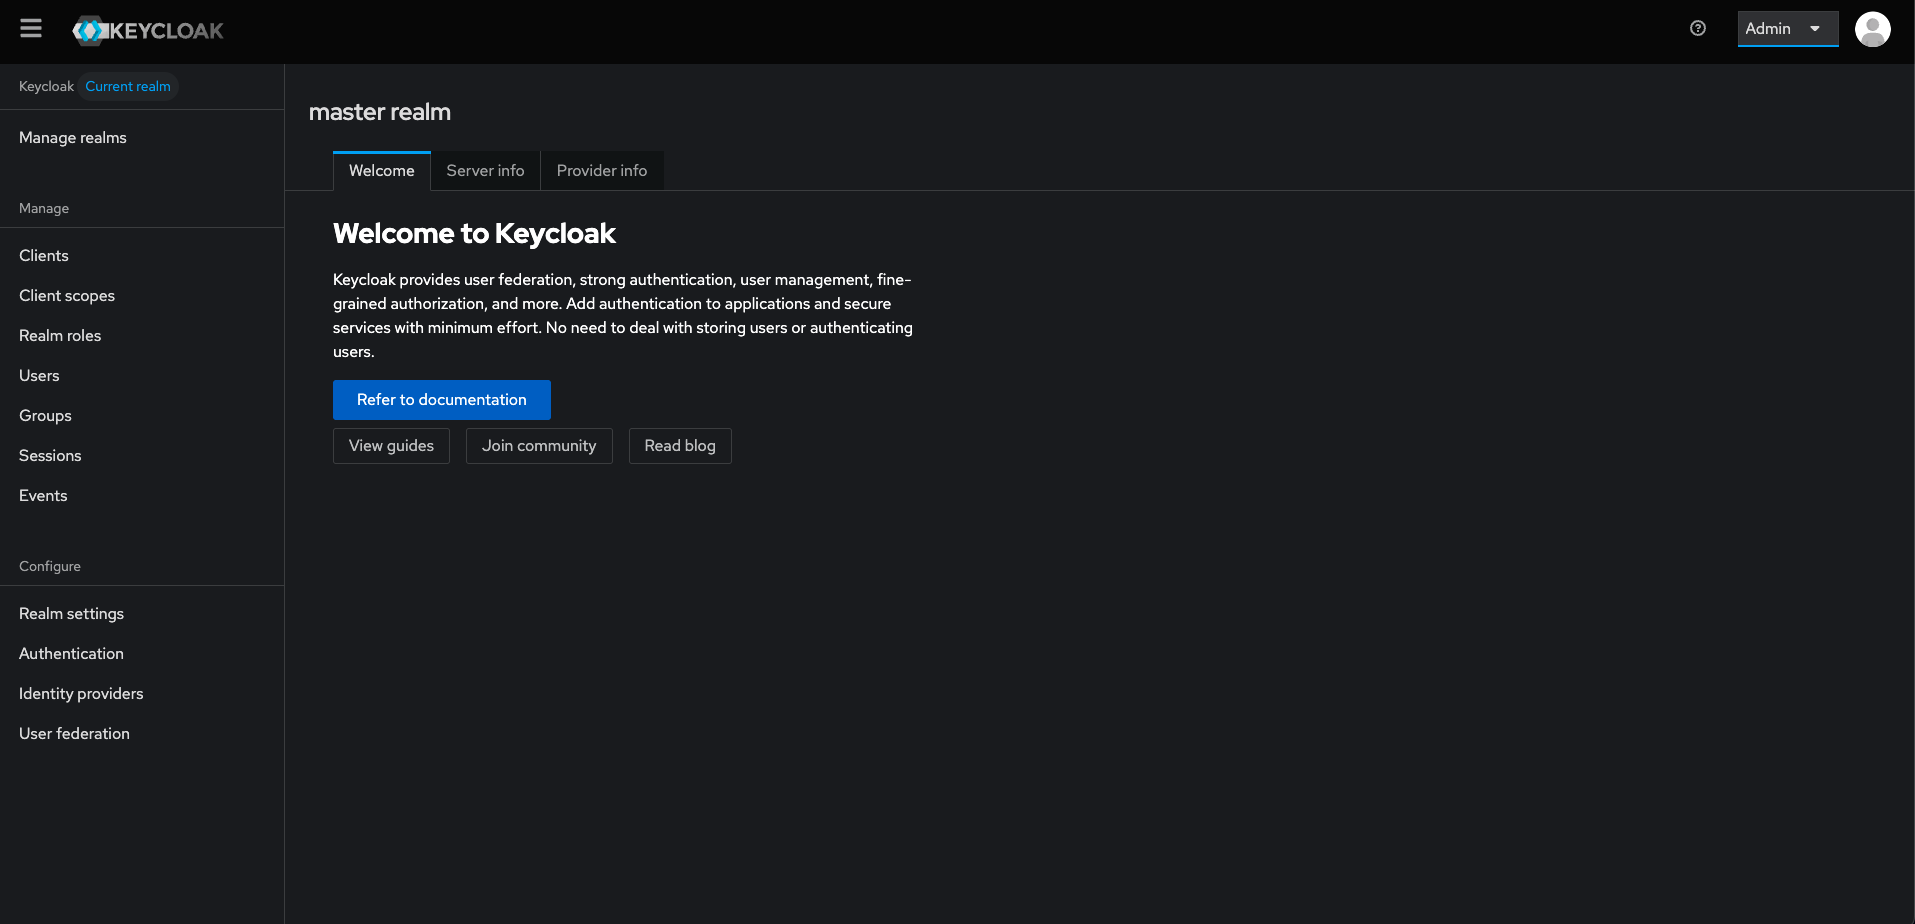
Congratulations, you are now in your Keycloak admin console!
Step 8 - Apply initial best security practices to your Keycloak deployment
To start applying the best security practice follow Initial Best Practice Guide on Keycloak tutorials.
Conclusion
🎉 Congratulations! You've successfully created, configured, and initiated your Keycloak deployment with Cloud-IAM. 🎉
Now that you're up and running, feel free to explore more Keycloak features and advanced configurations. Our comprehensive documentation is at your fingertips for detailed insights.
If you have any questions or need assistance with any step, don't hesitate to reach out. Connect with the Cloud-IAM team through our Contact Us page or leverage Cloud-IAM Support for prompt assistance.
Thank you for choosing Cloud-IAM for your Identity and Access Management needs!